I started self-taught on a cut length of railroad track clamped to a stump, and I made just about every mistake a beginner blacksmith can make before I made anything worth keeping. Twenty-five years later I still teach weekend beginners, and the questions barely change. What do I buy first? Coal or propane? How heavy an anvil? Am I going to burn the shop down? This is the reference I wish somebody had handed me before I spent money I didn't have on gear I didn't need. It is not a shopping list and it is not a sales pitch. It is the honest shape of what you are getting into, from a hobby smith who still lights the forge most weekends.
Blacksmithing is not complicated the way people think it is. You heat steel until it moves, you hold it with something that won't let go, and you hit it with a hammer against a hard face until it becomes the shape you want. Everything else is refinement on those three verbs. The reason beginners struggle is not that the craft is mysterious. It is that they buy the wrong things, stand in the wrong place, and expect their hands to know something only repetition can teach them. Let me walk you through all of it.
What a beginner blacksmith actually needs to start
You need four things to make your first real object: a heat source, a way to hold hot steel, a hammer, and something hard to hammer against. That is the whole starting kit. A forge, a pair of tongs, a hammer, and an anvil. Everything past that is convenience, specialization, or vanity, and you can add it later once your hands tell you what they are missing.
I say this because the single most common way a beginner blacksmith wastes money is buying breadth instead of depth. They see a starter bundle with fifteen tools and think fifteen tools makes them fifteen times as capable. It does not. You will spend your first six months learning to control a hammer and read the color of hot steel, and for that you need one hammer, not five. When you are ready to build out the shop, I have written up how I would assemble it piece by piece in the beginner blacksmith kit buying guide, but read that after you have made a few hooks, not before.
The other thing you need, and nobody sells it, is a plan for where the heat and noise are going to live. A forge throws real heat and burns real fuel, coal smoke or propane exhaust, and neither one belongs in a closed garage with the door down. You need ventilation, a non-combustible floor under the forge, and clear space around the anvil where a hot bar can swing without touching anything you care about. Sort that out before the first tool shows up.
Coal or propane: picking your first forge
I run two forges and have for years. A coal forge for heavy stock and forge welding, and a propane forge for fast, even heat and most of the day-to-day work. That gives me an honest basis to say what each one is actually like to own, and for a beginner the answer is almost always propane first.
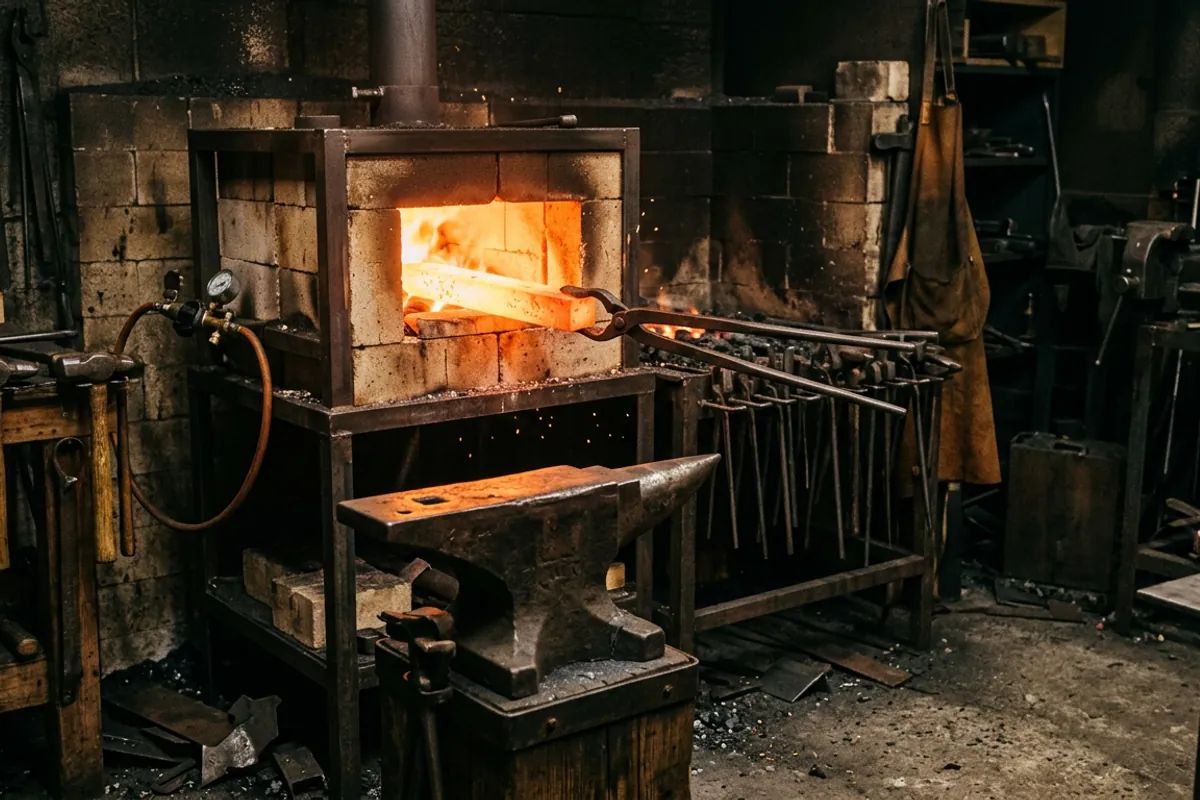
A propane forge lights with a match and a valve, comes up to a working orange in a few minutes, holds a steady even heat the length of the chamber, and shuts off clean when you are done. There is no fire to tend, no ash to rake, no smoke to explain to the neighbors. For learning to move steel, that consistency is worth a lot. You want your attention on the hammer, not on nursing a fire.
A coal forge is a different animal. It burns hotter in a concentrated spot, which is what you want for forge welding and for heating one small section of a big bar, and there is a real craft to building and managing the fire. It also makes smoke, needs the right coal, and asks more of you before you get any steel hot. It is a wonderful tool and I would not give mine up, but it is a second forge for most people, not a first one. If you want the full side by side from someone who runs both fuels, I laid it out in coal or propane, which first forge makes sense, and I walk a new smith through choosing a specific first forge in the beginner forge buying guide.
Whichever you pick, understand that the forge is where the heat lives, and heat is what makes steel forgeable. Mild steel forges in a bright orange to yellow range. Too cold and you are just beating on stiff metal and stressing your elbow and your anvil. Too hot, up into sparkling white, and you start burning the steel and ruining it. Learning to read that color window is most of the first month.
The anvil question, honestly
The anvil is the tool a beginner overthinks the most, and it is the one I get the most questions about. Here is the plain truth. An anvil is a big hard mass that gives your hammer blow back to the steel instead of soaking it up. The heavier it is, the more of your blow does useful work. That is the whole physics.
For a beginner, weight matters more than brand or shape. A useful working anvil for a home shop sits somewhere in the 100 to 200 pound range. My own anvil, Bessie, is a 148 pound Trenton, and it has handled everything I have ever asked of it in a hobby shop, from small blades to hardware to tool making. I measure every other anvil I pick up against her. You do not need more than that to start, and honestly most beginners would be well served by anything from 100 pounds up that has a flat face, decent rebound, and clean edges.
Know the anatomy so the listings make sense. The flat top is the face, where most work happens. The pointed end is the horn, for bending curves. The square hole near the heel is the hardy hole, which holds shank tools. The small round hole is the pritchel hole, for punching. When someone tries to sell you a cast iron doorstop shaped like an anvil, it will have no rebound and a soft face, and it will make you a worse smith by teaching your arm to work twice as hard for half the result. If you want to think clearly about how much anvil you actually need before you shop, start with what size anvil do you actually need, and for specific picks across budgets I keep an honest list in the best anvils for beginners.
Hammer and tongs
Your first hammer should be a cross pein or a rounding hammer somewhere in the one and a half to two and a half pound range. Beginners reach for heavy hammers because they think mass means progress, and then they wreck their elbow inside a month because they cannot control it and they are muscling every blow. You want a hammer light enough that you can swing it accurately a thousand times in an afternoon, because accuracy and repetition are what teach your hands. Speed comes from letting the tool and the heat do the work, not from swinging harder.
Tongs are the tool people underbuy and then curse. You need at least one pair that actually fits the stock you are forging, because a tong that does not grip properly will spit hot steel across the shop, and I have watched that happen to more than one beginner. A loose grip is not a minor annoyance. It is a launched projectile at forging temperature. Buy or forge tongs that match your bar, and check that the jaws close square on the stock without rocking. Making a pair of tongs is a fine early project once you have the basics, and it teaches you a lot about drawing out and matching two halves.
Safety is not optional, and here is why I mean it
I am going to be blunt about this because I have the scars to back it up. Early on I quenched a blade in oil that was too cold, standing too close in a cotton shirt with no face shield. The oil flared up and took my eyebrows, and I kept my eyesight by pure luck. Nothing about that story is exaggerated for effect. That is what the shop does to you when you treat protection as optional.
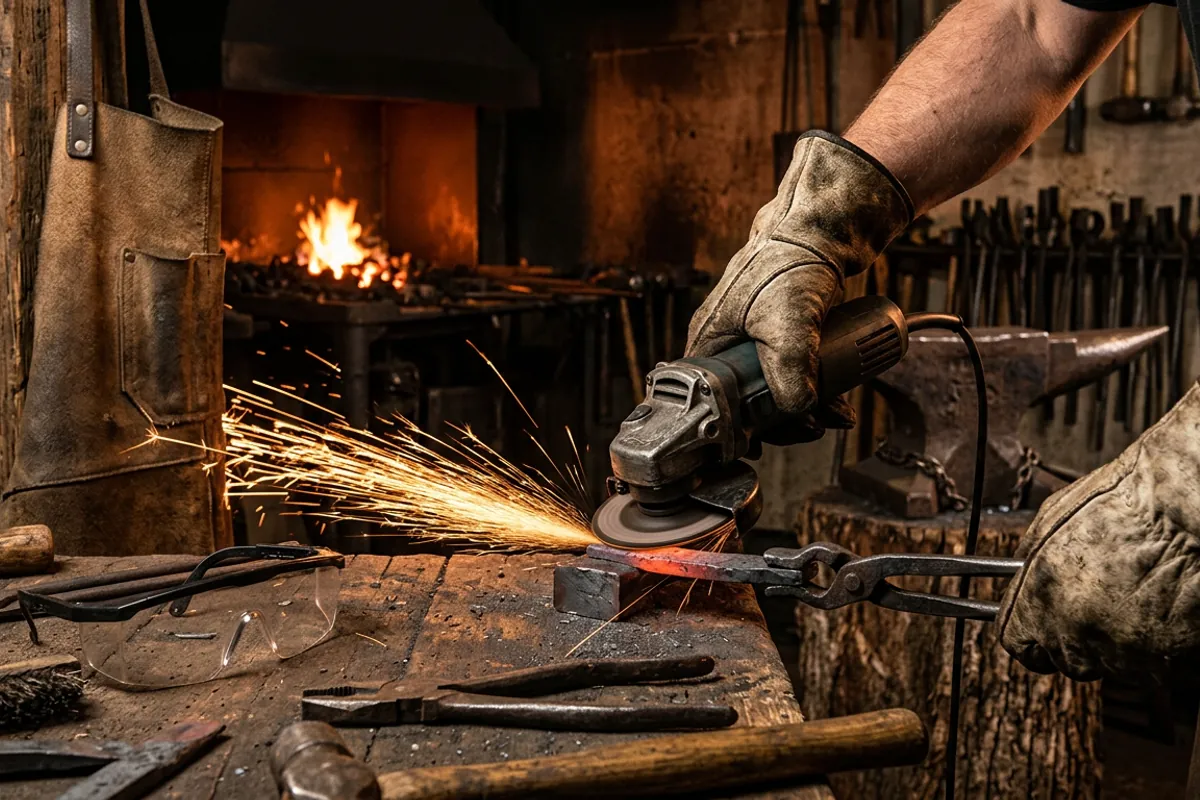
So here is the floor, not the ceiling. Eye protection rated to ANSI Z87.1, worn any time the forge is lit or the grinder is spinning. Hot scale flakes off steel and flies, sparks come off the grinder in a stream, and your eyes do not grow back. Wear natural fibers, cotton or wool or leather, not synthetics, because synthetics melt onto skin instead of just burning and the wound is far worse. Leather boots, not sneakers, because you will drop hot steel on your feet eventually. Hearing protection when you are hammering for hours. Good ventilation for any forge, and a real awareness that coal smoke carries carbon monoxide you cannot smell.
None of this is expensive and none of it slows you down once it is habit. I break down exactly what matters and what is overkill in blacksmith safety gear, what matters and what to skip, and I would rather a new smith spend their first fifty dollars there than on another pair of tongs. The eyebrows grow back. Some of what the shop can take does not.
Learning to actually forge
Here is the thing no gear guide tells you. You cannot buy your way to competence. The hammer control, the heat reading, the sense of when steel is ready to move, all of it comes from doing it wrong many times and slowly doing it wrong less. That is not discouraging, it is freeing, because it means you do not need the perfect setup to start. You need a working forge, a decent anvil, a hammer you can control, and steel to ruin.
The fastest way to build real skill is to pick projects that force you to learn one fundamental at a time. A simple hook teaches you to draw out a taper, put a scroll on the end, and bend cleanly. It is the first thing I hand almost every beginner because it packs so many core moves into one small object you can finish in an afternoon. From there, a leaf, a bottle opener, a set of tongs, a small knife. Each one adds a technique on top of the last. I keep a whole progression of these in the blacksmithing projects for beginners that actually teach your hands, built around the idea that a project should teach a skill, not just look nice on a shelf.
Forge a lot of small things badly before you try one big thing. A beginner who makes fifty hooks has fifty times the hammer time of the one who spent three months planning a sword and never finished it. Volume of honest repetition beats ambition every time in the first year.
Where the money actually goes wrong
Since I teach beginners, I see the same spending mistakes over and over, and they are worth naming so you can skip them. People buy a cast anvil-shaped object instead of a real anvil and wonder why nothing moves. They buy a three pound hammer and hurt themselves. They buy a fifteen piece bundle and use four of the pieces. They buy a coal forge as a first forge and give up because tending the fire fought them the whole way. And they buy every gadget except the eye protection that would actually keep them in the hobby with two working eyes.
Spend where it matters and wait everywhere else. A real anvil with good rebound, a forge that fits your fuel situation, one hammer you can control, tongs that grip, and proper PPE. That is a complete beginner shop and it will take you years to outgrow. The specialty tools, the second and third forges, the power hammer you are already dreaming about, all of that can wait until your hands tell you exactly what job you cannot do with what you have. When it does, you will buy the right thing instead of guessing, because by then you will know.
If you want the broader map of where all of this fits together, the getting started topic hub collects the anvil, forge, hammer, tongs, and safety guides in one place. Start with a hook, keep your face shield down, and give your hands the time the craft actually takes.