The first project most new smiths pick is the wrong one, and I understand why. You just got a forge lit and an anvil that finally rings, and the temptation is to reach straight for a knife or a fancy hook you saw online. But the best beginner blacksmith projects are not the ones that look good on a shelf. They are the ones that teach your hands to do the four or five moves that every other project is built out of. Learn to draw out, taper, bend, twist, and upset with control, and you can make almost anything. Skip that and you will fight the same problems on every piece for years.
I have been at this about twenty-five years, most of it on Bessie, my 148 pound Trenton, and I teach beginners most weekends. What follows is the order I actually hand people, and why each project earns its place. If you want the reasoning behind picking projects that teach rather than projects that just look done, I wrote that up separately in how to pick a forging project that actually teaches you something. This piece is the reference list itself.
What a beginner project is really for
A project is a delivery system for a skill. That is the whole idea. When I say a hook teaches you the scroll, I mean the hook is just the excuse to make you practice a controlled bend forty times until your wrist knows the motion without your brain narrating it.
So before you pick anything, know the core moves you are trying to build:
- Drawing out: making stock longer and thinner. This is most of forging.
- Tapering: drawing to a point, evenly, on all sides.
- Bending and scrolling: controlled curves over the horn or the edge of the face.
- Twisting: putting a clean spiral in square stock without kinking it.
- Upsetting: making stock shorter and fatter, which is the hardest of the group for a beginner.
Every project below is chosen because it forces one or two of these and lets you ignore the rest. Do them roughly in order. Each one leans on the last, and by the time you get to the harder ones your hammer control has quietly caught up. If you are still assembling gear, the short honest list of what you actually need to start these is in the tools that actually matter; you do not need much.
The J-hook, your real first project
I hand every beginner a J-hook first, and I am not alone. Walk into any club forge and the newest person there is almost certainly making a hook. There is a reason it has been the standard first project for generations.
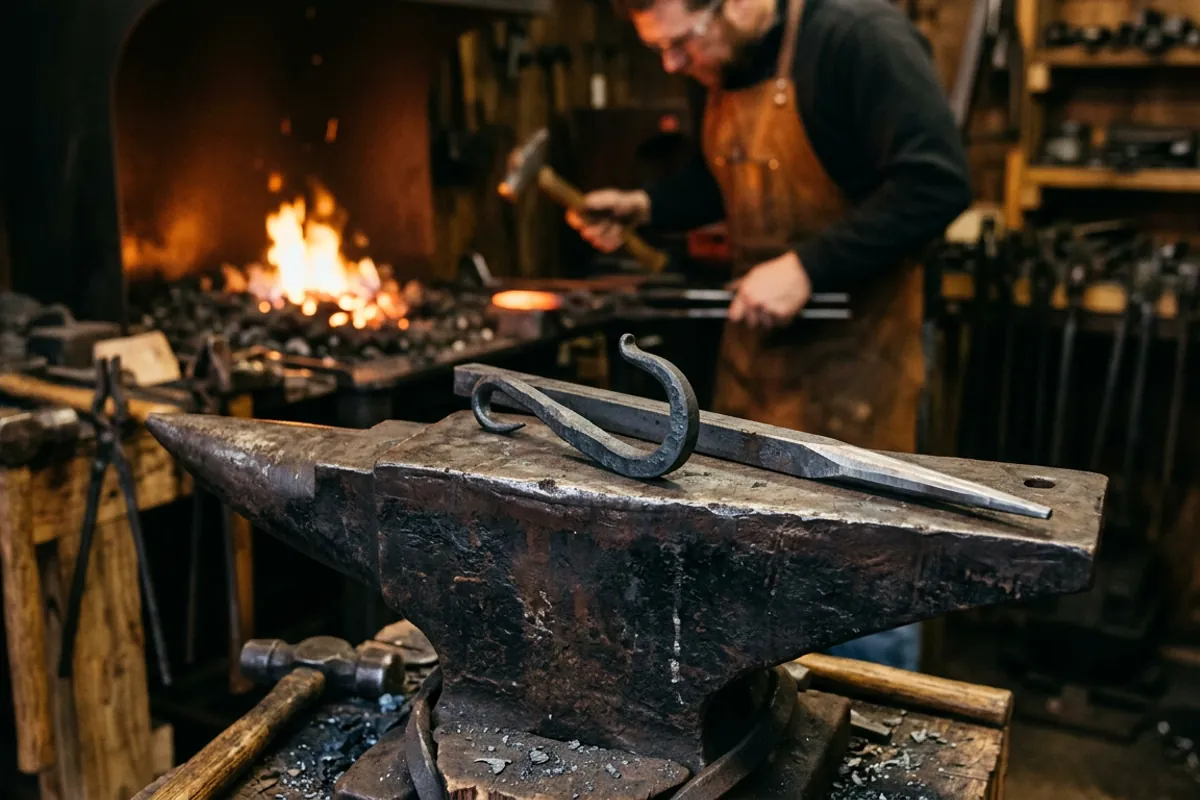
A J-hook teaches you a taper on one end, a flattened and punched or drilled mounting tab on the other, and a bend in the middle. That is three skills in one small piece you can finish in a session. You start with a foot or so of quarter inch square or round mild steel, draw a taper on one end, curl it back over the horn into the hook, then flatten the other end for a screw hole. When it works you have a thing you will actually screw into a wall and use, which matters more than beginners expect. Making something usable on day one keeps people at the anvil.
Do not rush the taper. The single most common beginner mistake is hammering only the top of the stock and getting a fish-lipped, one-sided point. Rotate the bar a quarter turn between hammer blows and keep the taper square before you round it. If you want the full walk-through and the reasons this project is the one I trust, I laid it all out in the blacksmith hook, and why I hand it to every beginner.
S-hooks and simple scrolls
Once a J-hook comes off the anvil clean, make a pile of S-hooks. An S-hook is two opposing curves, so it doubles your bending practice and starts teaching you symmetry. Getting both curves to match takes real attention, and that struggle is the point.
From there, move to a decorative scroll. A scroll is a tightening spiral, and it teaches you to read heat and to work the very tip of the horn. Cold steel will not scroll cleanly, and steel that is too hot will flatten and mark under the hammer, so scrolls quietly train your eye for a proper working heat, that bright orange-yellow you learn to trust. Make a bunch. Make a leaf on the end of one. These are cheap, fast, and forgiving, and a rack of matching S-hooks is a genuinely honest measure of whether your hammer control is improving.
The tapered spike or a set of nails
Forging nails or a tapered tent spike looks trivial and is not. This is your dedicated taper drill, and it also introduces the header, a simple tool with a hole that you upset the nail head against.
Grab a nail header or drill a hole in a chunk of thick scrap. Draw a clean four-sided taper on a piece of mild steel, cut most of it off over the hardy, drop the hot end through the header, and upset a head on top with a few quick blows. Now you have practiced tapering, cutting hot on the hardy, and your first taste of upsetting, all in a project you can repeat twenty times in an afternoon. Repetition is the whole value here. Nobody makes one nail and improves. You make forty and watch the last ten come out better than the first ten.
The bottle opener
The bottle opener is the first project where a beginner makes something they are genuinely proud to hand to someone, and that pride is worth a lot for sticking with the craft. It also stacks several skills: a taper, a flattened and shaped working end, a punched or drilled opening slot, and often a twist in the handle.
You can make a solid one from half inch round or square stock. Flatten a section, shape the business end that catches the cap, open the slot, and put a twist in the handle to dress it up. It forces you to plan your steps in order, because you cannot easily go back and re-flatten a section after you have twisted the handle next to it. That planning, working out the sequence before the steel is hot, is a real blacksmithing skill and this is a good gentle place to learn it. I wrote a full gear-and-steps walk-through in the gear I would use to forge a bottle opener at home if you want the specifics.
The twist, done on its own
Before you trust a twist inside a project you care about, practice it as its own exercise. Take a foot of half inch square mild steel, heat a marked section evenly, clamp one end in the vise, and turn the other with a wrench or tongs.
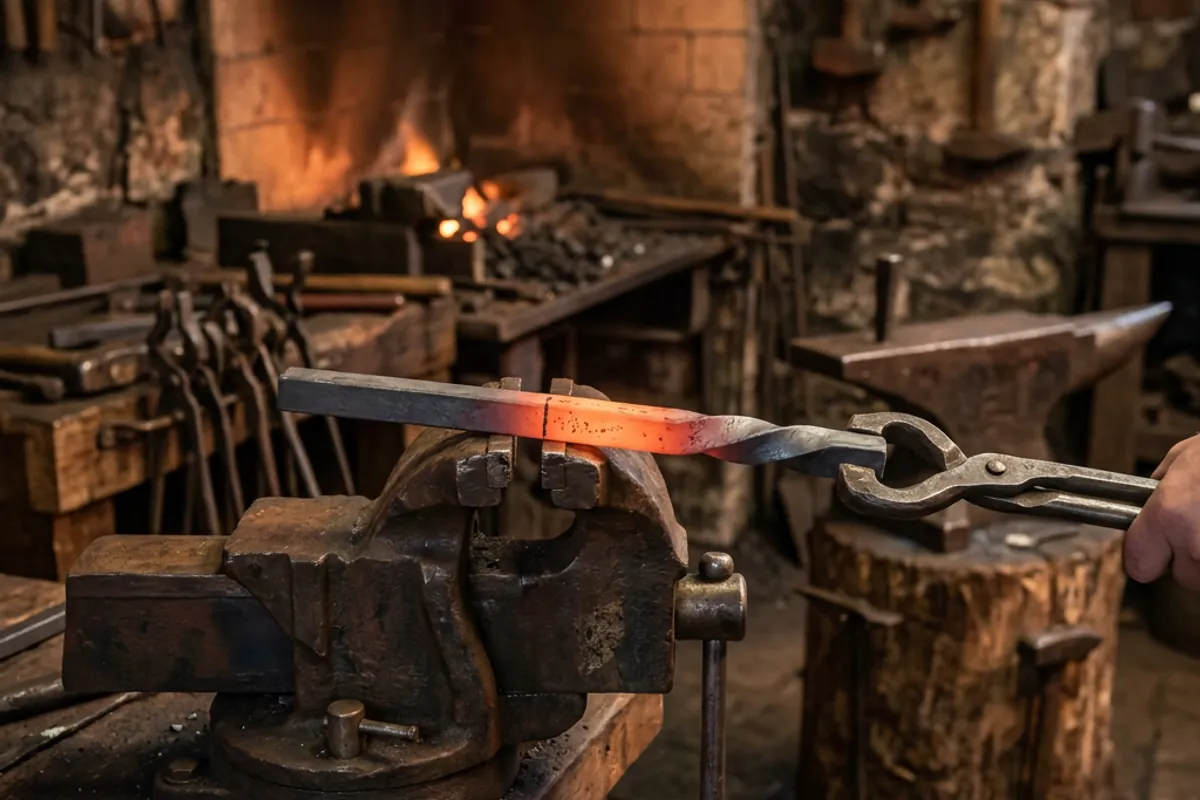
The lesson is heat evenness. A twist tightens wherever the steel is hottest, so an uneven heat gives you an ugly, bunched-up twist that pinches in one spot. Get the whole marked section to the same even orange and the twist comes out regular and clean. Practice both a tight twist and a loose open one. Once you can do it on demand, go back and put twists in your S-hooks, your bottle openers, and eventually a fireplace poker or a wall hook set. This one skill dresses up almost everything else you make.
A pair of tongs, when you are ready
Tongs are the project that turns a beginner into an intermediate smith, and I am careful about when I hand it out. This is not a first-week project. It is a multi-heat, multi-part build with a lot of precise steps, and it will humble you. It is also enormously satisfying, because a set of tongs you forged yourself is a tool you will use for the rest of your smithing life.
Making tongs teaches you to forge two matching halves, to set a joint by upsetting a boss, to draw out reins evenly and at length, and finally to rivet and fit the two pieces so the jaws meet square. Every one of those is a skill that shows up everywhere else. When your first pair grips hot stock and the jaws actually close on it, you have crossed a real line. Until you get there, do not go without proper tongs on your other projects; a good bought pair is cheap insurance against a dropped hot bar, and I cover picking a first set in the blacksmith tongs I would buy first.
The railroad spike knife, and an honest word about it
Nearly every new smith wants to make a knife, and the railroad spike knife is the classic gateway. I am glad people make them, but I want you to understand exactly what you are getting so you are not disappointed.
A spike knife is a fantastic forging project. Drawing out the blade, shaping the spike head into a guard or leaving it as a striking pommel, and grinding a bevel all build real skill and give you a knife-shaped object you forged with your own hands. What it will not reliably give you is a knife that holds a working edge. Most railroad spikes are low or medium carbon steel, and even the ones stamped "HC" for higher carbon are marginal knife steel at best. You can harden them a little, but do not expect the edge retention of a real blade steel. Treat a spike knife as a letter opener, a camp knife you are willing to touch up often, or pure forging practice, and you will love it. Expect a hard-use blade and you will be let down. I went deep on this, including what the markings actually mean, in the railroad spike knife, honestly explained. When you are ready to make a knife that truly performs, that is a metallurgy conversation, and for the real heat-treat science I send people to Knife Steel Nerds rather than trusting shop lore, because edge steel is where guessing gets expensive.
Safety, which is not optional on any of these
None of these projects are dangerous if you respect the shop, and all of them can hurt you if you do not. I say this as the guy who once quenched a blade in oil that was too cold, standing too close in a cotton shirt with no face shield. The oil flared and took my eyebrows, and I kept my eyesight by luck alone. That is the price of casual PPE.
So, for every project on this list:
- Eye protection, always. Safety glasses rated to ANSI Z87.1, on your face from the moment the forge is lit. Hot scale flies off the anvil at the first hammer blow, and it does not care that you were only making a hook.
- Natural fibers only near the forge. Cotton, wool, leather. Synthetics melt onto skin. This is not a comfort preference, it is a burn-severity issue.
- Know where the hot end is at all times, and keep water nearby. Hot steel and cold steel look identical. Everyone who has been at this a while has grabbed the wrong end once. You want it to be once.
- Ventilate. Both coal and propane forges produce carbon monoxide. Doors open, air moving.
The full breakdown of what safety gear earns its place and what is oversold is in blacksmith safety gear: what matters and what to skip. Read it before your next session, not after your first burn.
How to actually work through this list
Do not treat these as a checklist to speed through. Treat each one as a skill to own. Make a dozen hooks before you move on, not one. When your S-hooks come out matching and your tapers land square and four-sided on the first try, you are ready for the next project up. The projects are just scaffolding; the hammer control you build climbing them is the real thing you keep.
If you want the wider map of where to begin, the whole getting started hub collects the gear guides and reference pieces that sit under these projects, from your first forge to your first anvil. Pick a hook, light the forge, and make forty of them. That is how this actually works.