A railroad spike knife is the first thing about half my weekend students ask to make, and I have never once talked one of them out of it. It is a great project. You start with a chunk of steel that already looks like something, you finish in an afternoon, and you learn drawing out, tapering, twisting, and grinding a bevel all in one go. What I do talk them out of is the expectation at the end of it. A spike knife is a forging exercise and a conversation piece that happens to be shaped like a knife. It is not a working blade, and the reason is chemistry, not skill. Below is everything I tell them before they put the first spike in the fire, including the part about where the spikes come from and why that matters legally.
What a railroad spike knife actually is
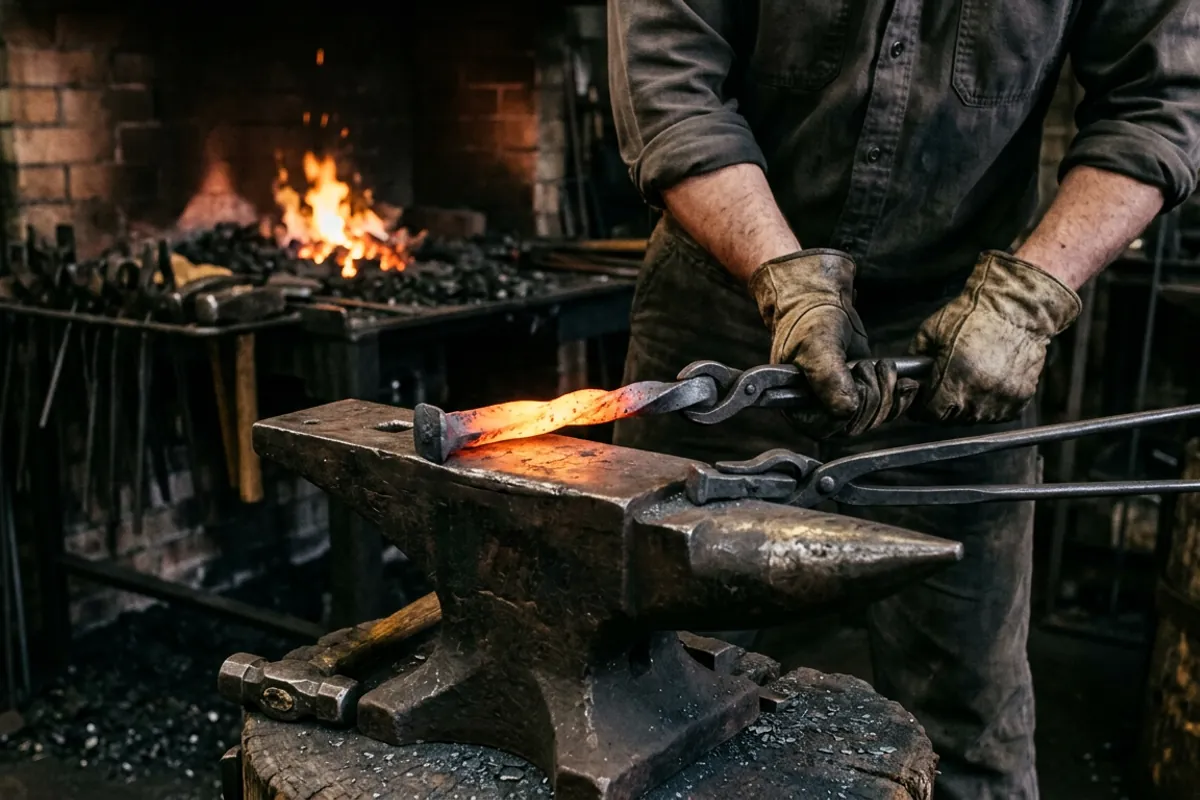
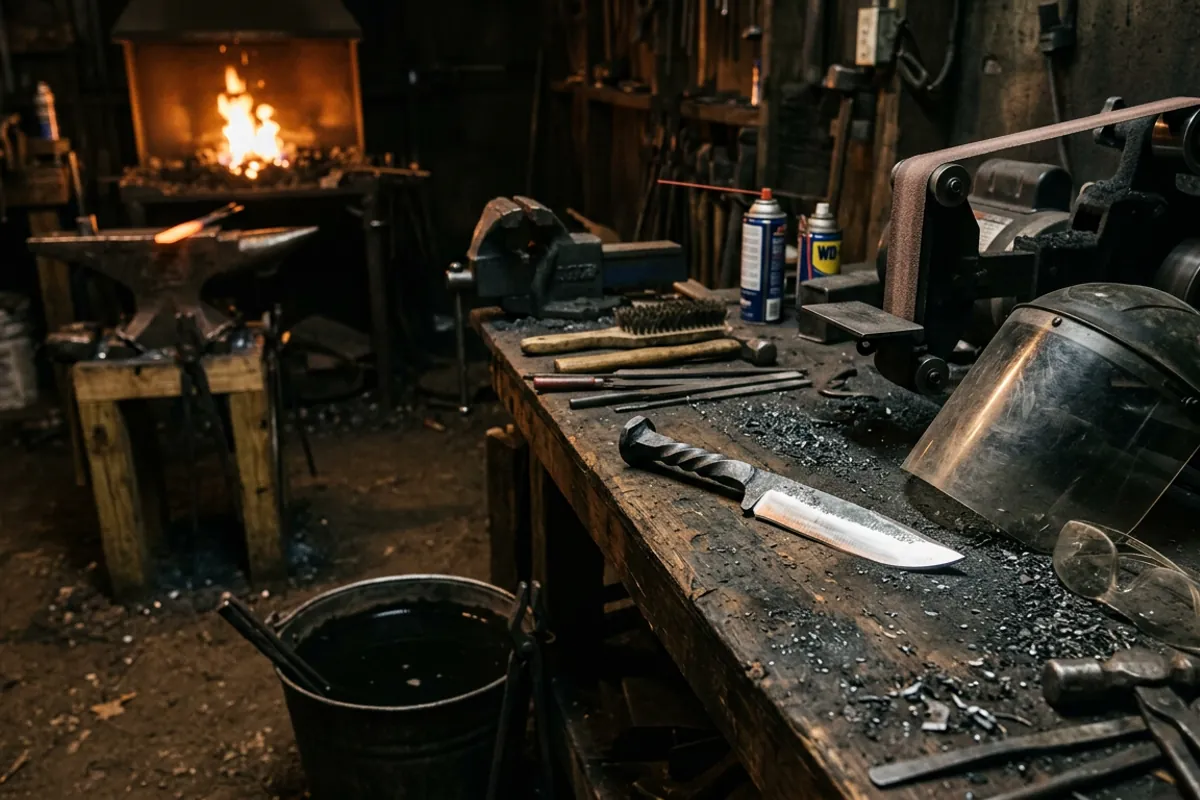
The project is simple. You take a track spike, heat the shank, and draw most of its length out into a blade while leaving the head intact at the other end. The head becomes the pommel and the reason anybody can tell at a glance what the knife used to be. Somewhere between the two you usually put a twist in the shank, both because it looks good and because it hides the transition from square stock to blade.
The common track spike is a square shank around 5/8 inch, about 6 inches long, with an offset head that looks a little like a lopsided nail. You will also see 9/16 inch shanks and longer spikes depending on the road and the era. That is not much steel. A 6 inch spike drawn out gives you a blade of maybe 3 to 4 inches with a stubby handle, which is why most spike knives end up looking like a small camp knife or a large letter opener. If you want length, you either start with a longer spike or you accept a thinner, whippier blade.
That shape is also why the project teaches so much. Everything in it is a fundamental. If you can draw out a spike cleanly, keep the blade centered on the head, and put an even twist in the middle without it corkscrewing off axis, you have most of the hammer control you need for the rest of the knife making cluster. There is more on where this sits among the other beginner projects on the knife making topic hub.
The steel: why HC does not mean knife steel
Here is the part people do not want to hear. Track spikes are structural fasteners. They exist to hold a rail plate down, and the property the railroad cares about is toughness, not hardness. A spike that hardened well would be a spike that snapped.
Some spikes carry an HC stamp on the head, which stands for high carbon. High carbon by the railroad standard means a floor of roughly 0.30 percent carbon. That is genuinely high for a fastener. It is low for a blade. Plain unstamped spikes are leaner still, often down in the 0.10 to 0.20 percent range, which will not harden at all in any meaningful sense.
Why does 0.30 percent matter so much? Because attainable hardness in plain carbon steel tracks carbon content, and it does so on a curve that is still climbing steeply at 0.30 percent and does not flatten out until somewhere around 0.60 percent. The steels people actually make knives out of live at or above that flat part for exactly this reason. If you want the science laid out properly rather than taken on faith from a guy on the internet, Knife Steel Nerds is where I send people; Larrin Thomas has published the carbon and hardness relationship in more detail and with better data than any forum thread will give you.
The practical ceiling for fully hardened 0.30 percent carbon steel is somewhere around the high 40s on the Rockwell C scale, and a spike will not reach that anyway. Lean plain carbon steel has almost no hardenability, meaning the hardness does not penetrate; even with a fast quench you are getting a shallow, partial transformation in the thinnest section and nothing much behind it. What comes off the anvil is a blade you can still cut with a file, which is exactly the test people use to confirm it did not really harden. It will take an edge. It will not keep one through much more than opening boxes.
None of that makes the project worthless. It makes it a forging project. Know which one you are doing before you spend the afternoon.
Where to get spikes, and the part about the law
Do not pull spikes off the track. I mean that plainly. Railroad right of way is private property, the spikes in the ballast are railroad property whether they are in a tie or lying loose beside it, and railroads do prosecute. Walking a live line to collect hardware puts you in front of trains and in front of railroad police at the same time. It is not a gray area and it is not worth a knife.
The legitimate sources are easy enough. Scrap yards often have buckets of pulled spikes and will sell them by the pound. There are salvage sellers who deal specifically in reclaimed track hardware. New spikes are still manufactured and sold through agricultural and fence supply channels, because people use them for what they were made for. Buying new gets you a known specification and a clean spike, which matters more than it sounds like it does; see the next section.
If you buy pulled spikes, look at what came with them. Spikes that spent decades in a crosstie have been sitting in creosote. Creosote is a wood preservative, it is a recognized carcinogen, and burning it off in your forge produces smoke you do not want in your lungs or your shop. Wire brush the shanks, degrease them, and if a spike still smells like tar when it starts to heat, take it outside or run serious ventilation. I run the coal forge for that kind of thing because it is already vented properly; if you are deciding between fuels, I laid out the tradeoffs in coal or propane.
The same caution applies to any mystery hardware in the same bucket. Never heat anything zinc plated or galvanized. Zinc fumes cause metal fume fever, and the symptoms feel exactly like the flu, which is why people keep doing it to themselves without connecting the two. Spikes themselves are normally bare steel, so this is mostly a warning about what else ends up in the same scrap bin.
Forging the blade
I forge spikes at a bright orange, working hot and moving fast. Low carbon steel forgives a lot at high heat and is stubborn as a mule when it cools, so short heats and frequent returns to the fire are the whole game.
Drawing out
Start by flattening the shank near the head end just enough to establish which two faces will become the flats of the blade. Then work the far end down, drawing the tip out first and working back toward the head. Rotate the piece regularly so you are hitting all four faces; if you only pound two of them you get a wide flat bar with a diamond cross section that will never straighten out. Hammer control matters more than hammer weight here. I use a two pound cross peen for most of it, and I have opinions about beginner hammers that I wrote out separately in the blacksmith hammer guide.
Keep the blade centered on the head as you go. It is very easy to drift the blade off to one side of the pommel, and the eye picks that up instantly on a finished knife. Sight down the piece every few heats.
The twist
Most spike knives get one to two full twists in the shank between the head and the blade. Do it hot, at an even orange along the whole twisted section, and do it in one continuous motion with a wrench or a twisting bar. A cold twist or an unevenly heated twist concentrates stress at the coldest spot and you can shear the shank right off. If the twist is uneven, reheat the whole section and adjust; do not chase it cold.
Bevels and finishing
Forge the bevels in as far as you comfortably can before you touch a grinder. It saves steel and it is better practice. Then normalize before any final shaping: bring the whole knife to a uniform heat just past the point where it stops sticking to a magnet, pull it out, let it air cool, and repeat two or three times. Forging leaves the grain structure coarse and uneven, and normalizing puts it back in order. Even on a blade that will barely harden, normalized steel finishes better and bends rather than cracking.
Heat treating a spike, and what heat treat cannot fix
Steel loses its magnetism around 1418 F (770 C), which is a little below the temperature you want for hardening plain carbon steel. So the standard shop method is to heat until a magnet stops sticking, then take it slightly hotter and hold briefly to soak the thin section evenly.
Quench a spike in water or brine, not oil. Oil is too slow to do anything with steel this lean. Water quenching normally makes me nervous because of cracking risk, but at 0.30 percent carbon the crack risk is genuinely low; there is not enough carbon to build the kind of stress that splits a real knife blade. Move the blade edge first, straight in, and keep it moving.
Then test it with a file. If the file skates, you got some hardening in the edge and you should temper at around 350 to 400 F for an hour, twice, to take the brittleness out. If the file bites, and it usually will at least partly, you have confirmed what the chemistry already told you.
People ask about case hardening as a workaround. Carburizing does work in the sense that it drives carbon into the surface and that surface can get genuinely hard. The problem is depth. A shop level case is thousandths of an inch, so the first real sharpening cuts through it and you are back to soft steel underneath. It is a fine way to make a hard skinned decorative piece. It is not a way to make a cutting edge that survives use.
Making a spike knife that actually cuts
There is exactly one honest way to get a working blade with a spike head on it, and it is forge welding. You split or slot the spike shank and weld in a strip of real knife steel to form the edge, then draw the whole assembly out together. The spike becomes the body and the spine, the inserted steel becomes the cutting edge, and the edge hardens properly because it is actually hardenable steel.
I will not pretend this is a beginner project. Forge welding is its own skill, and welding two dissimilar steels with different working ranges is that skill on hard mode. You want a fire that can hold a soaking heat across the whole weld area, which in my shop means the coal forge, and you want to have made plain welds successfully before you try this one. But it is the real answer to "can a railroad spike knife cut," and it is why you occasionally see spike knives from experienced smiths that genuinely perform.
The other honest option is simpler: make the spike knife as a spike knife, enjoy it for what it is, and make your actual using knife out of steel chosen for the job. If you are not sure what that means yet, the steel selector walks through what different knife steels are good at.
Safety on this specific project
Eye protection rated ANSI Z87.1, every heat, no exceptions, and a face shield over it at the grinder. Spike heads have inclusions and old fatigue in them, and hot scale comes off a spike in flakes that travel.
Natural fibers only. Cotton, wool, leather. Synthetics melt onto skin instead of burning away, and the burn that follows is far worse than the one you were trying to avoid. I learned the general lesson the expensive way: early on I quenched a blade in oil that was too cold, standing too close in a cotton shirt with no face shield. The oil flared and took my eyebrows, and I kept my eyesight on luck alone. That is why I quench spikes in water at arm's length with a shield down, and why I will not soften this paragraph to sound friendlier.
Ventilate for the creosote question above. Use tongs that actually grip a square shank rather than pinching one corner of it, because a spike squirting out of loose tongs while you are swinging is how people get hurt on a project everybody calls easy. And do not grind a blade hot; besides ruining any heat treat you managed, hot steel and a spinning belt throw sparks in directions you are not expecting. The rest of what I think is worth wearing, and what is a waste of money, is in blacksmith safety gear.
Where a spike knife belongs in a shop
Mine hang on the wall. They are the pieces I hand to visitors, the things I use to show a beginner what drawing out and twisting look like when they are done right, and the project I give somebody on their first day because they leave with something recognizable in their hand. That is a real function and I do not think it is a lesser one.
What I do not do is put one on my belt and expect it to process a deer. The steel is not there, no heat treat conjures it, and pretending otherwise is how people end up frustrated with a hobby that has plenty of real challenges in it already. Make the spike knife. Learn the hammer work. Then go make a knife out of knife steel and notice how much of the spike practice carried over. That is the actual value of the project, and it is worth more than the blade you get from it.