A blade warped after quench is how a good day in the shop turns sideways. You normalized, you got the heat even, the steel came out of the oil hard and skated a file, and then you set it on the bench and see daylight under one end. It has happened to me with stock I forged, stock I ground from flat bar, thin kitchen knives and thick camp choppers. Most of the time it comes back. Not always, and anybody telling you a warp is always fixable has not broken enough blades to know better.
This is the article our normalizing guide points at when it says that a bent part gets straightened by straightening. So here is the whole job: why the blade moved, what you can do in each window of time, what real testing actually says about the popular methods, and how to stop it happening to the next one. If the rest of the sequence is still new to you, start at the knife making hub and come back.
Why a blade warps in the quench
Two things fight each other when a hot blade hits the oil, and both of them move steel.
The first is plain thermal contraction. The outside of the blade cools and shrinks long before the middle does. Thin sections cool first, thick sections last, so the edge is already shrinking while the spine is still soft and hot. That alone will pull a blade around.
The second is the transformation itself. Austenite turning into martensite is not a neutral swap. Martensite takes up more room than the austenite it came from, so the part of the blade that transforms first physically grows while the rest of it is still waiting. If the edge transforms a fraction of a second before the spine, or one flat before the other, the blade has to go somewhere. It goes into a bow, a twist, or both.
On top of that, the quench releases stress you put in earlier. Forging leaves the steel unhappy. So does grinding, especially heavy grinding on one side, and so does a lopsided cross section where one bevel is thicker than the other. All of that sits quietly in the bar until the steel gets soft at critical temperature, and then it lets go. That is why so many warps are not really quench problems at all. They are grinding problems that only show up in the oil.
If you want the metallurgy properly, with data behind it rather than shop lore, Knife Steel Nerds is where I send people. I forge and I test edges. I do not run a lab, and I am not going to pretend otherwise.
First, tell a warp from a crack
Before you bend anything, find out whether the blade is cracked. This is the step people skip because they are annoyed, and it is the step that sends a piece of hardened steel across the shop.
Quench cracks usually start where the steel is thinnest or where stress concentrates: up from the edge, at a plunge line with a sharp corner, at a pin hole, at a sudden change in thickness. Look at the blade under strong light with whatever magnification you have. Wipe the oil off first, because oil hides a hairline crack beautifully. Some smiths hang the blade and tap it, on the idea that a sound one rings and a cracked one thuds. I use that as a hint and nothing more, since a short blade in a clamp will thud either way.
If you find a crack, you are done. A cracked hardened blade under bending load does not bend, it lets go, and it lets go fast. Do not try to straighten it, do not try to weld it, and do not put it in a handle and give it to somebody.
Whatever you do next, do it in eye protection rated to ANSI Z87.1, and do it with nobody standing in line with the blade. That is not a formality. Hardened steel at full hardness fails by breaking, not by bending, and the pieces have to go somewhere.
The window between quench and temper
Straight out of the oil, the blade is at its hardest, its most brittle, and its most stressed. This is the window where a warp is easiest to move and easiest to turn into two pieces.
Get the blade into the temper soon. I am not going to hand you a minutes figure, because I could not find a primary source that supports one, and a made up number is worse than no number. The reason for hurrying is real, though: as quenched martensite is brittle and loaded with internal stress, and blades have cracked sitting on the bench doing nothing at all. The temper is what takes that stress down to a level the steel can live with. Anything you do before the temper, you are doing to the most fragile version of your blade that will ever exist.
Plenty of respected smiths do work in that window anyway. On the bladesmithing forums, including the American Bladesmith Society crowd, the common advice is to hand straighten while the blade is still warm from the quench and before it drops below roughly 400 degrees F. I could not read that discussion against a primary source, so I pass it on as shop practice from experienced people rather than as a verified fact. It matches what I have felt at the bench, which is that a blade with a little residual heat in it will move where a cold one will snap.
For a bad warp, the same crowd talks about a sub critical anneal, often quoted as around 1200 degrees F for about two hours, to soften the blade enough to straighten cold and then heat treat again from the start. Same caveat: that is respected practice repeated on a forum, not a number I verified. If you use it, understand you are throwing away the heat treat you just did and starting over.
Straightening in the temper, where most warps actually come out
This is where I fix the majority of warped blades, and it is the method I would tell a beginner to use before anything else.
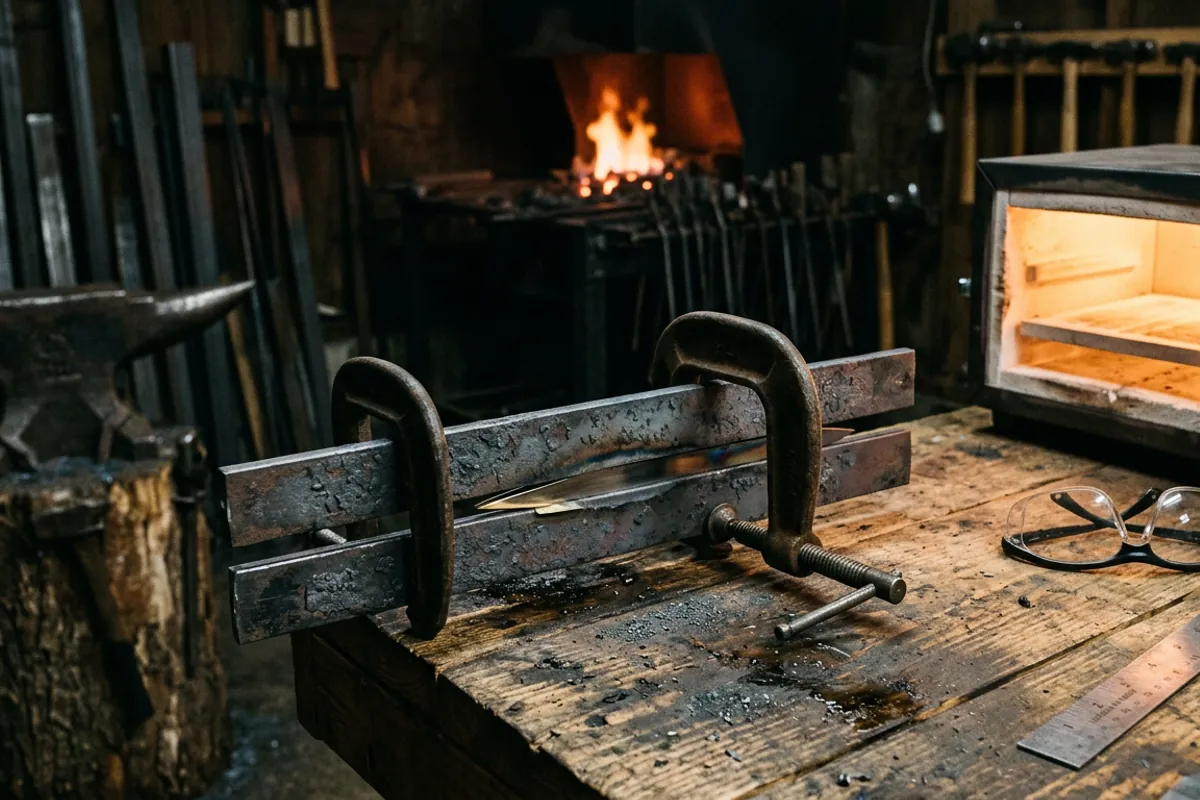
Knife Steel Nerds is clear that you should temper at least twice, and that each temper is usually one to two hours long. That is not just good practice for toughness, it is two or more chances at your warp. Common shop practice, and this part is practice rather than anything Knife Steel Nerds instructs, is to clamp the blade straight, or slightly past straight, and run the temper cycle with it held that way.
The setup does not need to be fancy. Two lengths of flat bar and a couple of clamps will do it. Lay the blade between the bars with a shim under the high spot so that snugging the clamps pushes it past straight, then put the whole assembly in the oven and let it soak. Let it cool clamped. Steel springs back, so if you clamp it dead straight you will get a blade that is still slightly bent. Overshoot a little, check it, and adjust on the second cycle.
Two things matter here. Clamp the blade on its flats, not on a finished edge, and do not crank a thin blade down onto a hard point that will dent it. And check the blade against a straightedge or a known flat surface between cycles rather than eyeballing it, because your eye will tell you a blade is straight right up until you set it on granite.
More on what the temper is doing while all this is going on is in the tempering guide.
The carbide hammer, and what the testing actually shows
The other method that comes up constantly is the carbide faced straightening hammer: you support the blade and tap the concave side, stretching that side until the blade comes back. Smiths who use it swear by how much control it gives on a finished, hardened blade.
I do not own one, so what follows is owner consensus and published testing, not my bench.
Knife Steel Nerds addressed the obvious worry, which is whether hammering a hardened blade wrecks it. Their framing is that using a carbide hammer on a piece of steel is a type of peening. They tested MagnaCut coupons in three conditions, peened before finishing, peened after finishing, and unpeened, three coupons per condition, and reported that all of the specimens performed very similarly to each other. Take that for exactly what it is: one steel, three coupons per condition. It is real evidence that the method is not automatically destructive. It is not proof about every steel at every hardness.
Their conclusion is the useful part. Peening does not negatively affect steel when done properly, but cracks can form if the steel is over peened, and they show a real over peened example that cracked. So the failure mode is not the technique, it is doing too much of it in one place.
What nobody has published, as far as I can find, is a hardness number above which a carbide hammer becomes unsafe to use. If somebody hands you one, ask where it came from. I would rather tell you the number does not exist than invent one that sounds authoritative.
Cold straightening a finished blade, and why it can snap
Sometimes you have a tempered, ground, nearly finished blade with a bow in it, and you decide to bend it cold. I have done it. It works more often than it fails. It also fails.
The method is a slow three point bend: support the blade near both ends, press steadily in the middle over the high spot, and go past straight because it will spring back. Steady pressure, not a jerk. Small increments with a check against a straightedge between each one.
Here is the honest part, and I am not going to dress it up. A hardened blade straightened cold can snap, and when it does it comes apart with real energy. You do this in ANSI Z87.1 eye protection, with your face out of the plane of the blade, with nobody else in the shop standing where a piece would go, and having already decided that you can accept losing the blade. If losing it is not acceptable, the answer is to soften it and heat treat again, not to push harder.
Thin stock has more give than thick stock, and a lower hardness has more give than a high one. A hard, thick, short blade is the worst case, and that is the one I stop bending soonest.
Grinding a warp out instead of bending it
If the warp is small and the blade still has meat on it, you can sometimes take it out with abrasive instead of force. This is the low drama option, and on a blade that is not yet at final thickness it is often the right one.
The limits are real, though. Grinding a bow out means removing more material from one side than the other, so you will move the edge off center, and you will see it in the ricasso and the plunge lines where a flat suddenly is not flat anymore. On a full flat grind you can hide a fair amount. On a blade with a wide flat ricasso and crisp plunges, a warp corrected by grinding shows.
Grind it cold. Light passes, a fresh belt, and a dip if the blade gets warm enough to be uncomfortable to hold. Blueing the edge on a grinder pulls the temper right back out of the thin part of the blade, and then you have a soft edge on a blade that is finally straight, which is worse than where you started. The rest of the shaping sequence, and where warp correction fits into it, is in the walk from bar stock to finished edge.
Where the warp really starts, before the blade ever sees oil
Most of the warp fights I used to have went away when I fixed things upstream of the quench.
Normalize and stress relieve before you harden. Forging and stock removal both leave stress in the bar, and the quench is where it comes out. The normalizing guide covers the cycles.
Grind symmetrically. If your left bevel is thicker than your right, the blade cools unevenly and pulls toward the thin side. Measure rather than trusting your eye, especially near the tip.
Leave the edge thick going into the quench. A thin pre ground edge cools almost instantly while the spine is still hot, which is exactly the condition that bends blades, and it cracks besides. Leave it thicker than you think you need and take it down after the temper; a thin edge going into the quench is a bend or a crack waiting to happen.
Drill your pin holes before heat treat, and break any sharp internal corner at the plunge. Sharp corners are where cracks start.
Heat evenly. A hot spot in a forge, or a blade sitting half in the flame, means half your blade transforms on a different schedule than the other half. Move the blade, or use a longer soak at a lower differential, and watch the color along its whole length.
And straighten the blade before it goes in. A blade that is bent at critical temperature quenches bent. Check it flat, correct it hot, then quench.
Quench technique, oil speed, and the steel itself
How the blade enters the oil matters. Straight down, edge first, spine level, in one motion. Do not let it go in at an angle so one flat sees the oil before the other.
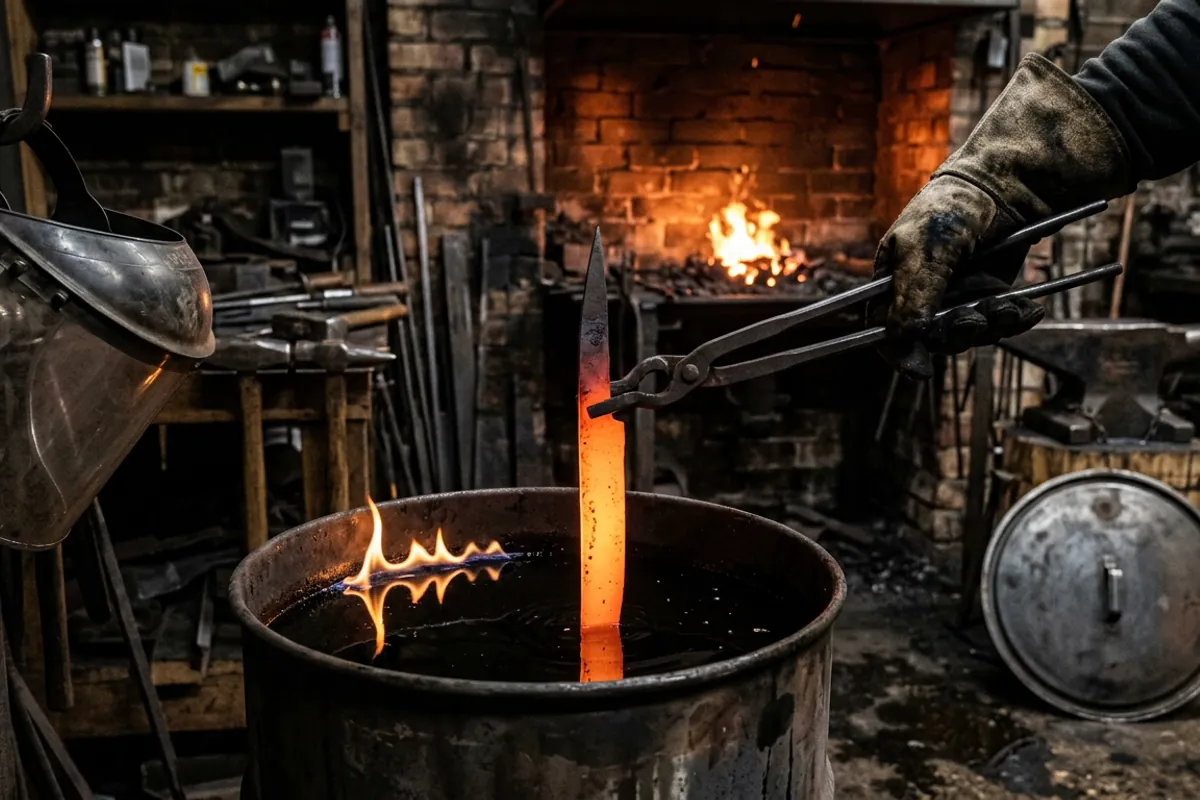
The forum advice on agitation is to move the blade forward and back along its length rather than swishing it side to side, on the theory that side loading a blade that is transforming is exactly how you put a bend in it. That is smith practice, widely repeated, not something I verified against a test. What I can attribute is that in their own quench testing Knife Steel Nerds moved coupons rapidly up and down within the oil. That is their test procedure, not a law of the shop.
Oil speed is a real lever. Knife Steel Nerds puts it plainly: the concerns with quenching more rapidly are warping and cracking, and high hardenability steels can be quenched in slower oils to minimize the chances of warping and cracking. That last clause is doing a lot of work. A deep hardening steel gives you the option of a gentler quench. A shallow hardening steel like 1084 does not, and slowing the quench to chase a warp will simply leave you with a soft blade. Match the oil to the steel, at the temperature the oil calls for, and read what a fast quench oil actually does before you go shopping for a gentler one.
Some steels dodge the problem differently. For air hardening steels, Knife Steel Nerds describes placing the steel between aluminum plates so heat is drawn out, which is faster than sitting in air and helps keep the knife flat if the bevels are not yet ground. That is air hardening practice, and it is worth being blunt about the limit: plates are not a rescue for oil quenched 1084 or 5160. Those steels need the oil. Stainless has its own routine with foil and plates, covered in the stainless heat treating guide.
Thin stock warps more than thick stock, full stop. If you are running thin material, expect movement and plan for the clamped temper. That is one of the things worth knowing about 15N20 and other thin bar before you cut into it.
When to stop and start over
There is a point where the honest answer is that this blade is done. A crack anywhere in it, a warp you have already fought through two temper cycles and a cold bend, a twist plus a bow in a thick blade: at some point you are spending an evening and risking a snapped piece of steel to save material worth less than the belts you will burn finishing it.
Soften it and start the heat treat over, or cut it up for practice tips and test coupons. I keep a bucket of them. Breaking your own failures is how you learn what your quench is actually doing, and a blade you already gave up on owes you nothing.
The blades that stay straight are not the ones that got lucky in the oil. They are the ones that were symmetric, stress relieved, thick at the edge, and straight when they went in.