Blade smithing is the part of knife making where the shape comes out of the hammer instead of the grinder. You take a bar of steel, heat it until it moves, and push it into a blade with directed blows, then you fix the grain you disturbed doing it, harden it, temper it, and grind it clean. That is the whole arc. It sounds simple written down, and the first dozen times you try it the blade will be crooked, the edge will be thick in one spot and paper thin in another, and something will crack in the quench. That is normal. I have been at this about twenty-five years, most of it as a hobby smith in a home shop in the upper Midwest, and I still ruin blades. What follows is the reference I wish someone had handed me when I was working off a piece of railroad track clamped to a stump.
This is not a buying guide. It is the shape of the craft: what each stage is for, what actually controls success, and where beginners lose blades. If you want gear specifics, the knife making hub collects those.
What blade smithing actually is, and what it is not
There are two ways to make a knife. Stock removal starts with a flat bar of steel and grinds the blade out of it, subtracting everything that is not a knife. Blade smithing forges the shape first, moving the steel while it is hot, then grinds far less material away. Both make excellent knives. Anyone who tells you a forged blade is automatically better than a ground one is selling something.
What forging genuinely gives you is control over distribution. You can move mass where you want it: a thick spine and a thin edge, a distal taper that lightens the tip, a bar that grows longer without getting thinner everywhere. You can start with a cheap chunk of round or square stock and end with a blade profile that would have cost you three times the steel in flat bar. You can also put a blade together faster, once you are decent, than you can grind one.
What forging does not give you is a free pass on heat treatment. The old story about the grain being "aligned" or "packed" by the hammer, so a forged blade needs less careful hardening, is folklore. Forging heat grows grain. Everything you do after forging is aimed at undoing that damage. If you want the metallurgy on this rather than my summary, Knife Steel Nerds is the place to read it. They test rather than repeat, and that distinction matters more in knife making than in almost any hobby I know.
Steel choice, and why simple carbon steel wins early
The single biggest cause of a dead blade in a beginner's shop is unknown steel. Leaf springs, files, sawmill blades, old bearing races, mystery bar from the scrap bin: every one of those is some steel, and you cannot heat treat "some steel." The alloy determines the hardening temperature, the quench speed, and whether the thing will survive the shock of an oil quench at all. Guessing produces blades that are either soft as butter or cracked before you ever grind a bevel.
Start with a known simple carbon steel bought as a known simple carbon steel. 1084 is the standard beginner recommendation for good reason: it sits right around the eutectoid composition, which means the temperature window where it is ready to quench is wide and forgiving, and it hardens fully in oil without exotic equipment. 1075, 1080, and 80CrV2 behave similarly enough that the process below applies. Stainless steels and the high alloy tool steels need soak times at temperature, tight control, and usually a heat treating oven with a controller. They are not beginner blade smithing steels, and no amount of eyeballing color in a coal fire will substitute for the equipment they require.
Salvaged steel has a place later. Old files can make good blades. Leaf spring makes good choppers. But you test salvage the way a machinist does: forge a small coupon, quench it, and try to break it and file it. If a file skates across the quenched sample, it hardened. If the file bites, it did not, and no amount of hope changes that. The railroad spike knife is worth reading here, because spikes are the most common piece of found steel handed to beginners and the honest answer about what they can and cannot become is instructive.
Heat: the part that decides everything
The hammer gets the credit and the fire does the work. Steel forges well in a fairly narrow band. For simple carbon steels you want to be working from a bright orange down to a solid red, roughly 1600 F to about 2000 F, and you stop hitting when the color falls off toward a dull red. Below that, around a dark red, the steel resists moving and you start pushing cracks into it, especially at the edge and the tip where the section is thin. Above it, up near a yellow white, you are cooking the steel: grain grows fast, and if you get sparks coming off the surface in the fire you have burned it and the only fix is to cut that section off and throw it away.
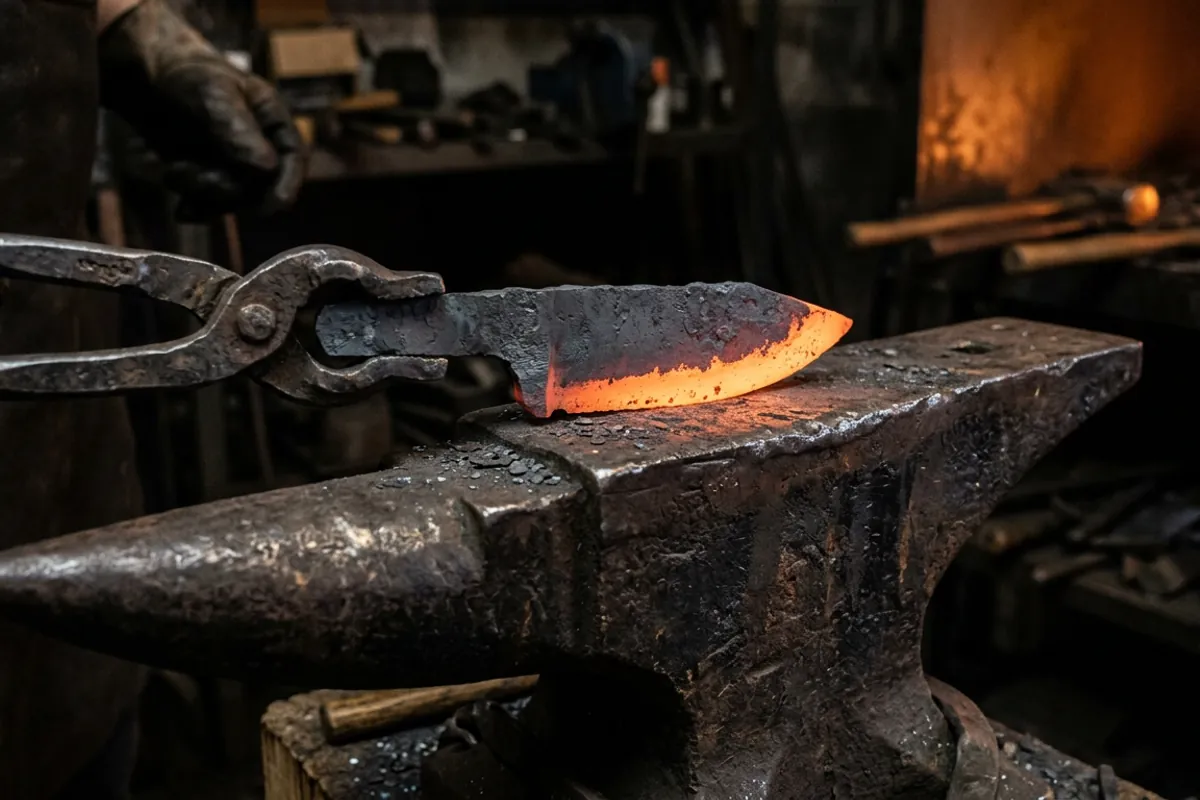
Color judgment is easier in a dim shop. Bright daylight through a garage door will make a piece look cooler than it is and you will pull it too hot without realizing. That is one of the small reasons smiths tend to work in a dark corner.
Both fuels forge blades fine. A propane forge gives you even, repeatable heat over a long section and it is the one I reach for on ordinary blade work. A coal fire gives you a small, intensely hot spot you can put exactly where you want it, which is worth a lot when you are drawing out a tang without overheating a finished tip. I run both and have for years. If you are choosing your first one, coal or propane covers the tradeoffs in detail.
Forging the blade from bar to rough shape
The sequence most smiths use, in some form:
Draw the bevels first, then the profile. It is tempting to hammer out a knife silhouette and then thin the edge. Do it the other way. Forge the edge bevel down while the bar is still a straight bar, because a straight bar is easy to hold, easy to hit square, and easy to see. Thinning the edge makes the bar grow longer and curve away from the edge, which is the plow effect, and you straighten it back as you go.
Leave the edge thick. Every beginner forges the edge too thin. Steel that thin overheats in the next fire, decarburizes, cracks in the quench, and gives you nothing to grind. Leave the edge about as thick as a dime, closer to a nickel if you are new. You want material left for the grinder to take.
Forge the tip by moving mass, not by pinching it. A tip forged by squeezing the last inch to nothing is thin, burnt, and fragile. Bring the spine down toward the edge instead.
Set the plunge and the tang last. The tang is just drawn out stock and it is easy work compared to the blade.
Anvil weight matters more here than beginners expect, because a light anvil moves under the blow instead of returning energy to the steel. My anvil is a 148 lb Trenton I call Bessie, and it is more than enough for blade work of any size I do. Something in the 100 to 150 pound range is a comfortable place to be for knives; below that you feel every blow bounce the tool instead of the work. There is a full breakdown in what size anvil you actually need.
Straightening is continuous, not a step at the end. Check the blade against the anvil face every few heats and correct while it is hot. Cold straightening of a forged blade is how you find out where the stress cracks were.
Normalizing and annealing: the steps beginners skip
Forging heat grows the grain, and coarse grain makes a brittle blade no matter how well you quench it. Normalizing is how you shrink it back. The process is simple: heat the blade to just above its critical temperature, hold briefly, and let it cool in still air. Then repeat, lower each time. Three cycles, each a little cooler than the last, is the common recipe for simple carbon steels, and it works.
Finding critical temperature without an oven is done with a magnet. Steel loses its magnetism at the Curie point, a bit above 1400 F, so a blade that a magnet no longer grabs is close to where you need to be. Understand the limit of that trick: non magnetic is near critical for these steels but not identical to the ideal hardening temperature, which is normally somewhat above it. It is a good field indicator, not a thermocouple. Anyone selling you the magnet as precision is overselling it.
Annealing is separate. It is a slow cool, buried in vermiculite or wood ash or left in a shut down forge overnight, and it leaves the steel as soft as it will get so you can drill the handle pins and do rough grinding without eating belts. Do your drilling annealed. Drilling a hardened blade is a bad afternoon.
Hardening and tempering
Hardening is one heat and one fast cool. Bring the blade evenly up past critical, edge first into the quenchant, spine level, straight down, no stirring sideways with a thin blade in it because that is how you warp one. It comes out hard and brittle and full of stress, and it will chip like glass if you drop it.
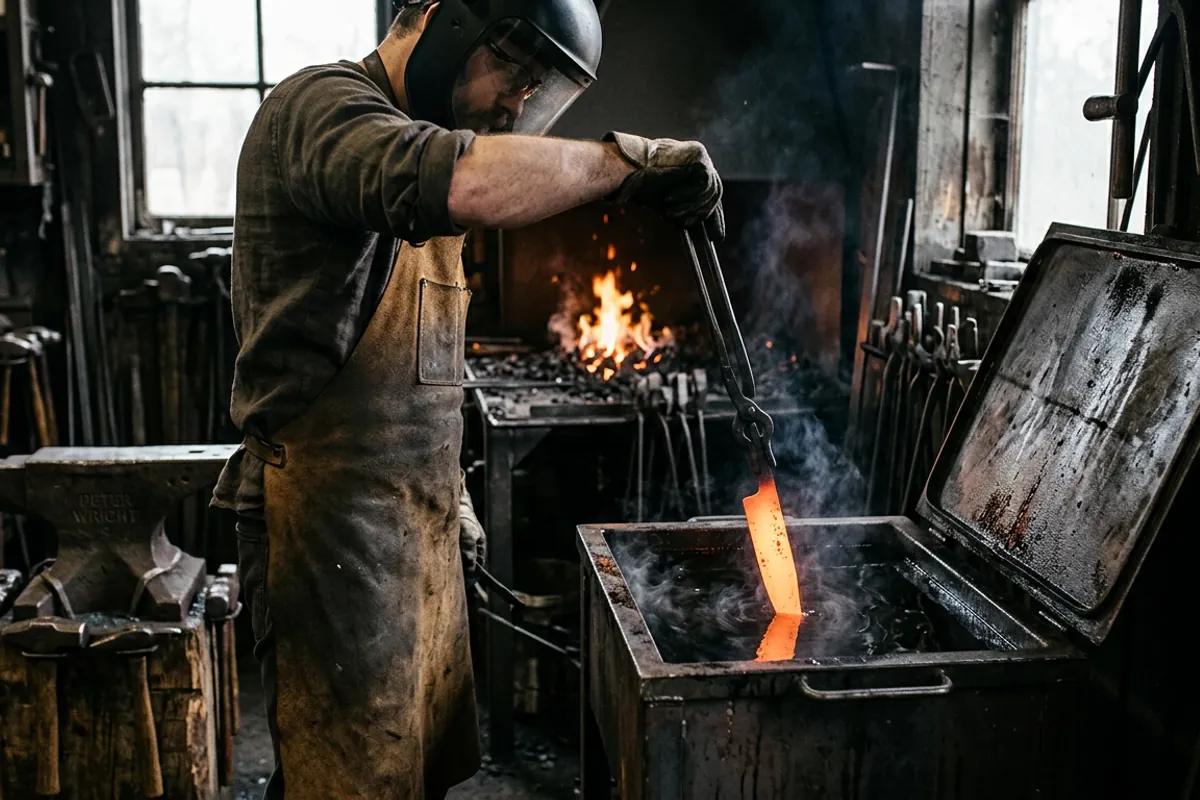
Quench oil is the part where people get hurt, so I am going to be blunt about it. My eyebrows once went into a quench tank because I used oil that was too cold, stood over it in a cotton shirt with no face shield, and the oil flared. I kept my eyesight by luck, not judgment. Rules that came out of that:
- Use enough oil. A gallon or two, not a coffee can. Small volumes heat fast and flash.
- Warm the oil first, roughly 120 F to 130 F for canola, or whatever the maker specifies for a purpose made quench oil. Cold oil is slow, thick, and more likely to flare.
- Use a steel container with a lid that fits, and keep the lid within reach. A lid smothers an oil fire. Water does not, and never goes near burning oil.
- Face shield over safety glasses rated to ANSI Z87.1, natural fibers only, no synthetics anywhere near it. Synthetic fabric melts into skin.
- Stand to the side, not over the tank, and keep your face out of the vapor column.
Water quenching simple carbon steel is possible and is how it was done historically, but it cracks blades at a rate that will discourage you. Use oil.
Temper immediately. A quenched blade left overnight can crack sitting on the bench. Tempering is a low, controlled reheat that trades a little hardness for the toughness that keeps the blade from shattering. For 1084 a common starting point is two cycles of about two hours at around 400 F in a kitchen oven, which lands the blade near 60 Rockwell C. Verify against real published data for your specific steel rather than my memory of it, and again, Knife Steel Nerds has the tested numbers. A cheap oven thermometer is worth buying, because oven dials lie by a lot. The whole logic of what tempering does is worth reading properly in tempering of metal, explained from the forge floor.
Grinding after heat treat, and how to avoid undoing your work
Once the blade is hardened and tempered, every minute at the grinder is a chance to ruin it. Friction heat at a thin edge climbs fast, and the edge is the thinnest part with the least mass to carry heat away. If you overheat the edge past your tempering temperature you have locally softened it, and there is no fixing that except by starting the heat treat over.
Keep a container of water at the grinder and dip constantly. Light pressure, sharp belts. A dull belt generates heat instead of cutting and is the single most common cause of a burnt edge. On clean bare steel you can watch tempering colors appear as a warning, straw and then bronze and then blue as it climbs, but by the time you see blue at the edge the damage is done, so do not use color as your control. Use dipping.
Two other grinder hazards get glossed over too often. Grinding dust from high carbon steel is a respiratory irritant and should not be breathed; run ventilation or a dust collector and wear a respirator if you grind for any length of time. And grinder sparks are ignition sources, so the quench oil, the rags, and the solvent do not live near the grinder. Ever. If you want the detail on what protective gear is worth owning, blacksmith safety gear covers it plainly, and the machine side is in the belt grinder guide.
A realistic first year
Ask ten smiths how long it takes to make a knife you would hand someone, and the honest answers cluster around a lot longer than you would like. Here is a path that works.
Make five blades of the same simple pattern from the same known steel before you change anything. Same profile, same length, same steel, same heat treat recipe. Variation teaches you nothing until you have a baseline. Break one of them. Clamp it in a vise and snap it, look at the grain in the fracture, see whether it is fine and gray like velvet or coarse and sparkly. That single destructive test tells you more about your normalizing than a year of guessing.
Keep notes. Steel, forging heats, number of normalizing cycles, quenchant and its temperature, tempering time and temperature, and what the finished blade did in use. Blade smithing is a process with a dozen variables and no memory will hold them straight.
Expect losses. Cracks in the quench, warps that will not straighten, tips burned off in the fire, an edge that chips because the temper was short. Every one of those is information. The smiths who get good are not the ones with fewer failures, they are the ones who figured out which stage the failure came from.
And do not chase gear as a substitute for repetitions. A forge that gets steel to orange, an anvil with a flat face, a hammer you can swing all afternoon, tongs that actually hold your stock, and a way to grind is the entire kit. The rest of the shop accumulates on its own. If you want the honest short list, the rest of the guides here go tool by tool, but none of them will move steel for you.