The tempering of metal is the step most beginners rush, and it is the step that decides whether the thing you just made is a tool or a piece of glass shaped like a tool. Hardening gets all the attention because it is the dramatic part: the steel comes out of the fire glowing, the quench roars, and you pull out something that skates a file. But steel straight out of the quench is at its most brittle. Drop it, and it can shatter. Put it to work, and the edge chips out or the whole thing snaps. Tempering is where you give back a small amount of that hardness in exchange for a large amount of toughness. It is not optional, it is not a finishing touch, and it is not something you eyeball on the way out the door.
I have been at this about twenty five years, most of it as a working hobby smith, and tempering is still the part I slow down for. I have seen more beginner projects ruined by a careless temper than by a bad forging session. This is a plain explanation of what is happening in the metal, what the two dials you control actually do, and how to run the process in a home shop without lying to yourself about the results.
What tempering actually does inside the steel
When you heat carbon steel above its critical temperature and quench it fast, the carbon that was dissolved in the hot structure does not have time to move. It gets trapped in the iron lattice, which distorts into a strained, supersaturated structure called martensite. That distortion is where the hardness comes from. It is also where the brittleness comes from, along with a great deal of locked in internal stress from the quench itself.
Tempering is a controlled reheat, well below the temperature where the steel would transform back to austenite. For plain carbon steel that lower critical point sits around 1335 F, and practical tempering happens far below it. At tempering temperatures the carbon atoms get just enough mobility to move short distances and precipitate out as fine carbides. The lattice relaxes. Internal stresses drop. Hardness comes down a little, and toughness comes up a lot.
There is more going on than that, and it happens in overlapping stages as temperature rises: first fine transition carbides forming, then any retained austenite left over from the quench decomposing, then those early carbides coarsening into more stable cementite. High alloy steels add their own behavior, including alloy carbides that precipitate only at much higher tempering temperatures. The practical takeaway for a shop is simple. Tempering is a trade, it moves in one direction, and the temperature you pick is what sets the exchange rate.
One more thing worth understanding: tempering does not undo. If you temper too high and the piece comes out softer than you wanted, you cannot cool it back to hard. The only way back is to normalize, harden, and start the whole heat treat over. That asymmetry is why I always temper low first and creep up if I need to.
Tempering is the second half of a two step job
You cannot temper steel that was never hardened. This trips people up constantly. If your quench did not work, whether because the steel was not hot enough, the quenchant was wrong for that alloy, or the section was too thick to cool fast enough, then heating it to 400 F afterward does nothing useful. Tempering only modifies martensite. No martensite, nothing to modify.
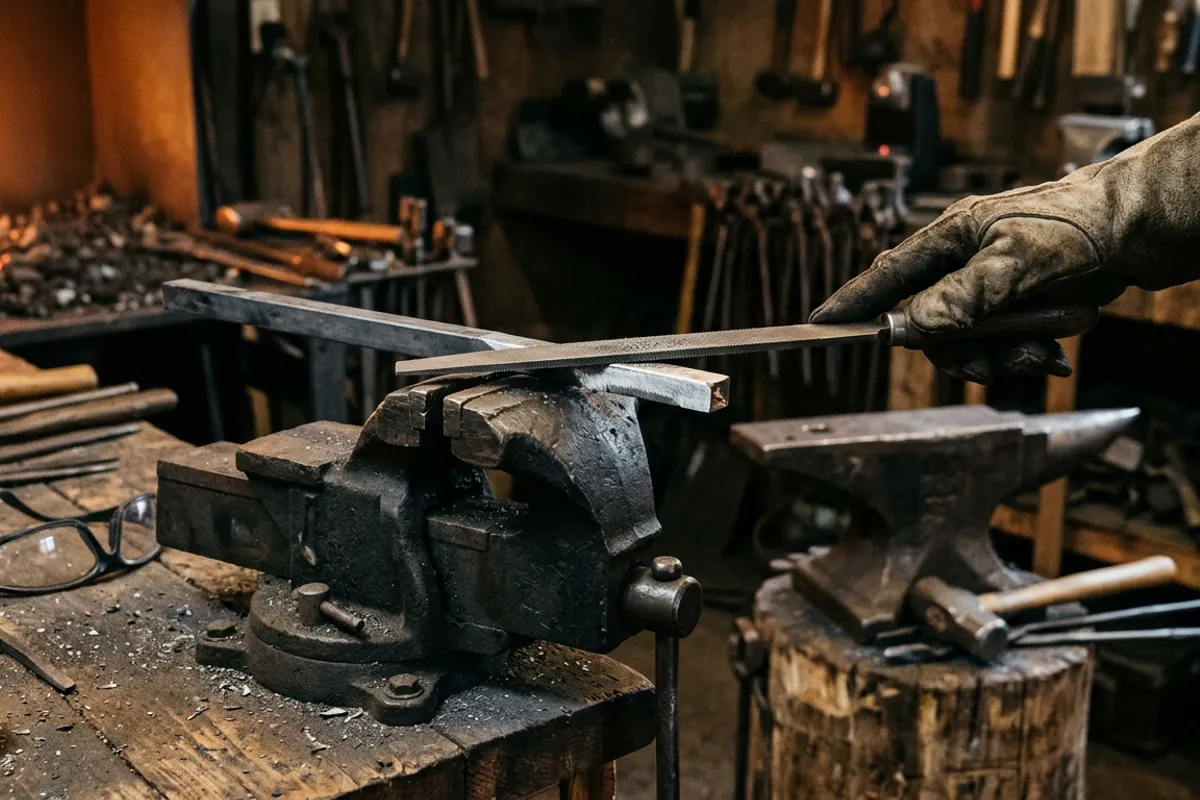
Check hardness before you temper. A sharp new file drawn across the hardened surface should skate and refuse to bite. If it bites and cuts, the piece is not hard and you need to go back to the fire. That file test tells you hard versus not hard. It does not tell you a number, and anyone who claims to read Rockwell points off a file is guessing. If you need a real hardness number, you need a real hardness tester, and most of us do not have one.
It also matters what steel you are holding. Known steel with a published data sheet can be heat treated to a spec. Mystery steel, leaf springs, and scrapyard finds cannot, because you do not know the alloy, and the tempering response of a plain carbon steel is nothing like that of an air hardening tool steel. Practicing on unknown stock is fine. Trusting the result is not. If you are working out what to buy for a project where the heat treat has to be repeatable, the steel selector tool and the steel and metallurgy topic hub are where I send people first.
Temperature and time: the two dials you actually turn
Temperature does most of the work. Every steel has a published tempering response, and higher temperature means lower hardness and higher toughness. As a rough map of intent rather than a spec sheet:
Blades in simple high carbon steels get tempered low, because a cutting edge needs hardness above almost everything else. Most smiths I know run knife blades in plain carbon steel somewhere between about 350 F and 450 F, and pick the exact number off the steel maker's data for the hardness they want. Cold chisels and punches get tempered somewhat higher, because a tool that takes hammer blows needs to deform rather than shatter. Springs get tempered far higher still, since a spring has to flex and return and does not need to hold an edge at all. The pattern is consistent: the more impact and flex the tool sees, the higher you temper.
Time is the second dial, and it is smaller but not negligible. The common shop rule is a minimum of one hour at temperature, and roughly an hour per inch of thickness for heavy sections. Time and temperature trade off against each other to a degree, but not evenly. A very long soak at a low temperature does not equal a short soak at a high one, so do not try to substitute one for the other.
Most people, myself included, run two tempering cycles rather than one, cooling fully to room temperature in between. The second cycle matters most for steels that retain a meaningful amount of austenite after the quench, because that austenite can transform to fresh untempered martensite as the piece cools from the first temper. The second cycle tempers that new martensite. High alloy tool steels and high speed steels take this further, tempering high and often running three cycles, and some of them get a cold treatment between quench and temper to deal with retained austenite before tempering at all. That is beyond what most home shops do, but it is worth knowing why the professional recipes look the way they do.
Reading temper colors, and where that method fails
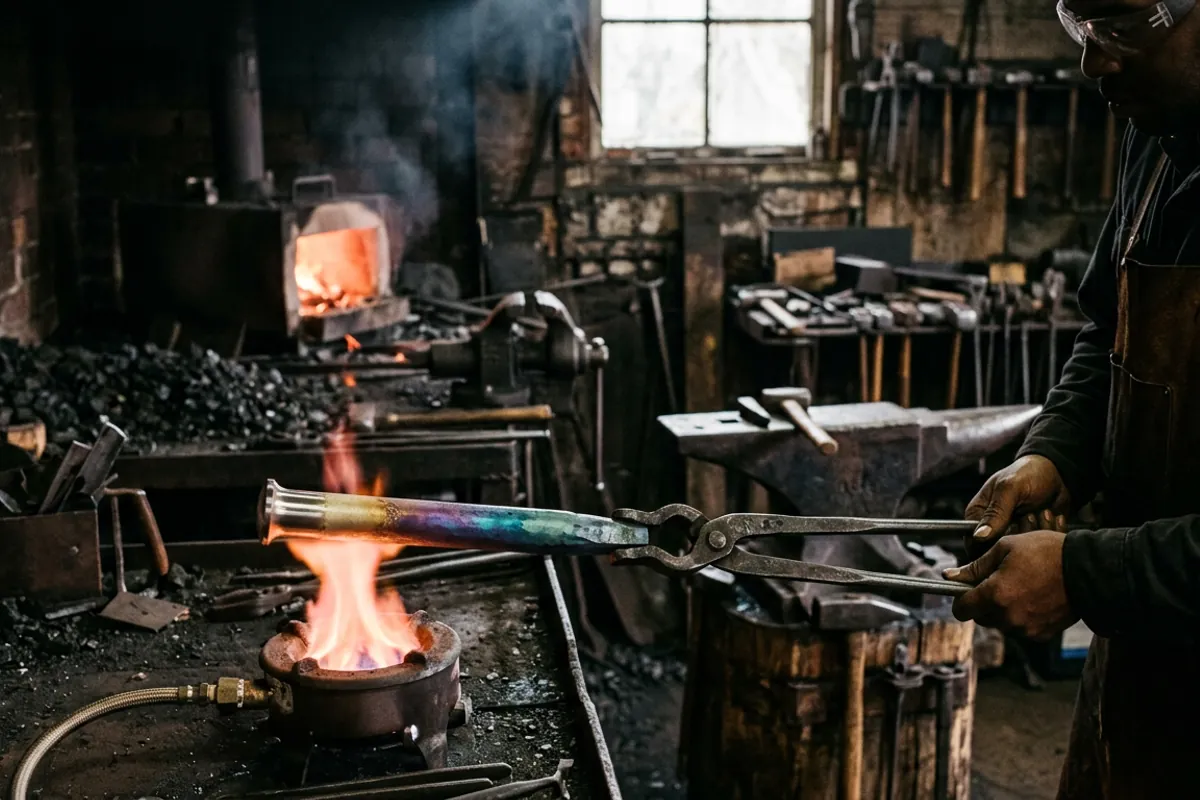
Heat clean, bright steel in air and it grows a thin oxide film that shifts color as it thickens. That progression is the traditional temper color scale, and it runs roughly light straw near 400 F, darker straw and brown as you climb toward 500 F, purple around 540 F, and blue in the high 500s to 600 F. Those numbers are approximate. They shift with the alloy, with how long the color has been developing, and with how the light hits the piece.
The color method is genuinely useful, and it is how smiths tempered tools for centuries. I still use it for differential work: bring the body of a punch or the spine of a blade up with a torch or a hot bar and let the color run toward the working end, so the edge stays hard and the back stays tougher. Done carefully, that gives you two different tempers in one piece, which no oven can do.
But be honest about its limits. Temper colors read the surface, not the core. They require clean, polished steel, so they are useless on anything scaled or oxidized. They are unreliable on stainless steels, which oxidize differently. Color also tells you the peak temperature the surface touched, not how long the piece was held there, and hold time is part of the recipe. If you want a repeatable, documented heat treat, use a thermostatically controlled oven and treat color as a cross check rather than the measurement.
How I temper in a home shop
My routine has not changed much in years. As soon as a quenched piece is cool enough to hold in a bare hand, it goes straight into the temper. Do not leave as quenched steel sitting on the bench overnight. It is full of stress and it can crack all on its own, and I have lost work that way. If I cannot run the full temper immediately, I at least give it a low stress relieving heat right away and do the real temper later.
Before anything goes in an oven it gets degreased. Quench oil residue on a hot part smokes badly and, on a heavily soaked piece, it is a fire risk. Wipe the part down properly. I would not temper oily blades in the oven anyone cooks in, and I say that as much for the smell as the safety.
Then I verify the oven temperature with an independent thermometer sitting next to the work. Household ovens and small countertop ovens swing well past their set point as the element cycles, and the dial is a suggestion, not a reading. I preheat, let the chamber stabilize, then load, then start counting the soak time from when the part has come up to temperature rather than from when the door closed. One hour minimum, cool to room temperature, repeat.
The safety side of this is not decoration. My own bad day came at the quench, not the temper: too cold an oil, standing too close, cotton shirt, no face shield. The oil flared and took my eyebrows, and I kept my eyesight on luck alone. Since then I run quench oil warm rather than straight out of a cold shop, keep a lid within reach of the tank, and never stand over the quench. Eye protection rated to ANSI Z87.1 goes on for the whole heat treat sequence, a face shield over it at the quench, and natural fibers only near hot metal, because synthetics melt and stick to skin instead of just burning. I go through the rest of that kit in the blacksmith safety gear guide.
Ranges to avoid, and other traps
There are tempering temperatures you should deliberately step around. Many low alloy carbon steels show a dip in toughness when tempered in roughly the 500 F to 700 F band, a phenomenon usually called tempered martensite embrittlement. Temper a cutting tool into that window and you can end up with less toughness than you would have had tempering lower, while also giving up hardness. It is the worst of both.
Separately, certain alloy steels containing chromium and manganese suffer what is called temper embrittlement when they are held in or cooled slowly through a higher band, several hundred degrees above the first one. That one is about cooling rate as much as peak temperature. Neither effect is folklore, both are well documented, and the exact windows are alloy specific.
This is exactly the kind of question where I stop talking from the anvil and point at real testing. Knife Steel Nerds publishes actual measured toughness and hardness data across steels and tempering temperatures, and reading their work will teach you more about where the cliffs are than any amount of shop lore. When a metallurgy question has a real number attached to it, go find someone who measured it.
The other common traps are simpler. Guessing the alloy. Trusting an oven dial. Tempering by color on a scaled surface. Skipping the second cycle on a steel that needed it. And tempering high on the theory that softer is safer, which mostly produces tools that will not hold an edge and hammers that mushroom.
What tempering cannot fix
Tempering is not a repair. It will not fix a decarburized surface, where carbon burned out of the outer layer in a long, hot, oxidizing fire and left you a soft skin over hard steel. It will not fix grain that grew coarse because the piece sat far above critical temperature for too long, which is a normalizing problem and has to be solved before hardening. It will not close a quench crack. It will not rescue a forge weld that did not take.
That is worth sitting with, because it changes how you run the fire. A lot of heat treat failures are actually forging failures, and they trace back to fire control: an overheated coal fire eating the surface of a blade, or a propane forge run oxygen rich and scaling the work. The fuel you burn shapes what problems you fight, which is most of the reason I keep both a coal forge and a propane forge in the shop and go into the tradeoffs in the coal or propane comparison.
Where "temper" means something else entirely
The word gets used two ways, and mixing them up leads people badly astray. Everything above concerns hardenable steel, where tempering means reheating quenched martensite.
Non ferrous metals mostly do not work that way. Aluminum alloys that gain strength do it through precipitation hardening, also called age hardening, which involves a solution heat treat and then holding at a relatively low temperature for hours so fine particles form. That is a strengthening process, not a softening one, and quenching aluminum does not harden it the way quenching steel does. Copper, brass, and bronze harden by being worked and are softened by annealing, and copper alloys can be annealed by heating and cooling in ways that would be nonsense for steel.
On top of that, in the metals supply world "temper" is a hardness designation. Sheet copper sold as soft, half hard, or hard, and aluminum sold with an H or T temper code, is describing a delivered condition, not a process you performed. When a supplier says temper and a smith says temper, they are not always talking about the same thing.
The short version to keep on the wall
Harden first and verify it hardened. Temper immediately, before the piece has time to crack sitting on the bench. Pick the temperature from the steel's published data if you know the alloy, and remember that low favors hardness while high favors toughness. Hold at least an hour, run two cycles with a full cool between, and measure the oven rather than trusting it. Use temper colors for differential work and for a sanity check, not as your primary instrument. Step around the known embrittlement bands. And when the question gets deeper than shop practice, go read the people who actually run the tests.
Tempering rewards patience more than skill. Nothing about it is hard to do. What is hard is doing it the same way every time, writing down what you did, and being willing to admit the heat treat failed instead of hoping the tool holds. If you want to practice the whole cycle on something cheap and forgiving, a railroad spike knife is a decent teacher, as long as you accept that spike steel is low carbon and will never harden like a real blade steel. For everything about what the steel itself is doing, the steel and metallurgy hub collects the rest of it, and the full guide list has the shop side.