When people say they want to temper steel by heating and cooling, they usually mean something bigger than tempering. They mean the whole heat-treat cycle: taking a bar of steel, making it hard, and then pulling it back from glass-brittle to something you can actually use. Tempering is one step of that, the last one, and it is the step most beginners either skip or misunderstand. I have watched a new smith at the club forge grind a beautiful bevel, harden the blade, and then snap the tip clean off tapping it on the anvil, because he thought hardening was the finish line. It is not. Hardened steel that has not been tempered is a liability, and getting the tempering right is the difference between a knife that holds an edge and a knife that shatters.
This is a reference piece, owner to owner. I am an experienced hobby smith, not a metallurgist, and I will tell you where the honest edge of my knowledge is and where you should go for real numbers. For steel science down to the degree, Knife Steel Nerds is the place, and I will point you there more than once.
What tempering actually is, and what it is not
Tempering is reheating already-hardened steel to a fairly low temperature, holding it there, and letting it cool. That is it. You are not making the steel harder. You are deliberately making it a little softer and a lot tougher. Hardened steel fresh out of the quench is at its maximum hardness and its maximum brittleness at the same time, and that brittleness is the problem. Tempering trades a slice of hardness back in exchange for toughness, so the finished tool can flex and take a shock instead of cracking.
The word gets thrown around loosely. Folks say they are going to "temper" a bar when they mean they are going to harden it, or they use "temper" to describe the general state of the steel. In the shop it helps to keep the three operations separate in your head. Annealing softens steel all the way down so you can file, drill, and grind it, and I have a whole walk-through of that in what annealing steel actually does, and how I do it. Hardening makes it hard and brittle. Tempering is the controlled step back from that brittleness. Tempering never happens first and never happens alone. There is nothing to temper until the steel has been hardened.
The two heats: hardening, then tempering
The phrase heating and cooling covers two completely different heats, and mixing them up is where most home heat treats go wrong.
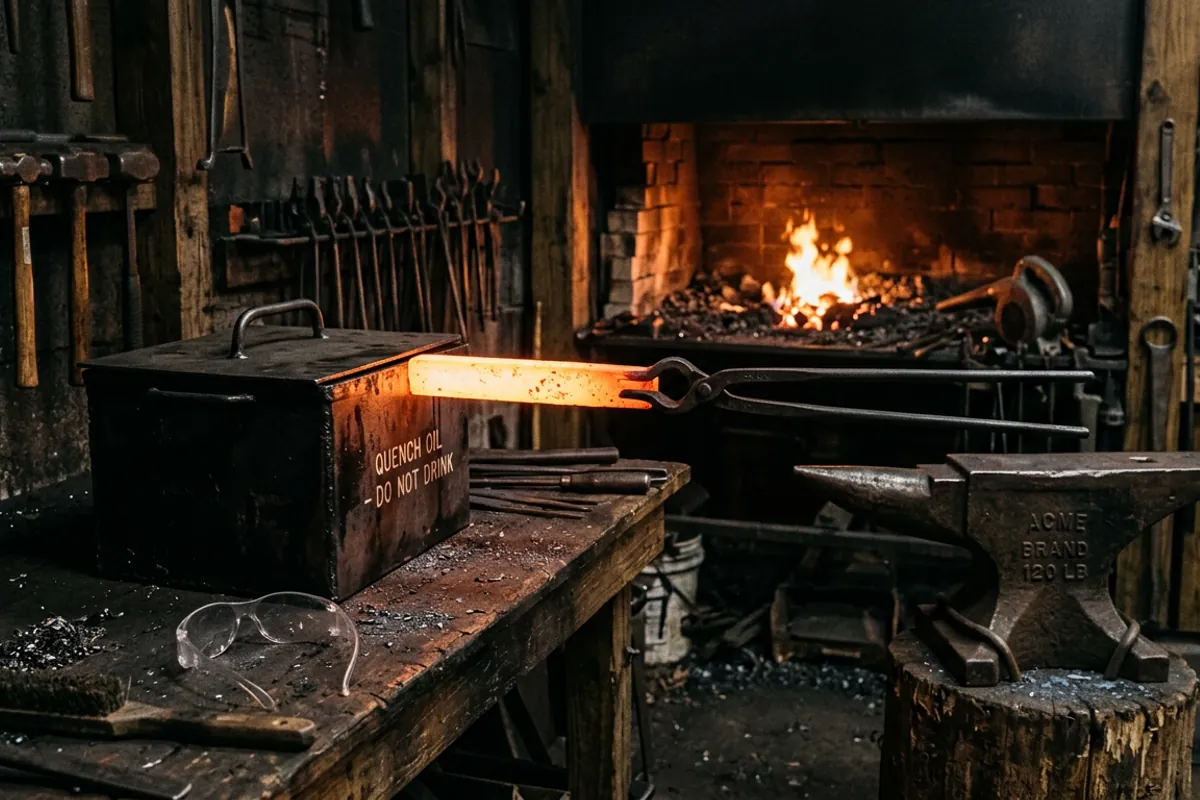
The first heat is the hardening heat, and it is hot. You bring plain high-carbon steel up past its critical temperature, the point where its internal structure changes and it will accept a quench. For a lot of the simple carbon steels a home smith uses, that is somewhere in the neighborhood of a bright cherry to orange heat, and there is a handy check for it: carbon steel loses its magnetism right around that transformation, so a magnet that stops sticking tells you you are close. Then you quench, which means cooling the steel fast enough to lock in the hard structure. Depending on the steel that is oil, or a fast oil, or sometimes water or brine, and the right quench medium is a property of the specific steel, not a preference.
The second heat is the tempering heat, and it is much cooler. Instead of glowing orange, you are talking about oven temperatures, the kind of heat you would bake at. You reheat the hardened steel to a few hundred degrees, hold it, and let it cool. That gentle heat is enough to relieve the internal stress and convert some of the brittle structure into something tougher, without undoing the hardening you just did. Two heats, two totally different temperature worlds, done in that order. I cover the whole arc from soft bar to finished edge in knife making, explained from the first bar of steel if you want to see where tempering sits in the full build.
Why brittle steel has to be tempered
Straight out of the quench, hardened carbon steel is under enormous internal stress. The fast cooling froze it into a hard, strained structure, and that structure is strong but has almost no give. Hit it wrong, drop it, or even let it sit with the stress in it, and it can crack on its own. A file-hard blade in that state can snap like a ceramic tile. I have seen it happen on the bench with no warning.
Tempering bleeds that stress off and converts the most brittle parts of the structure into a form that can absorb a shock. You give up some hardness doing it, which sounds like a loss, but a slightly softer edge that stays in one piece beats a maximum-hardness edge that chips out or breaks. Every usable cutting tool, chisel, and spring you have ever handled was tempered. The trick is matching the amount you pull back to the job. A knife edge wants to stay fairly hard so it holds an edge, so it gets a low, cautious temper. A cold chisel or a spring wants more toughness and gets a higher temper, further from the quench hardness. The general logic of that tradeoff, across tool types, is what I get into in tempering of metal, explained from the forge floor.
Reading temper colors, the old way to judge the heat
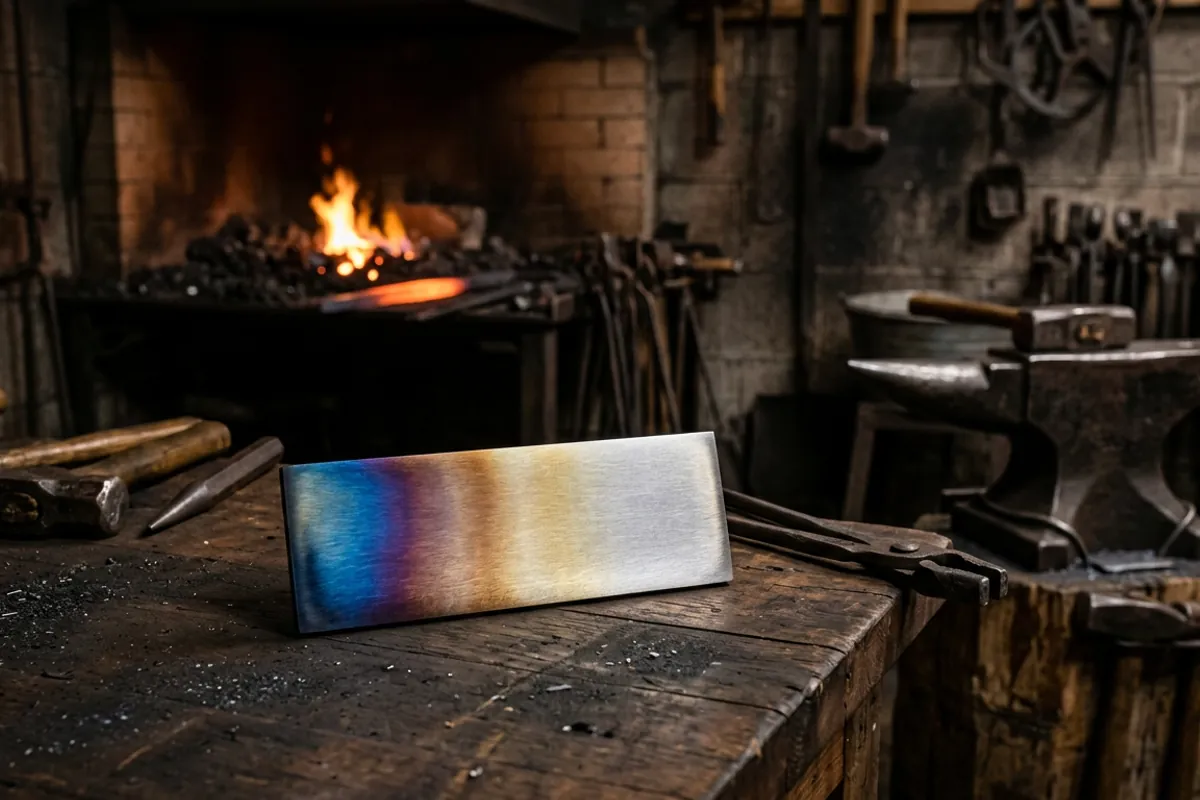
Before shop ovens with dials, smiths judged tempering heat by the color of the oxide that forms on clean, bright steel as it warms. Sand or polish a hardened piece so it is shiny, set it near heat, and you will watch a rainbow crawl across the surface as the temperature climbs. Light straw comes first, then darker straw, then a bronze or brown, then purple, then blue. Each color corresponds to a rough temperature, and roughly is the honest word for it.
The old rule of thumb runs like this: a light straw is a low temper for something that needs to stay hard, like a knife or a razor. Darker straw and bronze suit tools that take more of a beating. Purple and blue are hotter still and go with springs and tools that need real flex. The colors are real and repeatable enough that smiths used them for centuries, and they are a genuinely useful skill to have in your hands.
But be clear on the limits. The temper colors are oxide colors on the surface, and they depend on the surface being clean and on you catching them at the right moment, because they keep moving as the steel heats. They tell you the surface temperature, not what is happening deep in a thick section. And the exact color-to-temperature match shifts between steels. For a rough shop temper on simple carbon steel they are a fine guide. For anything where the number matters, colors are a starting point, not a spec sheet.
Doing it in an oven, and why I reach for one
For most of my tempering I use a dedicated oven set to a known temperature, and I would tell any beginner to do the same. The reason is simple: a thermostatically controlled oven holds the whole piece at one even temperature for a set time, and that beats chasing a moving color with a torch every time. You set the dial, you let the steel soak, you pull it, you repeat if the recipe calls for a second cycle. It is boring, and boring is exactly what you want in heat treat.
A couple of shop-honest cautions. A kitchen oven's dial is often off from what it actually holds, sometimes by a lot, so I check mine with a separate oven thermometer rather than trusting the number on the knob. And I do not temper food-contact ovens and then cook in them, because quench oil residue and scale do not belong near food; a tempering oven is a shop tool, kept in the shop. The broad picture of where hardening and tempering fit among all the metal heat treatments is laid out in heat treatment of metals, explained from the forge floor, and it is worth reading if you want the map before the details.
The cooling part, and where people go wrong
Heating and cooling makes it sound like the cooling is a matched, careful step on both ends. For the tempering heat, it mostly is not. After a temper soak, letting the piece cool in still air is normal and fine for the common carbon steels. The cooling that has to be precise is the quench in the hardening step, not the cooldown after tempering.
Where people get themselves in trouble is confusing the two coolings. They will read that a steel needs a fast quench, then panic and try to cool it fast after tempering too, or they will quench in the wrong medium entirely because they treated a cooling as one generic thing. The hardening quench is fast and specific to the steel. The tempering cooldown is gentle and forgiving. A second thing I see: people harden the blade and then let too much time pass before tempering. Do not let a fresh-hardened, untempered piece sit around, and definitely do not go banging on it. It is at its most fragile in that window. Get it into the temper reasonably soon after the quench.
Where the real numbers live, and the safety that is not optional
I have kept the temperatures general on purpose, because the exact hardening temperature, the right quench medium, the soak time, and the tempering temperature are all properties of the specific alloy you are holding. A steel like a simple 10-series carbon steel behaves differently from an air-hardening tool steel, and guessing across that gap ruins good bars. When the number matters, look up the manufacturer's data sheet for that exact steel, and for the science behind why those numbers are what they are, read Knife Steel Nerds. That site does the controlled testing I cannot do on a home bench, and I would rather send you to real data than make up a figure that sounds authoritative. This whole subject, from steel chemistry to heat-treat behavior, is what the steel and metallurgy topic hub collects in one place.
Now the safety, and I do not soften this. My eyebrows once went to a quench-oil flare-up because I stood too close, in a cotton shirt, over oil that was too cold. Hardening quench oil can flash and burn. Keep the oil at the temperature the steel calls for, never over water, have a lid or a metal cover within reach to smother a flare, and stand back and to the side, not leaning over the tank. Wear eye protection rated ANSI Z87.1 whenever you are at heat or at the grinder, and wear natural fibers, wool or cotton, near the forge, never synthetics that melt to skin. Tongs, not fingers, on anything that has been near heat, because a bar that looks cool can still be hot enough to brand you. None of that is fussiness. It is the price of admission for working hot steel, and it is cheaper than what I paid to learn it.
Temper steel by heating and cooling and you are really running the whole cycle: harden with a hot heat and a fast quench, then temper with a low heat and a gentle cool. Keep the two heats separate in your mind, match the temper to the tool, and send the precise numbers to real testing. Do that and the steel will do what you built it to do.