A beeswax finish for forged steel is the last ten minutes of a job that took three hours, and it is where a lot of otherwise good work gets ruined. The idea is simple enough: wax, a solvent and a drying oil, wiped onto steel that is warm enough to melt the mix and pull it into the surface. I have finished hooks, bottle openers, fire tools, brackets and shop hardware this way for years, and when it goes wrong it is almost always one of three things. The steel was not clean, the steel was the wrong temperature, or the rags went into a bucket in the corner afterward. That last one is the part of this article I care most about, because it can burn a shop down with no spark and nobody in the building.
I want to be honest about the ceiling on this finish before you read two thousand words on how to mix it. Wax over forged steel is a good looking, low fuss indoor finish. It is not paint, it is not plating, and it is not a rust proofing system. Everything past that I attribute to somebody by name, because there is no standard recipe here. The two best documented versions I know of disagree with each other, and I am not going to hide that by splitting the difference and inventing a third one.
What the wax actually does, and what it does not
The mix does two jobs. The oil wets the surface and darkens it, which is what deepens black forge scale into that even, soft black that makes a hand forged hook look finished instead of just cooled off. The wax leaves a thin film that slows moisture reaching bare steel and gives the piece a low sheen you can renew with a cloth. On a piece where you deliberately left the scale on, the difference between waxed and unwaxed is most of the visual result of the whole project.
What it does not do is make steel stop being steel. The film is thin, it is soft, and hands take it off. Sweat and skin oils are mildly acidic and a handled piece will show wear at the contact points long before the rest of the finish goes. On a fire poker, the business end will smoke the wax off the first time you use it. None of that is a defect in the recipe. It is what a wax finish is.
There is one attributed durability claim I will repeat, and only because it comes from a shop that does architectural metal for a living. Doug Bracken of Wiemann Metalcraft, quoted in Traditional Building magazine, says that in an air conditioned environment this type of finish will last for years with little or no maintenance, and that on exterior work not exposed to a lot of weather it performs, but use caution or expect more regular maintenance. That is the honest upper bound. I do not tell anybody that wax protects steel outdoors, and you should be suspicious of anybody who does.
If your real question is how much corrosion resistance a given steel has on its own, that is a metallurgy question, not a finishing question, and it belongs with real testing. Send it to Knife Steel Nerds rather than to shop lore, mine included.
One more boundary. I do not make food safe claims about a wax and solvent mix, and this article is not the place I work that out. Anything meant to touch food or drink is its own problem with its own answer, and I deal with it where it belongs, in the guides on the blacksmith bottle opener and the blacksmithing bottle opener.
Getting the scale off before anything else
Decide first whether you want the scale on the piece or off it. Loose, flaking scale has to go no matter what, because wax over flaking scale just glues the flakes down until they let go and take the finish with them. Tight black scale that came off the anvil even can stay, and waxing over it is a legitimate look.
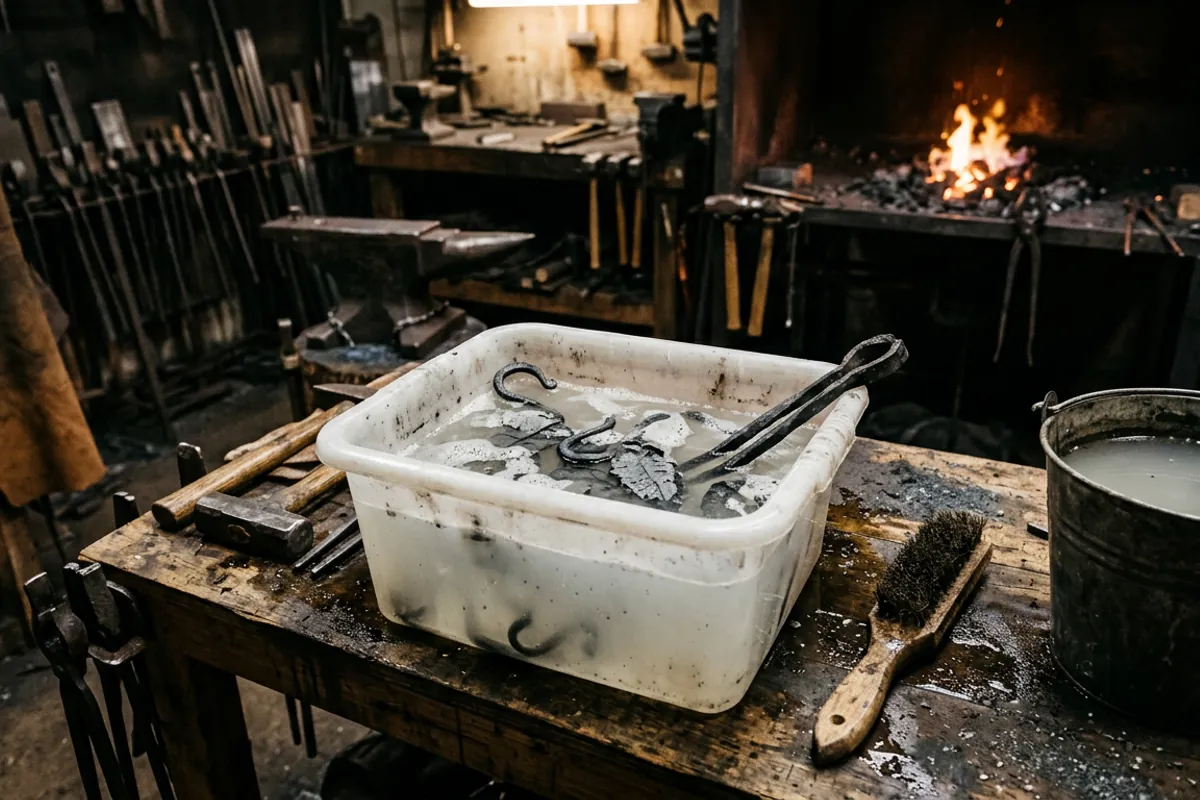
For removal, vinegar is the standard answer and it comes from good places. The ABANA Controlled Hand Forging series, in the lesson on forging a square punch and drift, puts it plainly: an easy way to remove this scale is to soak the piece overnight in vinegar, and vinegar contains acetic acid and will dissolve the scale. That is one night on a small forged part. Craig Cowan at The Barefoot Forge, who runs this at production scale, describes soaking in buckets of vinegar for a week or so, which tells you the timescale scales with the batch and the amount of scale, not with anything clever.
Vinegar is slow and forgiving, which is the point. Plain household vinegar in a plastic tub, the part fully submerged, lid on to slow evaporation, checked in the morning. When the scale has gone soft and grey it comes off with a scrub. Rinse it, dry it, and understand that clean bare steel in a humid shop will start flash rusting fast, so plan to go straight from rinse to wire wheel to wax rather than leaving it on the bench overnight.
If you are working on old rusted tools rather than fresh forgings, that is a bigger job than this article covers, and I have written it up separately in the antique blacksmith tools guide rather than restating it here.
The wire wheel, and the eye protection that is not optional
Most of my finishing prep ends at a wire wheel, and a wire wheel throws wires. They come off at speed, they are fine enough that you may not feel one land, and they are exactly the right shape to end up in an eye. Wear eye protection rated to ANSI Z87.1, and put a face shield over it, not instead of it. A face shield alone is a splash guard, not impact rated eye protection. I keep the rest of my thinking on shop protection in the blacksmith safety gear guide, but the short version at the wheel is glasses under a shield, sleeves down, and no loose synthetic clothing near heat.
Whatever route you take, the piece has to be dry and free of grease before wax goes on. Wax will happily seal a fingerprint of oil or a patch of flash rust under the finish, and then you get to strip it and start over.
The two recipes worth knowing, and why they disagree
There is no official ratio. There are working smiths and shops who publish theirs, and the two I would point at do not match.
Craig Cowan at The Barefoot Forge writes it as a ratio: a 4:2:1 mix of beeswax, turpentine and linseed oil. That is a wax heavy blend, and it makes a firm paste.
Doug Bracken of Wiemann Metalcraft, in that Traditional Building piece on metal finishes, gives it by volume: 1 cup beeswax or Johnson's Paste Wax, 1 cup turpentine, 1 cup linseed oil, and 1 tablespoon of Japan dryer. That is equal parts, so a much softer, oilier, more penetrating mix than Cowan's, plus a drier.
Both of those are real, both come from people who finish steel for a living or close to it, and they are four parts wax against one part wax on the same axis. Do not average them and do not treat either as a rule handed down from somewhere. Pick one, mix a small test batch, and put it on scrap that came out of the same fire as your real work.
What actually changes between them is predictable. More wax gives you a firmer paste, more film, more sheen after buffing, and less penetration. More solvent thins the mix so it flows and soaks in further, and then flashes off. More oil gives you a deeper, darker wet look and a finish that takes longer to stop being tacky.
The Japan drier is Bracken's addition, not Cowan's, and it is not required. It is a drying accelerator for the oil, and its whole job is to get the oil to cure faster so the piece stops feeling sticky. Plenty of smiths run beeswax, turpentine and linseed oil with nothing else in it. Note also that the linseed oil most people have on the shelf is sold as boiled linseed oil, which is not actually boiled but treated so it cures faster than raw oil. Whichever you use, the fire hazard in the rags section below applies to all of it.
Mixing the paste without setting yourself on fire
Turpentine is a flammable solvent. Beeswax has to be melted to combine with it. Those two facts pull against each other, and this is where a shop project turns into an incident.
There is a well circulated hobby recipe on the web from Brian Paonessa under the name Blacksmiths Polish. I want to be clear that Paonessa is a web developer rather than a smith, so I am not citing it as trade practice, but the warning it carries is the right one and it is worth repeating: heating solvents is usually a pretty bad idea. His method is a double boiler, outdoors. That matches what careful people do.
So: melt the wax in a container standing in hot water, never over a direct flame, never on the forge, never in the same room as an open pilot light. Do it outside or in a doorway with air moving. Many smiths melt the wax first, take it off the heat entirely, and stir the solvent and oil in while the wax is still liquid but no longer over any heat source at all. Mix in a metal or glass container you have written off for shop use, wear the same eye protection you would at the grinder, and keep a lid nearby, because a lid is the thing that puts out a small solvent fire and a bucket of water is not.
Mix small. A pint of this finishes a lot of hooks, and a batch you mixed two years ago and never used is a flammable liquid sitting on a shelf.
Heat is most of the job
Cold steel takes wax badly. The paste sits on top, streaks, and wipes back off, and you end up with a dull, patchy piece that will not buff out. Warm steel pulls it in.
Cowan heats pieces to 350 F before applying. I would treat that as one working smith's number for his own recipe rather than an industry standard, but it is a real published figure from somebody doing this in volume, and it is the best target I know of to start from.
He is equally clear about the failure on the other side. If you apply this combination of things to a piece that is too hot, you will burn the linseed oil, and the result is a brown and inconsistent finish. That is the streaky orange brown mess people post asking what went wrong. It is not a bad batch. It is too much heat.
For getting there, a cheap oven thermometer and a dedicated toaster oven that never sees food is the easiest repeatable answer, and it also removes any temptation to use the kitchen. Off the forge works too, but you have to let the piece cool well past black heat, far below any visible color, and then read it by behavior: the wax should melt and flow and soak in with a little wisp, not flash off in a cloud of smoke. If you get smoke and brown, wait longer next time.
Handle a 350 F piece with tongs or dry leather gloves. It looks exactly like a cold piece and it will take skin off. Wax soaked gloves are also flammable, which is worth remembering before you set them on the forge shelf.
How I apply it, start to finish
The sequence I run is clean, dry, heat, apply, wipe back, cure.
Apply with a cloth pad or a cheap natural bristle brush and be sparing. The mix should melt on contact and go where the steel is, including into the texture and the hammer marks, which is exactly why this finish suits forged work better than it suits a machined part. Cover the whole piece including the back and the inside of any curve, because those are the surfaces that rust first when nobody looks at them.
Then wipe it back while it is still warm. This is the step people skip. A thick coat of wax and oil left standing does not cure into a thicker finish, it cures into a soft, tacky film that collects dust and fingerprints and looks cheap. Wipe until the piece looks like steel with a sheen and not like a candle. A second thin coat after the first has cooled is better than one heavy one.
Then leave it alone. The oil needs time to cure, and how long depends on the mix, the temperature and whether you used a drier. Give it time before handling, and longer before you hang it somewhere that matters. When it is cured, a hand buff with a clean cloth brings up the sheen.
This is the finish I put on nearly everything a beginner makes in their first month, which is mostly hooks. If you want the forging side of that, it is in the blacksmith hook guide. The finishing part is the same on all of it.
Oily rags are the real hazard in this work
Linseed oil rags can catch fire on their own. No spark, no flame, nobody in the shop.
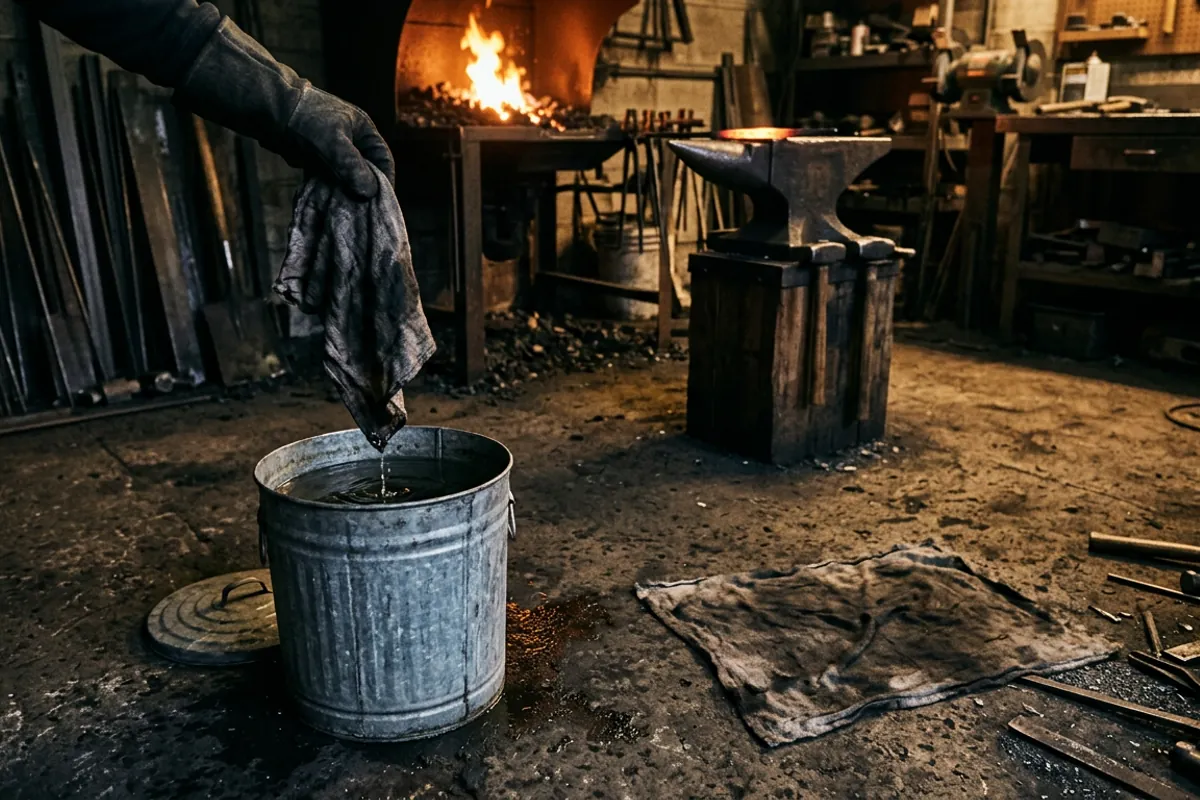
East Sussex Fire and Rescue Service explains the mechanism plainly in their guidance on the fire hazards of linseed oil: as the oil oxidizes, the rags act as an insulator, allowing the oxidizing oil to become hot enough to cause the cloth to smoke. They add the part that should worry you in a summer shop or next to a wood stove: the warmer it is, the quicker the rags can reach ignition temperature. Oxidation is the same reaction that cures the oil on your steel. In a wadded rag the heat has nowhere to go.
Their disposal guidance is short and I am going to give it as they give it. Spread out oily rags in a well ventilated area to dry before disposal. Soak oily rags in water for several days before disposal. If using a container, ensure it is made of metal with a tight fitting lid and fill it with water.
That means a rag laid flat on concrete outside until it is stiff, or a rag drowned. It does not mean a rag in a plastic bin, a rag in a shop trash can, or a rag balled up on the bench until tomorrow.
Cowan makes the same point about the wax side of it from the other direction: wax soaked shop towels make great fire starters, so keep them out of your garbage can. He is not being cute. That is what they are.
I say the same thing in the hammer handle replacement guide, because linseed oil on a hickory handle carries exactly this risk, and I would rather repeat myself than have somebody read only one of the two articles.
Metal can, tight lid, water in it. Buy it before you mix the wax, not after.
Where this finish holds up, and where it gives out
Indoors, on decorative and architectural work that people look at more than they touch, this finish is very good, and Bracken's air conditioned line above is the strongest claim I will make for its longevity.
On handled items, expect wear where hands go. A bottle opener kept in a drawer holds its finish; one on a keyring does not. That is not a reason to skip the wax, it is a reason to expect touch ups.
On anything that gets hot, the wax goes at the hot end. Fire tools, trivets by a stove, anything near a grill. Refinish the handle end and let the working end do what it does.
In an unheated shop or a damp basement, wax is not the tool for the job. That is an oiled tool situation, checked and re oiled, not a finish and forget situation. And outdoors, past Bracken's careful exception for exterior work not exposed to a lot of weather, I do not recommend it as protection at all.
Maintenance, touch-up, and stripping it back off
Maintenance is a cloth. Buff a dulled piece and it usually comes back. If it does not, warm the piece gently, put on a thin coat, wipe it back, and let it cure again. There is no preparation to redo as long as the steel underneath is still sound.
If rust has come up under the film, there is no shortcut. You have to get back to bare steel, which means solvent or heat to lift the wax, then the wire wheel, then start the process again. Wax over rust seals the rust in and it keeps going.
Stripping for a different finish is the same path. Heat softens it, solvent removes it, and abrasives finish the job. Nothing about this finish is permanent, which is one of its genuine advantages over a coating you cannot undo.
What I would tell a smith mixing a first batch
Mix small, test on scrap from the same fire as your real work, and pick one published recipe instead of hunting for the correct one, because it does not exist. Cowan's 4:2:1 and Bracken's equal parts with a spoon of Japan drier are both defensible and they are both somebody's shop practice rather than a specification.
Get the heat right before you fuss over the ratio, because temperature accounts for more bad results than mixing does. And buy the metal can with the lid on the same trip as the turpentine.
If you want the rest of the shop odds and ends I have written up, they are collected on the More from the shop hub.