A hammer handle replacement is the cheapest repair in the shop and one of the easiest to botch. Here is the verdict up front: buy an American hickory handle a size larger than you think you need, buy a bag of assorted steel wedges separately because the one that ships in the bag is usually too small, buy a four in hand rasp, and set aside an evening. For the 2 to 3 lb cross pein and rounding hammers most of us swing all day, the 18 inch machinist and ball pein pattern is the closest thing to an off the shelf fit, and the Link Handles 18 inch machinist handle (paid link) is where I would start. I have hung a lot of handles over about twenty five years and broken plenty more, but I have not run every brand on this list down in my own shop. The picks below lean on published specs and owner reports from the forums, weighed against that shop time. Where the signal is thin, I say so.
If you are still choosing hammers rather than fixing one, start at the hammers and tongs hub instead, or the blacksmith hammer buying guide.
What actually goes wrong with a hammer handle
Three things kill handles, and only one of them is your fault.
The first is overstrike. You miss, the work catches the handle just under the head, and the wood takes a bite out of itself. Do that enough times and the handle snaps at the eye mid swing. Every smith does this. It is the price of learning to hit where you are looking, and it is why a handle is a consumable and not a lifetime part.
The second is shrinkage. Hickory gives up moisture in a dry winter shop and takes it back in a humid summer, and the head goes loose. A loose head on a 2 lb hammer is not a nuisance, it is a projectile. It can leave the handle on the backswing and travel the length of the shop at head height. If your head moves when you push it sideways with your thumb, that hammer goes on the bench until it is fixed. There is no version of this where you finish the piece first.
The third is that the handle was never right to begin with. Factory handles come fat, round in section, and coated in lacquer so they look good in the rack. That combination makes you grip harder than you need to, and a hard grip is what leaves your forearm aching after an hour. Most of the handles in my shop have been thinned and stripped, and I did that with a rasp, not a wallet.
What does not go wrong: the wood being red heartwood instead of white sapwood. That argument runs forever on the forums, and the old Forest Products Laboratory work people quote in the BladeForums heartwood and sapwood thread found no strength difference between the two in any species. Density and straight grain are what matter. The USDA Wood Handbook treats slope of grain as a strength reducing characteristic, and that is the thing to look at: hold the handle up and follow one grain line from the head end toward the butt. If it runs off the side of the handle within a few inches, that is runout, and that is where it will break. Put it back on the shelf.
Measure the eye before you buy anything
Hammer eyes are not standardized. Two 2 lb cross peins from different makers can want handles a quarter inch apart in width, and an old flea market head might want something no catalog lists. So measure first.
Most blacksmith hammer eyes are hourglass shaped: they flare at the top and bottom and pinch at a waist somewhere in the middle. Measure the waist, both the long dimension and the short one, with calipers if you have them. That waist is the number that decides whether a handle will fit, and the flares above and below it are what makes the whole system work. When you drive wedges into the top of the handle, the wood spreads into the upper flare and cannot come back down through the waist. That is the entire mechanical principle, and it is why a sloppy fit cannot be rescued by more wedges.
Then buy oversize. You can take wood off all evening. You cannot put it back. A handle that needs an hour of rasping is a handle that will fit; a handle that drops through the eye is firewood.
The pattern names you will see are machinist and ball pein (long, slim, oval, the usual answer for blacksmith hammers), engineers or blacksmith (a bit stouter), and hand drilling or small sledge (short and thick). If you are shopping for an old head to hang, the old blacksmith hammer buying guide covers what is worth dragging home, and the hammer eye drift guide explains why forged eyes come out the shapes they do.
Scroll horizontally to see all columns.
| Handle | Length | Head weight it suits | Published eye size | Wood and finish |
|---|---|---|---|---|
| Beaver-Tooth 14 in blacksmith and shop | 14 in | shop and blacksmith heads | 1-1/8 x 3/4 in | mixed color hickory, wood and metal wedges included, made in USA |
| Beaver-Tooth 16 in engineers, ball pein, blacksmith | 16 in | ball pein, engineers, small sledge | about 7/8 x 5/8 in | American hickory, fire finish, one wood and one metal wedge |
| House Handle machinist and ball pein, largest size | 18 in | 32 to 48 oz | 11/16 x 1-3/16 in | hickory |
| Link Handles 65598 machinist | 18 in | 32 to 48 oz | not published on the maker page | American hickory, wax finish, homeowner grade |
Note what that table tells you: an 18 inch machinist handle for a 3 lb head has an eye a shade over an inch and three sixteenths long. If your hammer's eye waist measures an inch and a half, no machinist handle is going to fill it and you want a small sledge or a custom handle instead.
The handles I would buy
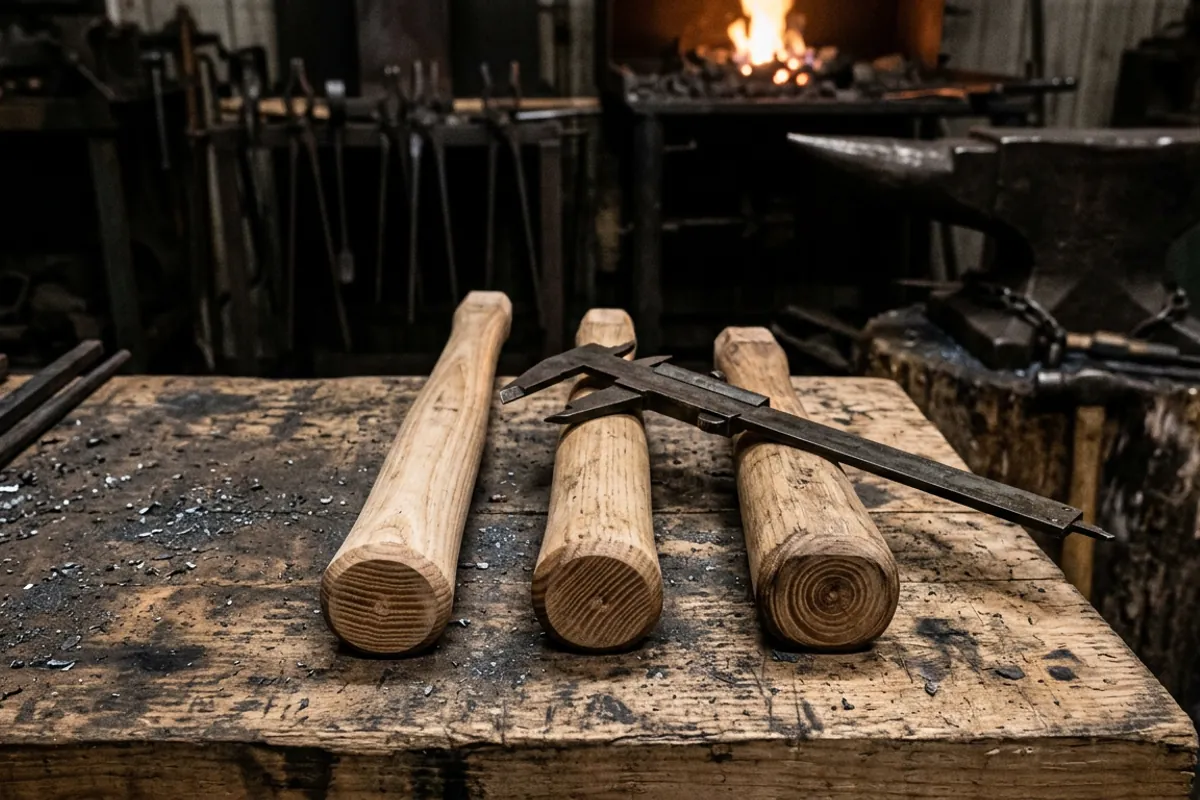
For 2 to 3 lb heads, the 18 inch machinist pattern
This is the workhorse. The Link Handles 18 inch machinist and ball pein handle (paid link) is listed by Seymour Midwest for 32 to 48 oz hammers in American hickory with a wax finish, homeowner grade. That grade wording is honest and worth reading plainly: it is a promotional handle, not a hand picked one. What you get for the money is straight enough hickory in roughly the right shape, and at this price you can afford to reject one out of three for runout and still be ahead.
Eighteen inches is longer than most smiths want for a cross pein. I cut mine back. Buying long and cutting to length is free; buying short and wishing is not.
For 1 to 1.25 lb heads, the 14 inch machinist pattern
Light chasing hammers, small ball peins, planishing hammers. The Link Handles 14 inch machinist handle (paid link) is specified for 16 to 20 oz hammers in American hickory with the same wax finish and homeowner grade. Same caveat about grade, same advice about inspecting the grain before you cut anything.
For short handled shop hammers, the drilling and sledge pattern
If you are rehanging a hand drilling hammer or a stubby 3 lb shop hammer with a thick eye, the machinist patterns are too slim. The Link Handles 10-1/2 inch hand drill and sledge handle (paid link) is the right family. It is short, which suits a hammer you choke up on, and thick through the eye section.
When to skip the marketplace and call a handle house
For anything unusual, and for anything where you want to specify grade, go straight to a handle company. Beaver-Tooth and House Handle both publish eye dimensions by pattern, which is the one number that decides the job, and both sell handles in the single digit dollars. Being able to match a published eye size to a measured eye beats guessing from a photo every time. House Handle also lists grade options rather than one homeowner grade, which is exactly what you want when you are hanging a head you care about.
The wedges nobody budgets for
Handles come with a wedge. Usually one soft wood wedge and one small steel one. For a claw hammer, fine. For a blacksmith hammer with a big hourglass eye, that is often not enough steel to fill the flare, and it is the single most common reason a rehung head goes loose in a month.
Buy wedges by the bag. Beaver-Tooth publishes the sizes in its 36 piece assortment: twelve each of 1/2 x 1-1/16 x 1/8 in, 3/4 x 1-1/16 x 1/8 in, and 1 x 1-1/16 x 1/8 in. Having all three on the bench means you set the wedge the eye actually wants instead of the one that came in the bag. The same assortment sells as the Beaver Tooth 36 lot steel hammer wedges (paid link).
If you only ever hang one hammer a year, the V&B 89004 wood and steel handle wedge pack (paid link) is the small version: a wood wedge, two steel wedges, and printed rehanging instructions with a diagram. Cheap insurance for someone doing this for the first time.
The geometry matters more than the quantity. The wood wedge goes into the saw kerf, which runs the long way of the eye, and spreads the wood lengthwise. The steel wedges go in across that, or on a slight diagonal to it, and spread the wood sideways. Wedges driven parallel to each other just split the handle. And no amount of wedging fixes a handle that was loose in the eye to begin with. Fit does the work. Wedges lock the work in place.
The rasp that does most of the work
Ninety percent of a rehang is removing wood in the right places. A four in hand rasp does that better than anything else on the bench: the Crescent Nicholson 8 inch 4-in-1 hand rasp and file (paid link), part 18924NNN, which Crescent publishes as 8.0 in overall, 0.881 in wide, in steel, with rasp, single cut, and double cut surfaces in one tool. Flat rasp for the flats, half round rasp for the curve where the handle meets the eye, and the two file sides to smooth what you tore up.
Resist the belt grinder. A 2x72 will take a handle from too tight to too loose in about four seconds, and you cannot feel it happening. The rasp is slow on purpose.
Add 80 and 120 grit paper, a sharp knife or a spokeshave if you want to thin the grip properly, and a fine tooth saw for trimming the top of the handle and cutting the wedge flush.
Getting the old handle out without ruining the head
Do not burn it out. Not in the forge, not in a burn barrel, not in the fire pit. The forums argue about this every year, and the argument in the BladeForums thread on removing broken handles with fire always lands in the same place: a wood fire runs far above any tempering temperature you want on a hammer face, and you have no way to know it happened until the face starts denting. Axe & Tool's handle removal writeup says the same thing about axe bits and its author declines to try the method at all. If you want the metallurgy of why that softening is permanent, Knife Steel Nerds covers what tempering actually does to the steel, and there is a plainer version in our own tempering explainer.
The method that works is destructive and boring. Cut the handle off flush under the head with a saw. Clamp the head in a vise with soft jaws or wood pads on the cheeks. Drill a series of holes through the remaining plug, staying off the steel wedge because it will eat a bit, and keep drilling until the plug is more hole than wood. Then it collapses inward and you punch the remnants out with a drift. That is the same sequence smiths describe in the I Forge Iron handle removal thread and in The Garage Journal thread on the same job, where the recurring advice is a flush cut saw plus four to six half inch holes.
Wear ANSI Z87.1 rated eye protection for all of it. Drilling throws chips, and punching a steel wedge out of an eye throws harder ones. I do not get casual about eyes, and a wedge that skids off a punch does not care how careful you felt. The rest of the shop PPE conversation is in the safety gear guide.
Hanging the new handle
Dry fit first, and keep dry fitting. Rub soot from the forge or a soft pencil around the inside of the eye, push the handle in as far as it goes, pull it back out, and rasp only where the black transferred. Repeat. Twenty cycles is normal. You are aiming for a handle that starts into the eye by hand and needs driving for the last inch or so.
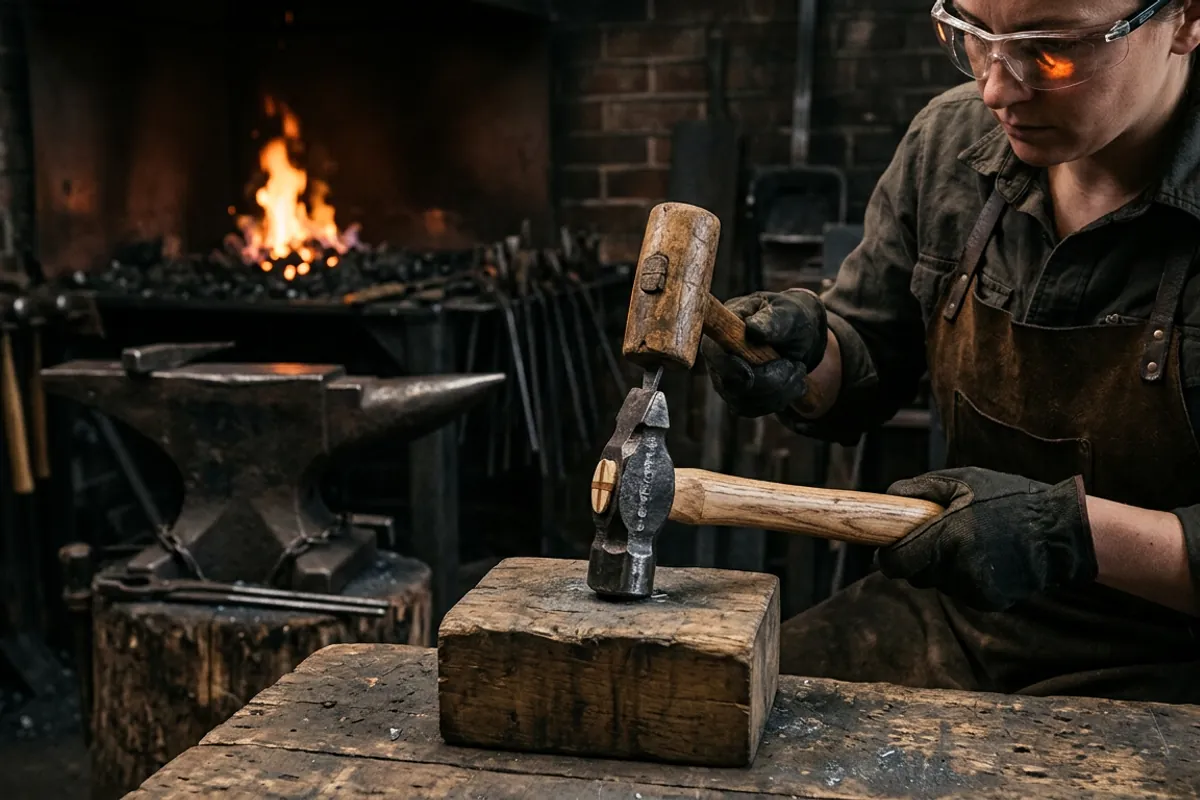
Before you commit, sight down the handle from the butt end and check the head is square. The face should sit perpendicular to the line of the handle. If it is cocked, fix it by rasping the fit, never by driving one wedge harder than the other.
To seat it, hold the handle vertical with the head pointing up and strike the butt end of the handle with a wooden mallet or a dead blow. The head's own inertia drives it down onto the wood. Do not seat it by hitting the hammer head with another hammer. Two hardened faces striking each other can spall, and a chip off a hardened face moving at that speed will go straight through an eyelid. That is the one rule in this article I would not bend for anybody.
Once it is seated, trim the top of the handle so it stands a little proud of the eye, roughly a sixteenth to an eighth of an inch. Drive the wood wedge into the kerf until it stops moving and refuses to go further, then saw it flush. Set the steel wedges across it, sunk just below flush so nothing catches your hand. Then leave the hammer alone for a day and check it again. Wood settles. A wedge that needed one more tap will tell you tomorrow, not tonight.
Two things I do not do. I do not glue the wood wedge, though plenty of smiths do and their hammers stay tight. And I do not put epoxy in the eye to take up a gap, because epoxy in an eye is a fit problem wearing a costume, and when it lets go it lets go all at once.
The thing nobody should do: soak the head in water to swell the wood tight. It works for a weekend, it rusts the inside of the eye, and it leaves you with a handle that is looser than before once it dries.
Finishing the handle, and the rag that can burn your shop down
Strip the factory finish. Lacquer and wax are slick the moment your hands sweat, and once they wear through in patches the edges raise blisters. Sand the whole handle to about 120 grit.
Then thin it. Most factory handles are round and fat; I take mine to a slim oval, most aggressively in the third nearest the head, and I round the transitions so there are no hard corners under my fingers. A thinner handle flexes, which lets you hold it loosely, and holding it loosely is what keeps your elbow from aching. If you are working out what shape suits your hammer, the cross pein hammer guide covers how the head's balance changes what you want out of the grip.
Finish with boiled linseed oil. Flood it on, let it soak fifteen to thirty minutes, wipe every bit of excess off, repeat over several days. Owner opinion is genuinely split on the finish and I am not going to pretend otherwise: in the BladeForums thread on oils for wood handles some smiths report boiled linseed breaking down with hand sweat and prefer tung or walnut oil. Any of them beats varnish for grip.
Now the part that is not optional. Rags soaked in boiled linseed oil can catch fire on their own, with no spark and no flame, because the oil cures by reacting with oxygen and that reaction gives off heat. Balled up in a bin, the heat has nowhere to go. The National Park Service documents exactly this, including an incident where oiling tool handles led to a rag igniting and taking the workbench and the wall with it, and it cites an NFPA estimate of about 14,070 spontaneous combustion fires a year. Spread your rags flat in a single layer outdoors on concrete, out of direct sun, weighted at the corners until they are hard and dry, or drown them in water in a sealed metal can. Do not wad them and do not bin them. A shop full of coal dust and propane is the worst possible place to learn this lesson.
What owners say
I have hung handles for years, but I have not run each product above through a controlled comparison, so here is what the forums actually report, with the thin spots left in.
On removal, the consensus is unanimous and unglamorous: destroy the old handle. I Forge Iron's handle removal thread and The Garage Journal's both land on cut flush, drill it out, punch it through. Nobody recommends trying to save the wood.
On fire, the picture is more mixed than I would like. BladeForums has smiths who have burned handles out successfully by keeping the working end buried in wet earth or wrapped wet. It can be done. It is also the method with the highest cost of failure, and the people who use it are experienced enough to judge the risk. I would not start there.
On sourcing, the recurring pattern across I Forge Iron's rehandling threads and its changing hammer handles thread is that smiths buy cheap heads at flea markets and hang them on a hardware store handle plus a wedge kit. That is also the honest thin spot: almost nobody names the handle brand they bought. Owner signal on any specific handle model is close to nonexistent, which is exactly why I lean on published eye dimensions rather than reputation.
On grain, the forum consensus lines up with the published wood science. In BladeForums' grain orientation discussion, ring orientation gets argued endlessly while the thing that actually predicts breakage, runout, gets agreed on quickly. Straight grain running the full length beats a perfect ring pattern with a runout three inches from the eye.
What I would tell a friend
Measure the eye waist. Buy the 18 inch machinist handle (paid link) if your head is 2 to 3 lb, the 14 inch (paid link) if it is around a pound, and reject any handle with grain running off the side. Buy a bag of assorted steel wedges (paid link) so you can pick the one the eye wants. Buy the four in hand rasp (paid link) and use it instead of a grinder. Take a whole evening over the fit and ten minutes over the wedging, not the other way around.
Skip anything that promises to shortcut the fit: no epoxy in the eye, no soaking the head in water, no burning the old handle out over a fire you are not watching with a thermometer.
And the one that matters most: a hammer with a moving head does not get one more heat. It comes off the anvil and goes on the bench. I have watched a head come off a handle in a shop full of people, and the only reason that is a story instead of an injury report is luck.