A blacksmithing bottle opener is the first real forging I hand most of the weekend beginners who come through my shop, and I do it on purpose. It looks like a small thing, and it is, but it quietly asks you to do nearly every basic move a smith needs: heat control, drawing steel out, setting a taper, bending on the horn, sometimes a twist or a punched hole, and a finish that keeps it from rusting in a kitchen drawer. Nobody gets hurt if it comes out a little crooked, and at the end of an afternoon you are holding a tool that actually works. That combination is hard to beat, and it is why I keep coming back to it after about twenty-five years at the anvil.
This is a reference piece, not a shopping list. I want you to understand what the object is, how it works, what steel goes into it, and what forging one teaches your hands, so that when you pick up a bar you know why you are doing each step instead of just copying a video.
Why the bottle opener earns its place as a first project
Let me be blunt about why I do not start people on a knife. A knife has an edge and a heat treat, and both of those are places to fail in ways that stay invisible until the thing snaps or will not hold. A beginner who rushes a blade learns mostly frustration. A bottle opener has neither trap. There is no edge to ruin and no hardening step that can go wrong, so all of your attention lands where it should at the start: reading the color of the steel, hitting where you are looking, and moving metal on purpose instead of by accident.
It is also a whole project in one sitting. You can take a cold bar and walk out with a finished tool the same day, which matters more than people admit. A beginner who finishes something comes back to the forge. A beginner who spends three sessions on a blade that ends up in the scrap bucket often does not. The bottle opener gives you a real result fast, and the result is genuinely useful, which is a rare thing to say about a first forging.
The last reason is that it scales. The plain version teaches drawing and bending. Add a twist and it teaches you to keep stock square and heat even. Punch a hole through it and you have learned to move metal sideways around a drift. You can keep making bottle openers for a year and each one can teach a different lesson if you let it. I have written more about that ladder of first projects in my beginner blacksmith projects guide, and the opener sits right at the bottom rung where it belongs.
How a bottle opener actually works
Before you forge one, understand what you are building, because the geometry is the whole job. A crown cap, the fluted metal one, is crimped down over a bead of glass at the lip of the bottle. Those crimps are what hold it on. To pop it off, you do not pull straight up; you lever the near edge of the skirt upward until the crimp lets go, and the cap flips loose.
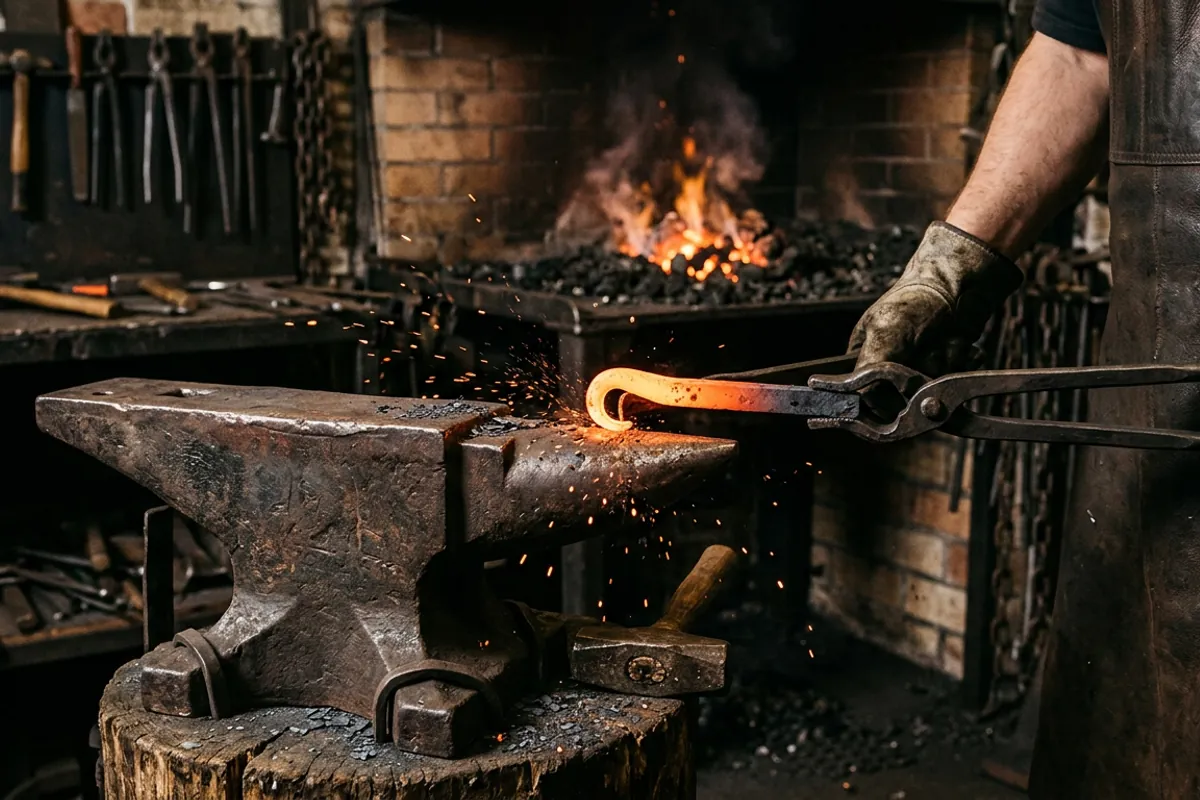
That means a working opener needs exactly two contact points. One is a lip, a small catch that slips under the crimped edge of the cap on the side nearest you. The other is a fulcrum, a point or an edge that bears down on the top of the cap, usually toward the far side. When you lift the handle, the lip pries the near edge of the cap up while the fulcrum holds the far side down. It is a simple lever, and the whole trick is the spacing and the depth of those two points.
If the lip is too shallow, it slides off the cap instead of catching. If it is too deep or too sharp, it digs into the crimp and mangles the cap without popping it. If the fulcrum sits too far from the lip, the cap deforms before it releases and you get a bent cap and sore hands. Get those two points right and the thing pops a cap with a flick. Get them wrong and no amount of pretty finish work saves it. This is why I tell people to test the geometry cold on an actual bottle before they call it done. Every design below is just a different way of putting a lip and a fulcrum in the right relationship to each other.
The steel to reach for
Here is the good news that makes this such a clean beginner project: a bottle opener does not need to be hard, so you do not need fancy steel and you do not heat treat it at all. It never cuts anything and it never takes real wear, so plain mild steel is exactly right. Common hot rolled bar, the A36 or 1018 you buy at any steel supply, forges easily, bends without cracking, and will happily open bottles for the rest of your life without ever being hardened.
Round, square, and flat bar all work, and each gives a different character. Square stock in something like three eighths inch takes a twist beautifully and gives you flats to hammer. Round stock is friendly for a first bend. Flat bar is the natural choice for a punched hole style. There is no wrong answer here, so pick what you have.
The other classic starting material is a railroad spike, and it deserves a word because so many people reach for one. A spike is charming because the head becomes a ready made handle or thumb rest. The plain ones are low carbon; the ones stamped HC on the head are the high carbon version, which runs a nominal 0.30 percent carbon under the AREMA spec. That is the low end of medium carbon, and it is why I tell people a spike will never make a knife you should trust, but for a bottle opener the carbon content does not matter at all. You are not hardening it. If you want the full honest picture on that steel, I wrote it up in the railroad spike knife piece, and the short version there is: great for openers and hooks, wrong for blades.
One place metallurgy could tempt you: you might wonder whether hardening the lip would help it last. It would not matter in any way you could feel, because the lip never abrades against anything the way a knife edge does. Wear and edge retention are real, measurable properties, and outfits like Knife Steel Nerds put actual numbers on them through testing rather than shop lore, but a bottle opener sits entirely outside that conversation. Mild steel, no heat treat, done.
The common forms, and what each one teaches
There are four shapes I see over and over, and I think of them as a curriculum more than a catalog.
The bent-tip opener
The simplest one. You taper the end of a bar, then bend the last quarter inch or so back on itself to form a small returning hook. That returned tip is your lip, and the shoulder where the bend starts becomes the fulcrum. This one teaches clean tapering and controlled bending, and it teaches you to test and tweak that tip until it catches a cap right. It is the version I put in most beginners' hands first.
The punched-hole opener
This is the forged cousin of the flat steel church key. You work a flat bar, then punch or drift a hole near one end. The near rim of that hole is the lip, and the far rim rides on top of the cap as the fulcrum. Punching a clean hole and drifting it to shape is a real skill, and this design forces you to learn it. It also looks the most like a store-bought opener, which people like.
The railroad spike opener
Here the spike head stays as a decorative end or thumb pad, you draw the shank down, and you form a hook or a bent tip at the far end. It teaches you to draw out heavy stock and to plan a piece around a feature you want to keep. It is a favorite at craft fairs for a reason.
The twist and scroll versions
Once the basics are solid, you dress up any of the above with a twist in the middle of square stock, or a small scroll on the tail for a hanger. A twist looks easy and is not: it teaches you to get the bar evenly hot and to twist in one smooth motion so the stock does not neck down or wander. Every twist you botch teaches you something about even heat.
Forging one, move by move
I am not going to pretend a paragraph replaces standing at a forge, but here is the shape of the work so the steps above have a spine to hang on.
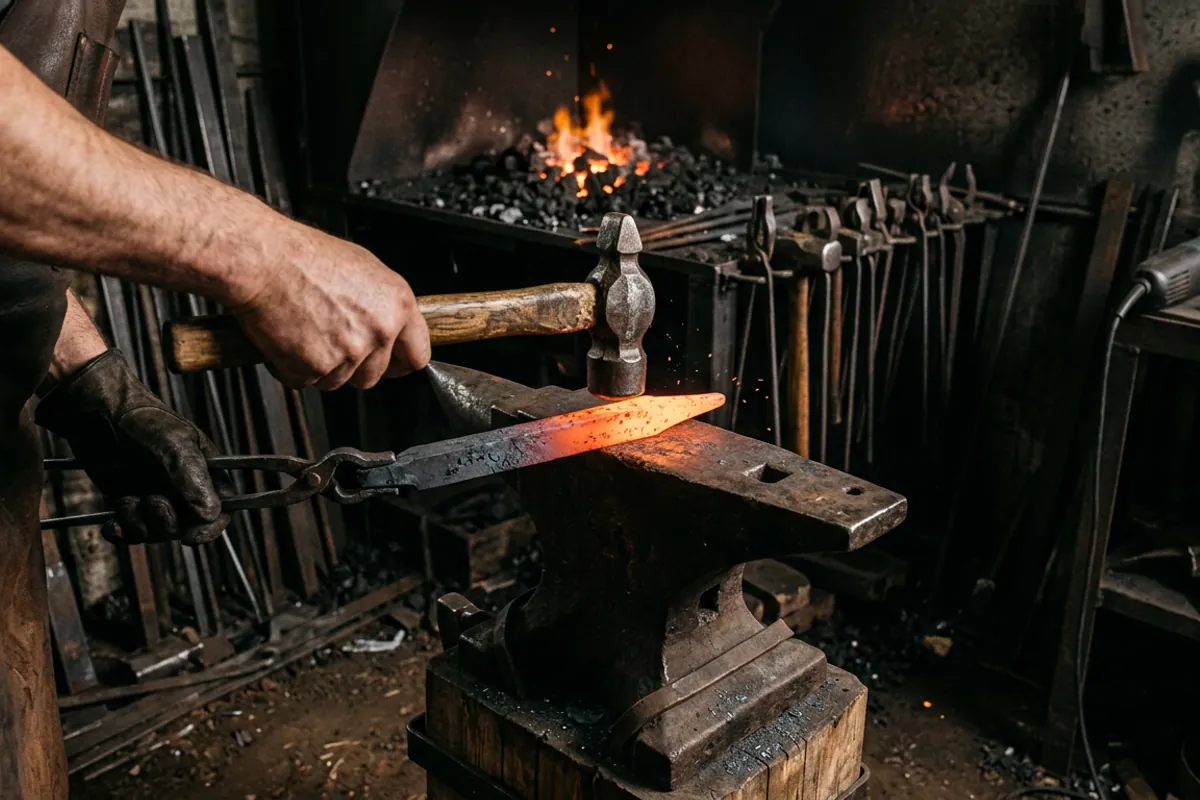
You bring the working end up to a forging heat, a bright orange, and start drawing the taper with the cross pein and then the flat face of the hammer, turning the bar as you go to keep it even. If you have never sized a hammer for this kind of work, my cross pein hammer notes cover why the pein does the drawing and the face does the smoothing. Once the taper is close, you form the lip. On a bent-tip opener that means bringing the very end to heat and folding it back over the edge or horn of the anvil into a tight little hook. On a punched-hole version you set the flat, mark your spot, and punch through hot, then open the hole with a drift.
Then you shape the body, add a twist or a bend if the design calls for one, and clean up the lines. The step people skip and should not is the fitting. Let the piece cool, take it to a real bottle, and try to pop a cap. Watch which of the two contact points is wrong. Too shallow a catch, and you go back to heat and deepen the hook. Too far a fulcrum, and you close the geometry up a touch. It usually takes two or three cycles of test and adjust before it pops a cap cleanly, and doing that teaches you more about how tools work than any single hammer blow will.
The anvil and forge you actually need
This is a light project, and that is freeing. You do not need my 148 pound Trenton, Bessie, to make a bottle opener; something this small can be worked on a modest anvil or even a heavy chunk of steel set solidly, because you are moving so little metal at once. It is the kind of work that makes a small starter anvil feel completely adequate, and it is a fair way to get real hours on whatever anvil you already own before you decide you need more mass.
A propane forge is plenty. You are heating a few inches of light stock, so an even, fast gas heat is ideal and you rarely need the reach of a coal fire for a piece this size. I run both fuels in my shop and reach for propane for exactly this kind of quick, small work. If you want the tool-by-tool rundown of what to have on the bench for this specific job, I put that in the forge a bottle opener gear guide, where the emphasis is on what you actually need rather than what a catalog wants to sell you.
Finishing so it does not rust in a drawer
A bare mild steel opener will rust, especially living near a sink and getting handled with wet hands. So you finish it. The simplest and my usual approach is a wax finish: bring the piece up to a low heat, just hot enough to sizzle wax, and rub beeswax or a beeswax and oil blend over it so it soaks in and leaves a soft protective film. It smells good, it goes on in a minute, and it wipes back to a nice satin black.
You can also just oil it, or leave a light forge scale and oil over that for a darker look. Since the thing touches bottle caps and gets handled around drinks, keep the finish simple and food-reasonable; a plain wax or oil is easy to freshen and easy to wipe clean. Whatever you use, get some barrier on it before it goes in a drawer, because nothing kills the pride of a first finished tool faster than opening that drawer a month later to a bloom of orange rust.
Safety, because even a small piece bites
Small project, same rules. Hot steel looks exactly like cold steel, and a bottle opener blank cools slowly enough to fool you, so I treat every piece as hot until I have watched it quench or felt it cold with the back of a gloved hand. Eye protection that meets ANSI Z87.1 goes on before the forge lights and stays on, because scale flies off the anvil and a wire wheel throws bits harder than you would believe. Wear natural fibers, cotton or wool or leather, never synthetics, near the forge.
I learned that last one the hard way. Early on I quenched a blade in oil that was too cold, standing too close in a cotton shirt with no face shield, and the oil flared and took my eyebrows. I kept my eyesight by luck alone. You will not be quenching an opener, so that exact hazard is off the table, but the lesson generalizes: the forge does not care that the project is small. Keep short stock in tongs rather than pinching a hot two inch stub in your fingers, and know where every hot thing on your bench is at all times. My full rundown lives in the blacksmith safety gear guide, and none of it is optional.
Where the bottle opener fits in the bigger picture
Think of the bottle opener as a gateway, not a destination. Everything it teaches, drawing a clean taper, bending to a shape you planned, punching a hole, twisting square stock evenly, finishing so the work lasts, is exactly what the next projects lean on. Hooks, coat racks, fire pokers, and eventually the knives people are itching to make all sit on top of those same skills. I would rather a beginner make ten good openers and own those moves cold than botch one blade and learn nothing.
They also make honest gifts. A forged opener is the sort of thing people actually use and remember where it came from, and it is the first thing most of my weekend students end up giving away. If you want to see where this project sits among the rest of the odds and ends that come out of a working shop, browse the More from the shop hub. But start here. Heat a bar, draw a taper, bend a lip, and go pop a cap with something you made. That is a real afternoon at the forge, and it is the right place to begin.