The equipment for blacksmithing that actually matters is a shorter list than the catalogs want you to believe: something heavy to hit against, something to get steel hot, one hammer, one pair of tongs, a way to clamp things, and eye protection you will actually wear. If you handed me a modest budget and told me to outfit a beginner today, I would buy a 100 to 150 pound anvil off the used market, a single burner propane forge like the Simond Store two door unit (paid link), a 1000 gram Swedish pattern Picard hammer (paid link), one pair of wolf jaw tongs, and a face shield. That is a working shop. Everything else is a want.
Fair warning about what this guide is. I have been at this about twenty five years, mostly on my own anvil, a 148 pound Trenton I call Bessie, with a coal forge for heavy stock and forge welding and a propane forge for everything else. I have not run every model below down in my own shop, and I am not going to pretend otherwise. Where I name a specific product, the picks lean on published specs from the maker or a non marketplace retailer, plus owner reports from the forums, weighed against what I know about how this gear gets used. Where owner signal is thin, I say so.
The short list, and where the money should go
Here is the order I give the weekend beginners who show up at my shop asking what to buy:
- Eye protection. Before anything. Nothing else on this list can blind you in a quarter second.
- Anvil, or something with mass. 100 pounds and up if you can. Used before new.
- Forge. Propane for most people starting out.
- One hammer. About 2 to 2.5 pounds.
- One pair of tongs. Sized to the stock you will actually forge.
- A vise. Bolted down, not clamped.
That is it for milestone one. The single most common mistake I see is spreading a small budget thin across six categories instead of putting most of it into mass under the hammer. A heavy anvil and a cheap hammer will make decent work. A featherweight anvil and a beautiful hammer will make you tired and frustrated. If you want the long version of the reasoning on weight, I wrote it up separately in what size anvil you actually need.
Published specs for the kit I would point at
Only figures the maker or a real retailer publishes. Where a number is not published anywhere I could verify, it says so.
Scroll horizontally to see all columns.
| Piece of kit | Model | Published spec that matters | Material or rating | Price tier |
|---|---|---|---|---|
| Anvil, budget | VEVOR single horn, 66 lb | Face 10.35 x 3.46 in, 50 HRC | Cast steel | Budget |
| Forge, small | Simond Store single burner, two doors | Rated to 2600 F, internal opening listed 4.8 in high by 4.8 in wide | SS-304 shell, 1 in ceramic blanket plus 1 in firebrick | Budget |
| Forge, roomier | Hell's Forge MAX, double burner | Chamber dimensions not published on a maker page I could load | Steel shell, made in USA | Mid |
| Hammer | Picard 0000811-1000, Swedish pattern | 1000 g head, 360 mm overall | Alloyed steel head, ash handle | Mid |
| Tongs | Simond Store 16 in wolf jaw | 16 in overall length, hand forged | Forged steel | Budget |
| Vise | Yost 650-C mechanics vise | 5 in jaw width, 360 degree swivel base | 30,000 PSI cast grey iron, tubular steel frame | Mid |
| Face shield | 3M H8A headgear with WP96 shield | Shield 9 in by 14.25 in, meets ANSI Z87.1 | Polycarbonate | Budget |
Sources for the table: VEVOR's own product page, Simond Store's tong listing, Yost's page for the 650-C, Haus of Tools on the Picard 0000811-1000, and ASA Supplies on the 3M WP96 shield.
The anvil: mass is the whole point
An anvil does one job, which is to not move when you hit it. Everything people argue about online, ring, rebound, brand, pattern, is downstream of mass and a hard face. Bessie is 148 pounds and I have never once wished she were lighter.
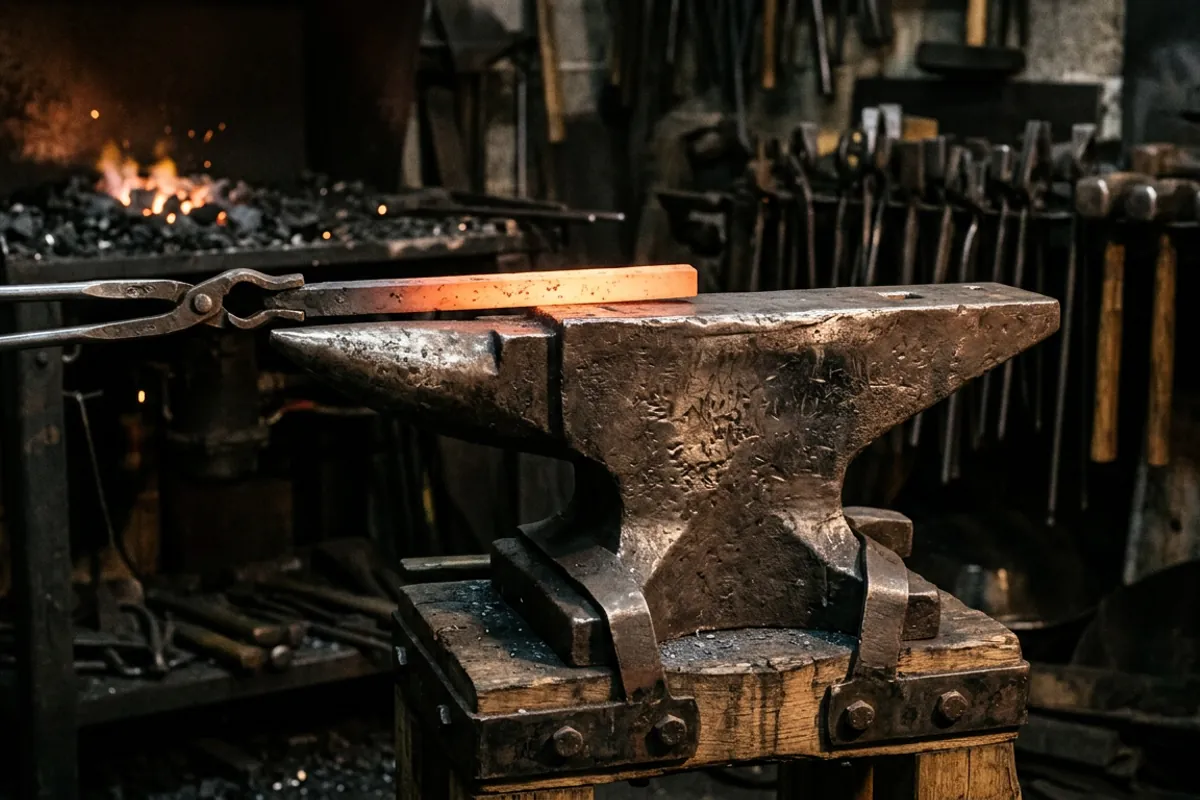
I started on a cut piece of railroad track clamped to a stump, and it worked, in the sense that hot steel moved. It also taught me why the standard shape exists: a horn to draw and bend over, a flat face big enough to work on, a hardy hole for tooling, a pritchel hole for punching. Track gives you almost none of that.
New cast steel anvils in the budget tier are the entry point most people take now. The VEVOR line is the volume seller, and their published figures are at least specific: the 66 pound single horn is cast steel with a face of 10.35 by 3.46 inches, heat treated to a published 50 HRC.

Honest read: 66 pounds is light. It will want a heavy stand and it will walk if the stand is not weighted or staked. If the budget stretches at all, the 132 pound version of the same anvil is the one I would rather see in a beginner's shop, because it is in the weight class where an anvil starts behaving like an anvil.

The used market is still the best value in blacksmithing equipment, and it is not close. A worn but sound Trenton, Hay Budden, Peter Wright, or Arm and Hammer at 100 to 150 pounds will outperform anything new at the same money. On I Forge Iron, the recurring advice in threads like best anvil for a beginner is blunt about the trap at the bottom of the market: cast iron anvil shaped objects are brittle and dead under the hammer, and the community steers people toward a smaller real anvil or a chunk of solid steel instead. Check the face for a hard, unbroken surface, ping it with a hammer, look for rebound, and walk away from anything with the face delaminating at the edges. There is a longer checklist in how to buy an anvil without wasting your money.
The forge: propane first, coal when you know why
I run both fuels and have for years, so this is the one piece of equipment for blacksmithing I can speak to from both sides. Propane lights in seconds, holds an even heat, needs no fire tending, and does not fill your shop with smoke your neighbors will call about. Coal gets hotter in a small spot, forge welds more easily, handles heavy stock better, and costs more of your attention. For a first shop, propane, every time. I laid out the full comparison in coal or propane for a first forge.
For a small propane forge, the Simond Store single burner with two doors (paid link) is the shape I would start with. Simond publishes a 2600 F rating, an SS-304 shell, and an interior lined with a one inch ceramic fiber blanket over one inch firebrick, with an internal opening listed at 4.8 inches high by 4.8 inches wide. Two doors matter more than the spec sheet suggests: you can pass long stock straight through instead of heating only what fits in one end.
If you know you want room for longer work or a second heat going, the Hell's Forge MAX double burner (paid link) is the mid tier unit most beginners land on. It is made in the USA and it is a genuinely capable forge. I could not load a maker page to verify chamber dimensions, so I am listing those as not published rather than repeating figures from resale listings.
Safety, and I am not softening this. A propane forge produces carbon monoxide. Run it outdoors or in a space with real cross ventilation and a working CO alarm, never in a closed garage, and never with the door down "just for a minute." Ceramic fiber blanket sheds respirable fibers: rigidize it, and wear a P100 respirator when you cut or handle raw blanket. And never, under any circumstances, put galvanized steel in a forge. Zinc fumes cause metal fume fever, and the smell is your only warning.
One hammer, about two pounds
New smiths buy too many hammers and too heavy. You need one, and you need it to be light enough that you can still swing it accurately in the fortieth minute, not the fourth.
The Picard 0000811-1000 (paid link) is the Swedish pattern that keeps getting recommended for a reason: a 1000 gram head, 360 mm overall, alloyed steel head, ash handle with a ring wedge, per the retailer specs above. 1000 grams is about 2.2 pounds, which is right in the middle of the useful range for hand forging.
Two things nobody tells you. First, the corners of a new hammer face are usually too sharp and will leave half moon marks in your work; dress the edges with a file and a bit of abrasive before you use it. Second, most factory handles are thicker than they need to be. Thinning the handle so it flexes slightly at the end of the stroke saves your elbow. If a hammer hurts, it is the wrong hammer for you regardless of what it cost. More on picking one in the blacksmith hammer I would hand a beginner.
One pair of tongs, not a set of four
Tongs are where the cheap kit sets do the most damage to a beginner's confidence. Four pairs that all fit nothing are worse than one pair that grips.
The Simond Store 16 inch wolf jaw (paid link) is the sensible single purchase, because wolf jaw is the closest thing to a general purpose pattern: it will hold flat, square, and round stock reasonably well, which is exactly what a beginner has lying around. Simond publishes them as hand forged rather than cast, at 16 inches overall.
Set the expectation properly: budget imported tongs almost always need fitting. You heat the jaws, close them on a piece of the stock you actually want to hold, and squeeze the reins so the jaws take that shape. That is normal practice, not a defect, and it is the first real forging job a lot of people do. When they still do not grip, you fit them again. Detail in the blacksmith tongs I would buy first.
A vise, and the one thing a mechanic's vise cannot do
You need a vise sooner than you think, for twisting, for filing, for holding while you punch. A traditional leg vise is the right answer and a used one is the cheap answer, but they are getting harder to find at sane money.
For a bench vise, the Yost 650-C (paid link) is the workhorse most home shops end up with: 5 inch jaw width, 360 degree swivel base, and Yost publishes the body as 30,000 PSI cast grey iron with a tubular steel frame.
The honest limit: that is a mechanic's vise, and cast grey iron is not made to be struck. Do not use the little anvil pad on the back as an anvil, do not hammer hot work against the jaws, and do not put a cheater bar on the handle. A leg vise is built to take hammer blows through a leg planted on the floor; a bench vise takes them through cast iron and a bolted base. I have seen a bench vise cracked by a smith who forgot which one he owned. The full comparison is in the blacksmith vise I would buy first.
Safety gear is equipment, not an accessory
I put PPE first on the buy list for a reason, and the reason is personal. Early on I quenched a blade in oil that was too cold, standing too close, in a cotton shirt, with no face shield. The oil flared and took my eyebrows. I kept my eyesight by luck, and luck is not a safety system.
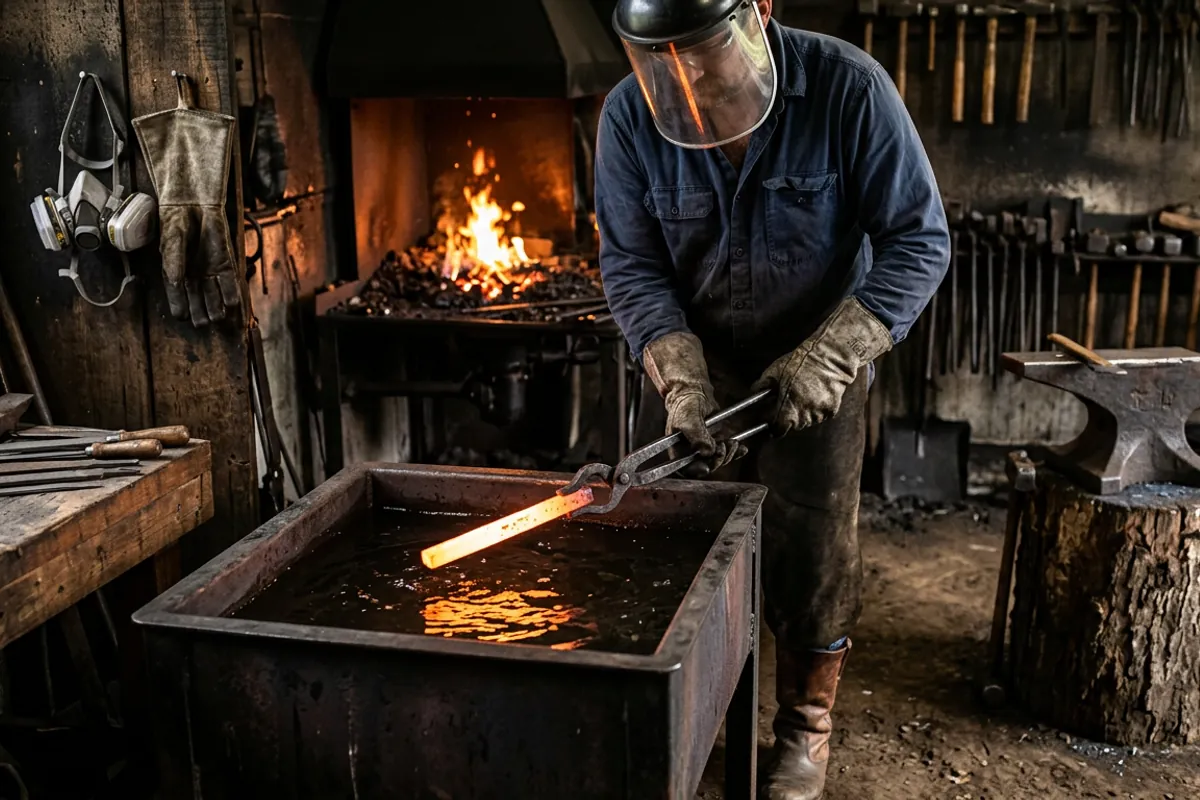
What matters:
- Eye protection rated ANSI Z87.1. Not fashion sunglasses, not readers. For grinding and for anything involving quench oil, add a face shield over the glasses. The 3M H8A ratchet headgear with the WP96 polycarbonate shield (paid link) is the common shop combination; the shield is published as 9 by 14.25 inches and meeting ANSI Z87.1.
- Natural fibers only. Cotton, wool, leather. Synthetics melt onto skin and turn a scale burn into a graft. This is not a preference.
- Hearing protection. Hammering on a ringing anvil, day after day, takes hearing you do not get back.
- A respirator for coal smoke, grinding dust, and ceramic fiber. Not a dust mask for the fibers, a P100.
- Boots, not sneakers. Hot scale finds mesh uppers.
What to skip: nothing on that list. What I would not spend early money on is a full leather apron. Useful eventually, hot and stiff at first, and a plain cotton work shirt covers most of what a beginner does. More detail in blacksmith safety gear, what matters and what to skip.
The equipment that can wait
The catalog wants to sell you all of this on day one. It can all wait.
A swage block is wonderful and unnecessary until you have a project that needs one. A belt grinder matters enormously for knives and not at all for hooks and hardware. A power hammer is a want until you are forging heavy stock regularly, at which point it becomes the best money in the shop. Tooling like hot cuts, punches, and drifts should be forged by you, out of your own scrap, as your first real projects. Buying them defeats the point and costs more.
Steel is the one consumable worth thinking about early. Skip mystery scrap for anything you intend to heat treat, and start with a known simple steel so your results mean something. Our steel selector will point you at a starting alloy, and for anything to do with heat treat numbers, go to real testing rather than forum folklore: Knife Steel Nerds has a solid piece on heat treating knife steel in a forge that will save you a stack of ruined blades.
What owners say
This is secondhand by design, attributed so you can go read it yourself.
On the Hell's Forge, a KnifeDogs thread titled Forge ??? has an owner describing theirs as a two burner unit and getting the reply that "that forge will do fine for starting out." The useful criticism in the same thread is about geometry rather than build quality: experienced knifemakers there argue that top down burners are aimed at blacksmiths who want one section of stock hot fast, and that side entry burners angled toward the rear create a swirl that heats more evenly end to end, which matters for heat treating. That is a design tradeoff worth knowing before you buy, not a defect.
On budget cast anvils, the I Forge Iron threads best anvil for a beginner and anvils, a beginner buyers guide run the same direction over and over: you do not need a London pattern anvil to start, cast iron is brittle with poor rebound, and a smaller genuine steel anvil or a solid steel block beats a large cheap casting.
On beginner hammers and tongs, the recurring advice in the I Forge Iron thread recommendations for a beginner's hammers and tongs is to keep stock long enough to hold by hand at first and buy one good pair of tongs, wolf jaw or bolt jaw, rather than a cheap multi pack.
Owner signal on the specific Simond Store and VEVOR items is thinner than I would like on the dedicated forums, mostly because these are recent volume products that hobbyists buy and do not write up. Take the specs as published and the rest as unproven.
What I would tell a friend
Buy mass first. A used 100 to 150 pound anvil with a sound face beats every new budget casting at the same price, and if you cannot find one, the 132 pound VEVOR class is a more honest starting point than the 66 pound. Get a single burner propane forge with two doors, one 2 to 2.5 pound hammer, one pair of wolf jaw tongs you expect to fit yourself, and a bench vise you promise not to hit. Skip the tooling and forge it.
And buy the eye protection before any of it. ANSI Z87.1 glasses under a face shield, cotton or wool on your body, and never let anyone tell you the shield is optional because they have been doing this for years. So had I, the day the oil flared.
More gear guides and shop reference live in more from the shop, or start with the black smith tools you actually need if you want the tightest possible version of this list.