Type "blksmith bottle opener" into a search bar and you turn up a thousand hooks, scrolls, and twisted bars that all do the same plain job: lift the cap off a bottle. I have forged more of them than I can count, most with a beginner standing next to me at Bessie, my 148 lb Trenton, because an opener is the first real object I hand a new smith. It looks like something when you are done, it works, and it teaches your hands four or five fundamentals in a single afternoon without ever asking you to get a heat treat right. This is a reference piece, not a shopping list, so I am going to explain what one actually is, how it works, what steel to use, and where they go wrong, owner to owner.
What a forged bottle opener actually is
A hand-forged bottle opener is about the simplest real tool a smith makes. It is one continuous piece of steel with two jobs at its two ends. One end is shaped into a lip that catches under the crimped edge of a bottle cap. The other end is the handle, drawn out, twisted, scrolled, or left square depending on the look you are after. In between is whatever grip and decoration the smith felt like adding. There are no moving parts, no rivets, no edge to hold, and no assembly. You start with a bar and you end with a finished object, and every bit of it came off the anvil.
That is the whole difference between a forged opener and the stamped steel one clipped to your keychain. The stamped one is punched flat out of sheet in a factory. The forged one is moved with a hammer, so the grip has heft, the lines are yours, and no two come out exactly alike. It is not a precision instrument and it does not need to be. It needs to be stiff, it needs a lip that fits a standard cap, and it needs to feel decent in the hand. Get those three right and you have a tool that will outlive you and everyone who borrows it.
Why it is the first project I hand a beginner
When somebody shows up to a weekend session wanting to make something real, I put a bottle opener in front of them first, and I have for years. A blade asks you to nail a heat treat or the whole thing is scrap, and that is a rough place to start when you are still learning to hit where you are looking. A bottle opener asks for none of that. Botch a bend and you stick it back in the fire and fix it. The steel forgives you all afternoon.
In one opener a beginner draws out a taper, bends a controlled curve, sometimes twists the shank, sometimes punches a hole for hanging, and reads heat colors the entire time. Those are the fundamentals that show up in every project after it, and here they come with almost no penalty for getting them wrong the first three tries. Just as important, the new smith walks out holding something that works and looks like a real object, and that does more for a person's nerve than any amount of me talking. If you want the fuller list, I laid out the beginner blacksmith projects that actually teach your hands separately, but the opener earns the top spot on it. When people ask me what to make for their first gift or first table at a craft fair, this is the answer too.
The designs you will actually see
There is no single "correct" bottle opener, and once you understand the working end you can hang it off almost any shape. These are the ones you will run into most.
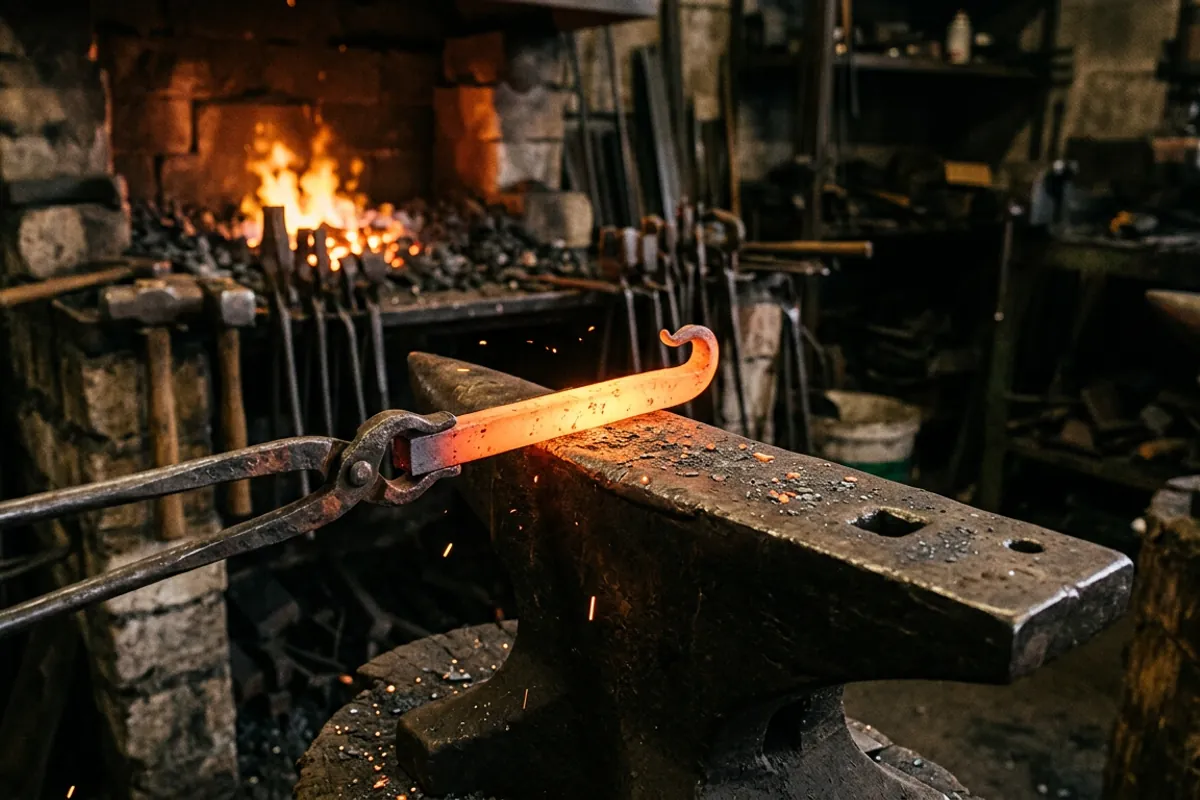
The simplest is the hook, sometimes called a beak. You draw a taper on the end of a bar and curl the last half inch back on itself into a small lip. That lip is the whole business end. Everything behind it is handle. A hook opener can be forged in twenty minutes and it works as well as anything fancier.
The twisted-handle opener takes square stock, forges the lip on one end, and puts a tight, even twist in the middle of the shank for grip and looks. The twist is where beginners either shine or make a mess, because it wants even heat and steady hands. Done right it is the design most people picture when they think of a blacksmith's opener.
The railroad spike opener is a favorite because a used spike is cheap, has a ready-made head, and looks the part. You draw and bend the shank into the working end and let the stamped head become the handle, or the reverse. Spikes have their own quirks in the fire and I go into those in detail in the piece on blacksmithing railroad spikes, but for an opener they behave fine.
Beyond those you will see scroll and heart openers that dress up the handle end into decorative curls, and horseshoe or horseshoe-nail openers built around found hardware. I do not forge many of the horseshoe ones myself, but ask ten smiths at a club meet and half of them have made one for a wedding or a bar, so the demand is real. Whatever the shape, the lip is the part that has to be right. The rest is taste.
The steel, and why you do not heat treat it
This is the part that surprises people: a bottle opener should be made from plain mild steel, and you should not heat treat it at all. A2 tool steel or 1084 or anything you would reach for on a blade is a waste here. An opener does not need to be hard. It needs to be stiff and it needs to not snap, and mild steel is both. A36 hot-rolled or 1018 is exactly right, and it is cheap enough that a beginner can ruin three of them and not care.
Higher-carbon stock will work, and so will a railroad spike, but neither buys you anything. A spike stamped "HC" carries roughly 0.30 percent carbon, which the railroads call high carbon and knife makers do not, and even that is far more than an opener asks for. Because you are never hardening it, the carbon content is close to irrelevant to how the finished tool performs. If you genuinely want to go down the rabbit hole of what carbon does in steel, the people at Knife Steel Nerds have tested it to death, but for this project you can set all of that aside. You are forging a stiff lever, not an edge.
For size, half-inch square or round is the sweet spot. Three-eighths makes a daintier opener that still works. Go thinner than that and the lip and handle start to flex under a stubborn cap; go much thicker and you are fighting the bar all day for no benefit and ending up with something clumsy in the hand. Half-inch square is what I hand beginners because it twists nicely and forges fast.
How it actually pops a cap
It helps to know what you are fighting. A crown cap, the standard beer bottle cap, is a shallow steel cup crimped down over a lip on the neck of the bottle, and the crimp is formed into a ring of little teeth, usually 21 of them. Those teeth are what grab the glass. To get the cap off you have to peel that crimped skirt back up and over the lip, and that takes more force than your fingers can manage. So you use a lever.
Every bottle opener, forged or stamped, is the same lever. You rest one edge of the opener on top of the cap as a pivot, hook a lip under the crimped skirt on the far side, and lift the handle. The pivot holds the top down while the lip levers the far edge up, the crimp lets go, and the cap comes off. All you have really done is trade a long handle for a short bite, which is why even a stubby opener with good geometry pops a cap with almost no effort, and why a poorly shaped one makes you wrestle.
Two things have to be true for the lip to work. It has to be thin enough at the very tip to slip under the crimp, because if it is a fat rounded nub it just skates across the top of the cap and never bites. And it has to be thick enough right behind the tip that it does not fold over the first time you put real load on it. That balance, thin edge with body behind it, is the entire skill of the working end. The spacing matters too: the pivot point and the lip have to straddle a standard cap, roughly an inch across, so if you forge the mouth too wide or too narrow it will not sit on a real bottle no matter how pretty it is.
Heat, tools, and the safety I will not skip
The tool list is short, which is another reason this is a starter project. A forge, coal or propane, either one is fine for stock this small. An anvil, though a hunk of steel works to learn on. A hammer, and I reach for a cross pein for the drawing and lip work. A pair of tongs that actually fit your bar. If you are twisting, a post vise and a wrench or a twisting bar. If you want a hanging hole, a punch and a drift. That is close to the whole kit, and I walked through the specifics in the guide on the gear I would use to forge a bottle opener at home if you want the full rundown.
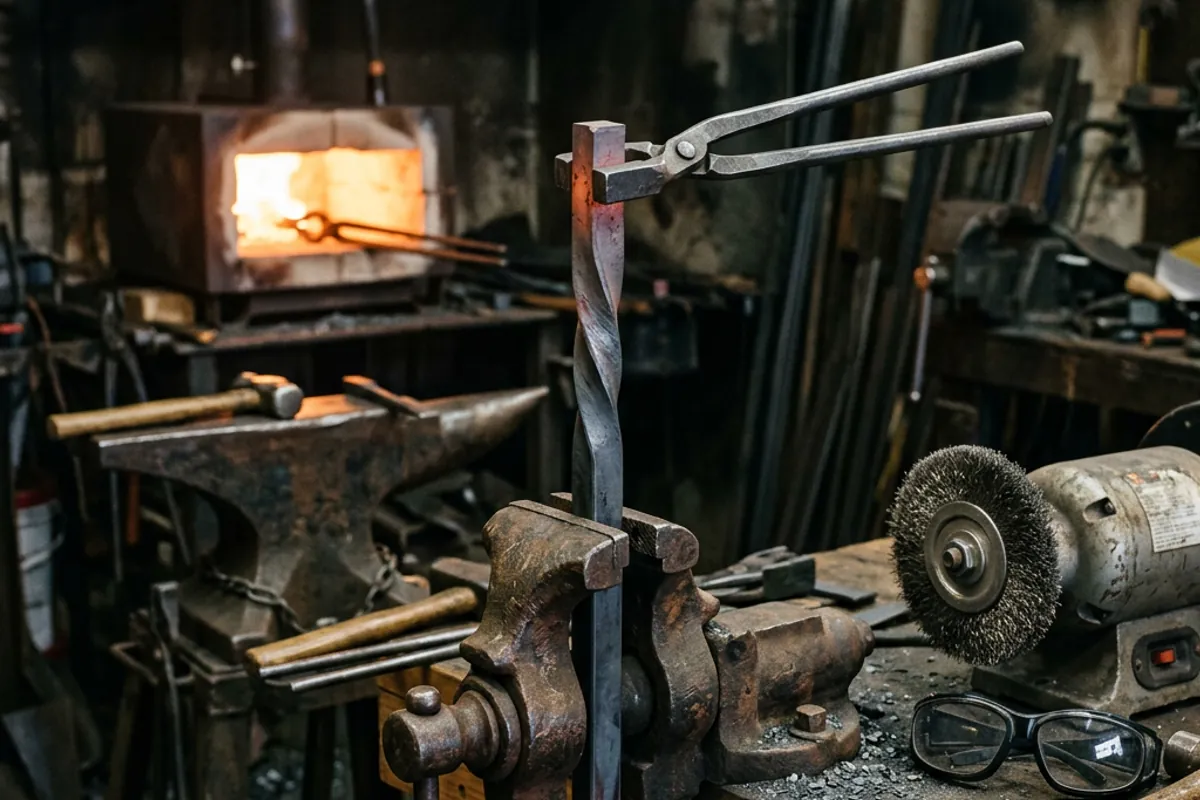
Forge at a working heat, orange to yellow for mild steel, and stop hitting it when it drops below a dull red. Forging cold does two things and both are bad: it can crack and split the bar, and it beats your wrist and elbow for no reason. When you twist, get the section evenly heated end to end, because a cold spot will not turn and you end up with the twist bunched into the hot zone. Take the heat, make the move, back in the fire.
Now the part I do not soften. Wear eye protection rated ANSI Z87.1, in the forge and doubly at the grinder or wire wheel when you clean the piece up, because that is where a wire flings loose at your face. Wear natural fibers, cotton or wool or leather, never synthetics near the forge, because a synthetic shirt melts into your skin instead of just scorching. I learned the cost of standing too close in the wrong shirt the hard way early on, at a quench tank rather than at a bottle opener, and it took my eyebrows and nearly my eyesight. A bottle opener is a friendly little project, but the fire does not know that, and the standards exist for a reason. File or wheel the finished opener so there are no sharp edges or burrs left, both for comfort and so nobody hooks a thumb on it.
Finishing and whether it is food safe
People ask whether a forged opener needs to be food safe, and the honest answer is that it barely touches anything you drink. The lip engages the crimped skirt of the cap, not the beverage and not your mouth. So it is not the same problem as a knife or a cooking tool. What you do care about is keeping it from rusting, because a rusty opener stains the cap and looks neglected.
Clean the scale off with a file, a wire wheel, or a quick soak and scrub, then put a finish on it. The common ones are a beeswax-and-oil paste rubbed on while the steel is still warm, a plain food-grade oil, or a clear lacquer for a shinier look that never needs redoing. A wax finish is my default here because the tool lives an easy life and wax is simple to renew. Whatever you use, avoid a brittle finish that flakes, and skip anything you would not want a fleck of near a drink. That is about as far as food safety goes for this one. If a customer presses the point, a wax or a genuinely food-grade oil covers it and you can say so honestly.
Where they go wrong
The failures are consistent, which is good, because that means they are easy to head off. Far and away the most common is the lip. Too thick and rounded, it will not slip under the crimp and the opener simply does not work. Too thin, it folds over on the first stubborn cap and never works again. You want a thin biting edge with body right behind it, and you find that balance by test-fitting on a real cap before you finish the piece, not after.
Geometry is the next one. If the pivot and the lip do not straddle a standard cap, the tool looks like an opener and functions like a paperweight. Forge it against an actual bottle in reach and check the fit as you go. After that it is the usual beginner troubles: forging too cold and cracking the bar, an uneven twist that bunched up in a hot spot, a handle so short there is no leverage, and sharp edges left on from never dressing the finished piece. None of these are hard to fix. They are just the things you stop doing after you have made a few.
That is the whole story of a forged bottle opener, which is exactly why I keep handing it to new smiths. It is honest work, it teaches your hands, and it ends the day with something that pops a cap. If you want more small projects and shop explainers in the same vein, they live in More from the shop, and I would forge a dozen openers before I forged anything harder.