black smith tools are one of those subjects where the internet will happily sell you a hundred-piece kit before you have made a single hook. So let me give you the short version up front, the way I would tell a weekend student standing in my shop: you need an anvil, a hammer, one or two pairs of tongs, a way to get steel yellow-hot, and the protective gear that keeps you out of the ER. That is the whole starting kit. Everything else you add later, when a real project tells you what it is missing.
A note on how I write these roundups. I have been at this for about twenty-five years as a hobby smith, and I can speak from the floor about what a tool is like to own, what wastes money, and how a fuel behaves. But most of the specific import products below are not things I have run down in my own shop, so I am not going to pretend I bench-tested them. What follows leans on published maker specs and owner reports from the forums, weighed against what I already know from years at the anvil. Where the advice is owner consensus rather than my own hands, I say so.
The short list: black smith tools you actually need first
Here is the honest core kit, in rough order of how much it matters:
- An anvil, or a good hard chunk of steel that acts like one.
- A hammer in the 2 to 2.5 pound range.
- One or two pairs of tongs sized to your stock.
- A heat source: a coal or propane forge.
- PPE: eye protection rated to ANSI Z87.1, natural-fiber clothing, hearing protection, and leather.
That is it. You can make a surprising number of things with just those. I started self-taught on a cut length of railroad track clamped to a stump, a cheap hammer, and a single pair of tongs, and that got me a good long way before I ever bought a proper anvil. If you want the wider view of the craft before you spend a dime, read what blacksmithing actually is, owner to owner first. Then come back and buy in this order.
The starter kit at a glance
These are the published specs for the three anchor tools I point beginners toward, pulled from the makers, not from a marketplace listing. Only figures the maker actually states are here; where a maker does not publish a number, it says so.
Scroll horizontally to see all columns.
| Tool | Key published spec | Material | Rating / hardness | Tier |
|---|---|---|---|---|
| VEVOR single-horn anvil (66 lb) | 66 lb; face 10.35 x 3.46 in; 3/4 in hardy, 5/8 in pritchel | Cast steel, London pattern | 50 HRC face | Budget |
| VEVOR single-horn anvil (132 lb) | 132 lb | Cast steel, London pattern | Not published for this size | Budget |
| Simond Store single-burner propane forge | 2600 F rated; chamber about 4.8 x 4.8 x 10 in; 0 to 21 PSI regulator | SS-304 stainless, 16 gauge | 2600 F rated | Budget to mid |
Specs above are from VEVOR's own product page and Simond Store's single-burner forge page. A hammer and a pair of tongs round out the kit; I cover those below, where the useful number is weight and jaw fit rather than a spec sheet.
The anvil: your biggest, most-used tool
The anvil is the tool you will put the most hours on, so it is the one worth thinking hardest about. Mine is Bessie, a 148 pound Trenton, and she is the yardstick I measure every other anvil against. For a beginner, though, you do not need a century-old Trenton. You need mass, a hard face that returns your hammer blow, a horn for curves, a hardy hole, and a pritchel hole.
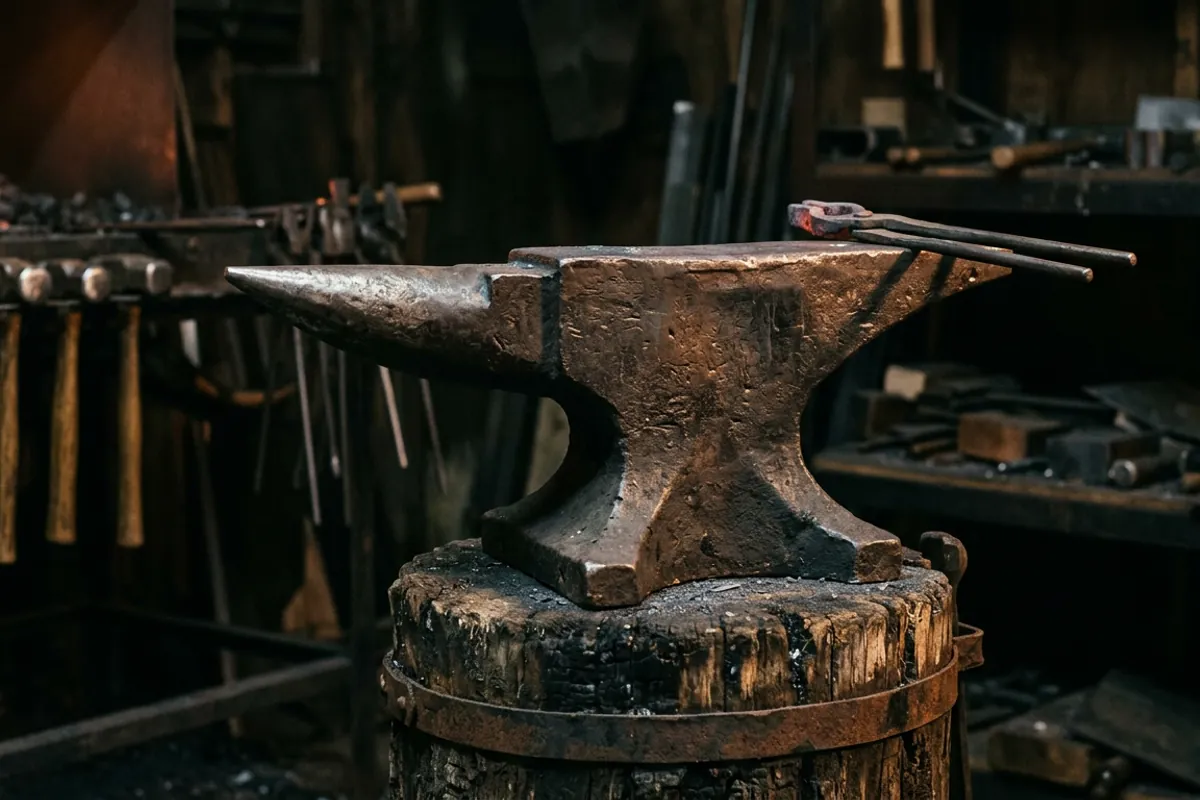
On weight: heavier is genuinely better here, because a heavy anvil throws less of your effort back into your arm and stays put on the stand. I would not go below about 70 pounds if I could help it, and 100 to 150 pounds is a sweeter spot if the budget and your back allow. I have written the long version of this in what size anvil you actually need and how to buy an anvil without wasting your money; read at least one before you buy, because a bad anvil is the most expensive mistake in this list.
If you want a new cast-steel anvil at the budget end rather than hunting the used market, the VEVOR single-horn is the one owners keep landing on. The 66 pound model publishes a 50 HRC face and a London-style shape with a 3/4 inch hardy and 5/8 inch pritchel hole, per VEVOR's spec page linked above. It is a budget cast anvil, and it behaves like one: fine for learning, not the lifetime tool a good wrought or forged anvil is. If you can swing the weight, the 132 pound version is the better learning platform for the reasons above.


For a fuller honest ranking across budgets, including where the cast imports sit against real steel anvils, see the best anvils for beginners. The one rule I will not soften: check the rebound before you commit money on a used anvil. Drop a ball bearing on the face from a foot up. A good anvil returns it most of the way; a dead one thuds, and no price makes a dead anvil worth owning.
The hammer: buy light before you buy heavy
New smiths almost always reach for too much hammer. It feels productive to swing three or four pounds. Your elbow disagrees, and it will tell you within a few weeks. The recurring advice across the hammer-weight threads on I Forge Iron is to start around 2 to 2.5 pounds and learn to let the hammer and the heat do the work, not your shoulder. You can read the community back-and-forth on the First Hammer and Hammer weight threads; the through-line is the same one I give students, which is that a lighter hammer swung well beats a heavy one swung badly, and it saves your tendons while you build technique.
A cross peen is the classic first shape: flat face on one side for drawing and planishing, a peen on the other for spreading and moving metal in one direction. A Swedish-pattern cross peen in the 2 pound range, like this wooden-handled blacksmith hammer (paid link), is a sensible starter profile. I have not run that exact import model down in my own shop, so treat the recommendation as a shape-and-weight call rather than a hands-on test: what matters is that it lands near 2 pounds, has a decently dressed face with no sharp edges, and sits tight on its handle. Dress the face and radius the edges with a file and some sandpaper before your first session, whatever hammer you buy. A hammer with a sharp factory edge stamps ugly marks into everything you make.
Tongs: get a pair or two, not a wall of them
Tongs are where the beginner kits waste your money, handing you eight pairs you will never fit to your stock. You need tongs that actually grip the size of steel you are working. A single pair of wolf-jaw or v-bit tongs covers a useful range of round and square stock, which is why a small starter set like this wolf-jaw plus v-bit pair (paid link) makes more sense than a giant bundle of poorly fitted jaws.
Here is the part the listings do not tell you: almost every import tong needs fitting before it holds well. You heat the jaws and close them on a piece of your actual stock so they grip the whole length of the bit, not just one corner. A tong that grips at one point lets hot steel pivot and launch, which is exactly the surprise you do not want with a yellow-hot bar. Eventually most of us make our own tongs, and that is a good early project. Until then, one well-fitted pair beats a drawer full of loose ones.
Heat: your first forge
No forge, no forging. You have two real fuel paths, and I have run both for years, so this is one place I can speak from the floor rather than the forums. Coal gives you a hotter, more concentrated fire that is better for heavy stock and forge welding, but it needs air, a chimney, and tolerant neighbors. Propane gives you fast, even, hands-off heat that suits most day-to-day work and a beginner learning to read color. I run a coal forge for heavy stock and welding and a propane forge for nearly everything else. If you are choosing your first one, I laid out the whole tradeoff in coal or propane, which first forge makes sense.
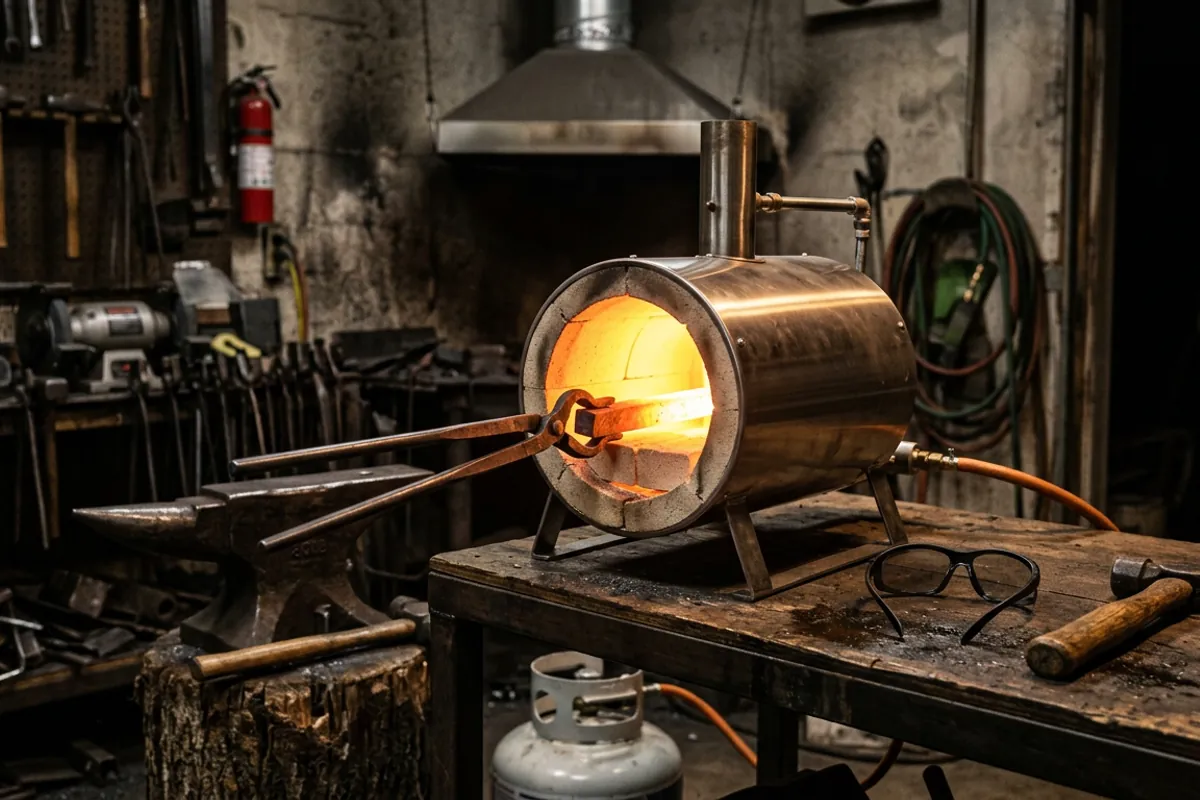
For most people starting out, a small single-burner propane forge is the path of least resistance. The Simond Store single-burner is a common beginner pick: its own spec page lists a 2600 F rating, a stainless SS-304 body, and a chamber around 4.8 by 4.8 by 10 inches, which is plenty for knives, hooks, and small tooling. If that fits your plan, here is the single-burner propane forge (paid link). One safety point I will not soften: any gas forge runs where you have real ventilation, never a closed garage, and you keep a extinguisher within reach. Propane and an enclosed space is how people get hurt.
The cheap tools that earn their keep
A few small black smith tools cost almost nothing and save you constant grief:
- A wire scale brush. As steel heats it grows scale, and you brush it off hot so you do not hammer it into the work and leave a pitted finish. The butcher-block style with flat spring-steel bristles is the one smiths favor for this; the I Forge Iron thread on wire brushing scale and retailers like Centaur Forge both point at the same tool.
- A sturdy bench vise. A post vise is ideal because it takes hammering, but any heavy vise beats none for bending and holding.
- A metal bucket of water and a can of quench oil, kept a sane distance from the forge.
- A steel rule, soapstone for marking, and a pair of pliers.
None of these are glamorous, and all of them show up in your hand within your first hour. If and when you move into knives and heat-treating, do not guess at steel or quench numbers. Send those questions to real testing, like Knife Steel Nerds, and use our steel selector tool to narrow what you are actually working with rather than trusting a mystery bar.
Protect your eyes, ears, and lungs before anything else
I lead with this in person and I will lead with it here, because I earned the lesson. Early on I quenched a blade in oil that was too cold, standing too close in a cotton shirt with no face shield. The oil flared and took my eyebrows, and I kept my eyesight by luck. Luck is not a safety plan.
The non-negotiables: eye protection rated to ANSI Z87.1, worn any time you are at the forge or the grinder. Natural-fiber clothing, cotton, wool, or leather, because synthetics melt onto skin. Hearing protection, because hammer on anvil on steel is louder and more damaging over years than people think. Leather boots and an apron. A face shield over safety glasses for grinding and for any quench. And ventilation for the forge, always. I go tool by tool on what is worth buying and what is marketing in blacksmith safety gear, what matters and what to skip. Read it before your first fire, not after your first scare.
What owners say
Because most of the specific products above are not tools I have personally run down, here is the honest owner signal from the forums, with the thin spots left in.
On hammers, the consensus is strong and consistent: start lighter than you think. The First Hammer and Hammer weight discussions on I Forge Iron repeatedly steer beginners toward roughly 2 pounds and warn about elbow and wrist strain from starting heavy. That matches my own shop experience closely enough that I pass it along without hesitation.
On the budget cast anvils like the VEVOR, owner reports are mixed in the way you would expect from a budget cast tool: usable rebound and a fine learning surface for many buyers, with a real minority reporting soft spots or edges that chip. That is the nature of low-cost cast steel, and it is why I frame it as a learning anvil, not a lifetime one. If your budget reaches a heavier or used forged anvil, owners and I agree it is the better spend.
On the small import forges and tongs, the recurring note is that they work but arrive needing fitting and fettling, tongs dressed to your stock, forge doors and regulators checked. Owner signal on any single import model is thinner than I would like, so treat model-specific praise with a grain of salt and buy on the specs and the fitting work you are willing to do.
What I would tell a friend
Buy in this order: the heaviest sound anvil you can afford, a 2 pound cross peen, one well-fitted pair of tongs, a single-burner propane forge if you want the easy path, and your PPE before any of it. Skip the giant beginner kits; they pad the box with tongs you will never fit and tools you do not need yet. The budget cast anvils and import forges are honest ways to start as long as you know what they are, and you will replace or supplement them as your work tells you what it needs.
The one thing I will not let you skip is the safety gear and the ventilation. Everything else on this list you can upgrade later. Your eyes and lungs you cannot. For the rest of the shop reading, the whole library lives under More from the shop and all the guides. Now go light a fire, carefully.