I have verified two live ASINs (Seymour HB-3 hammer B001G5PERC, wolf jaw tongs B098F2Q1N7) and real forum/maker sources. Writing the article now.
Most blacksmithing tools you see on a starter list are noise, and if you asked me which few actually matter I would name four: an anvil, a forge, one good hammer, and one pair of tongs that fits your stock. Everything past that is something you will buy later, or make yourself once you can move hot steel, or never need at all. I have been at this about twenty-five years, I started self-taught on a length of railroad track clamped to a stump, and the single most useful thing I can tell a new smith is that the kit is smaller than the internet wants you to believe. Buy those four things well, add eye protection before you light anything, and you can forge for a year before you feel a real gap.
I want to be straight about what this guide is and is not. I own a hammer, tongs, and an anvil I have put thousands of hours on, so I can tell you what makes each of those tools worth owning. But I have not run down every model below on my own anvil. Where I point at a specific product, the read leans on the maker's published specs and on what owners actually report in the forums, weighed against shop experience. When something is owner consensus rather than my own bench time, I say so. That distinction is the whole reason to trust a gear guide.
What "blacksmithing tools" actually means
Strip away the marketing and the trade breaks into a handful of jobs. You need a way to get steel hot (the forge), a hard surface to shape it on (the anvil), a way to hit it (the hammer), and a way to hold it while it is hundreds of degrees and trying to leave your hand (the tongs). That is the working definition of blacksmithing tools for anyone starting out. A vise is close behind, and a wire brush and a container of quench are cheap and immediate, but the four above are the spine.
Everything else on the wall of a working shop, the punches, drifts, hardy tools, fullers, swages, flatters, hot cuts, is a specialization of one of those jobs. A lot of it a smith forges for himself once he can move metal, which is part of why the hobby is cheaper long term than it looks up front. So do not shop for the full wall on day one. Shop for the spine, buy it once, and let the rest arrive as your work tells you what it needs. If you want the broader beginner path laid out, I go deeper in the starter kit guide and in the plain-language what is blacksmithing walkthrough.
The starter picks at a glance
Here is the small field, with only figures the makers actually publish. Where a maker does not state a number, it says so rather than guessing. Hardness on tongs and cast anvils is rarely published, and I will not invent it.
Scroll horizontally to see all columns.
| Tool | Type | Published spec | Material | Price tier |
|---|---|---|---|---|
| Seymour HB-3 hammer | Cross pein forging hammer | 3 lb head, wood handle | Forged steel head | Budget |
| Wolf jaw tongs (16 in) | Flat/round/square gripping tongs | 16 in overall length | Steel | Budget |
| VEVOR single-horn anvil | Cast anvil with horn and hardy | 66 lb | Cast steel | Budget |
Three tools, all in the budget tier, is a functional cold start for moving hot steel. The one thing I would change for a smith with a little more to spend is the anvil, and I will get to why below. Published hammer weight comes from Seymour Midwest's own catalog listing for the cross pein pattern (seymourmidwest.com).
The hammer: one good cross peen beats a rack of them
New smiths want to buy five hammers. You need one. A two to three pound cross peen is the standard first forging hammer for good reason: the flat face moves and planishes steel, the peen draws it out lengthwise, and three pounds is enough mass to do work without wrecking a beginner's elbow. Heavier hammers are not more advanced, they are just heavier, and swinging too much hammer for too long is how people end up with tendon trouble that keeps them off the anvil for weeks.
The Seymour HB-3 is a plain, honest, widely sold cross pein at three pounds on a wood handle. I have not forged with this exact model, so I will not pretend to. What I can tell you is what to check the day it arrives, because a cheap production hammer usually needs a little work before it earns its keep. Look at the face. A forging hammer face should be lightly crowned and dead smooth, with the sharp edges eased off, because any nick or hard corner in the face prints straight into your workpiece and you spend the next hour grinding out marks you hammered in. If the face has casting or grinding marks, a few minutes with a fine flap disc and then progressively finer paper fixes it for good. The peen wants the same treatment: smooth, no sharp shoulders. Owners of budget cross peens report exactly this, that the tool is fine once dressed, and I would treat that as the price of a budget hammer rather than a defect.
Check price on Amazon (paid link)
Match the handle length to your reach and never keep swinging a hammer with a loose head. If the head shifts on the handle, stop, re-wedge it or re-hang it, and check it cold before every session. A hammer head coming off mid-swing in a shop full of hot steel is exactly the kind of avoidable event this site refuses to shrug at.
Tongs: get one pair that fits your stock
Tongs are where beginners waste the most money, buying a boxed set of eight pairs that each grip one exact size badly. Skip that. Buy one versatile pair sized to the stock you actually plan to forge. For general work in quarter inch to half inch square and round, a wolf jaw pattern is the honest first choice, because the stepped, grooved jaws hold flat, square, and round stock in one tool instead of one profile each. That flexibility is the entire reason wolf jaws show up on nearly every beginner recommendation list.
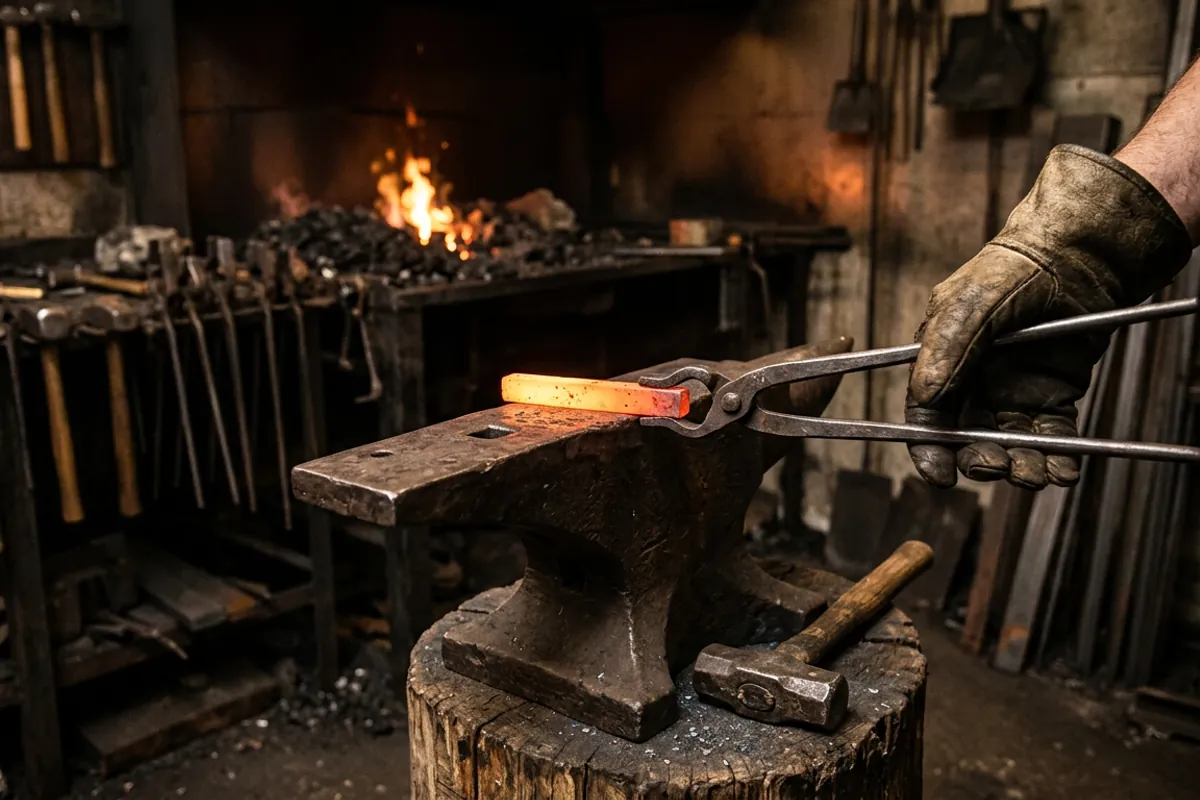
The 16 inch wolf jaw tongs above are a typical import pair. Again, I have not run this specific pair down myself, so here is the general truth about budget tongs that applies to all of them: out of the box they usually do not grip cleanly, and they are meant to be adjusted. Tongs are fitted hot. You heat the reins and the boss, close them on a piece of your actual stock, and squeeze or tweak until the jaws hold the metal with even contact along the whole bit rather than pinching at one point. A pair that grips your stock all the way down the jaw will not spit hot steel across the shop. A pair that touches at only one spot will, and a hot bar leaving the tongs is how people get burned. Adjusting tongs is a normal shop task, not a warranty problem.
Check price on Amazon (paid link)
The forums are consistent that cheap tongs are a fine starting point precisely because you are going to fit them anyway, and that fitting them is good early practice. Once you can move steel, most smiths end up forging their own tongs to fit exactly, which is a rite of passage worth reaching.
The anvil: the tool everything else hits against
The anvil is the one place I would not chase the rock bottom price if you can help it, because it is the tool every other tool works against and the one you will keep longest. My own anvil is Bessie, a 148 lb Trenton, and I measure every other anvil against her. A good anvil returns your hammer energy back into the work through rebound, so the steel moves instead of the anvil eating your effort. Mass and hardness are what buy you that. A heavy anvil with a hard face does more work for the same swing than a light soft one, every single blow, all day.
For a budget cold start, a small cast anvil like the VEVOR single-horn below gets you a horn, a face, a hardy hole, and a pritchel hole in one piece for not much money, and for light work it will forge steel.

I will be honest about the tradeoff, because a budget cast anvil is a budget cast anvil. At 66 lb it is light for serious forging, and cheap cast anvils vary a lot in face hardness, which is the thing that governs rebound and how long the face stays flat under a hammer. Some are fine, some dent. If your budget allows, jumping to a heavier used steel anvil in the 100 to 150 lb range is the single best upgrade a beginner can make, and it holds its value if you ever sell. I walk through exactly how to judge one, rebound test and all, in the anvil buying guide. If you are still deciding how much anvil you actually need, that guide plus the weight breakdown will save you money.
The forge, the vise, and the rest
The fourth spine tool is the forge, and it deserves its own decision rather than a line in a tools table, because the fuel you pick shapes your whole shop. A propane forge gives fast, even heat and is the easiest place for a beginner to start; a coal forge runs hotter in a concentrated spot and is what you want for heavy stock and forge welding. I run both, a coal forge for heavy work and a propane forge for most day to day forging, and the choice is genuinely about what you plan to make and where you can vent it. I lay the whole thing out in coal or propane for a first forge rather than shortchange it here.
After the spine, the next tool most smiths reach for is a sturdy vise, ideally a post or leg vise built to take hammering, because a bench vise will loosen and crack under forge work. Then the cheap essentials: a wire brush to knock scale off the work and the anvil face, a container of proper quenchant, a metal bucket of water for cooling tools and tongs, and something to hold hot stock safely. None of that is exotic and none of it needs to be bought new. The point of naming the spine first is that these round out a shop, they do not start one.
Safety gear is a tool, not an accessory
I treat eye protection as a tool because forging without it is not a shortcut, it is an injury waiting for a date. Hot scale flies off the work and off the anvil face on nearly every blow. Wear safety glasses rated to ANSI Z87.1, the standard actually stamped on the frame or lens, not fashion sunglasses that shatter. At the grinder, add a face shield over the glasses, because a wheel throws far more and far faster than a hammer does.
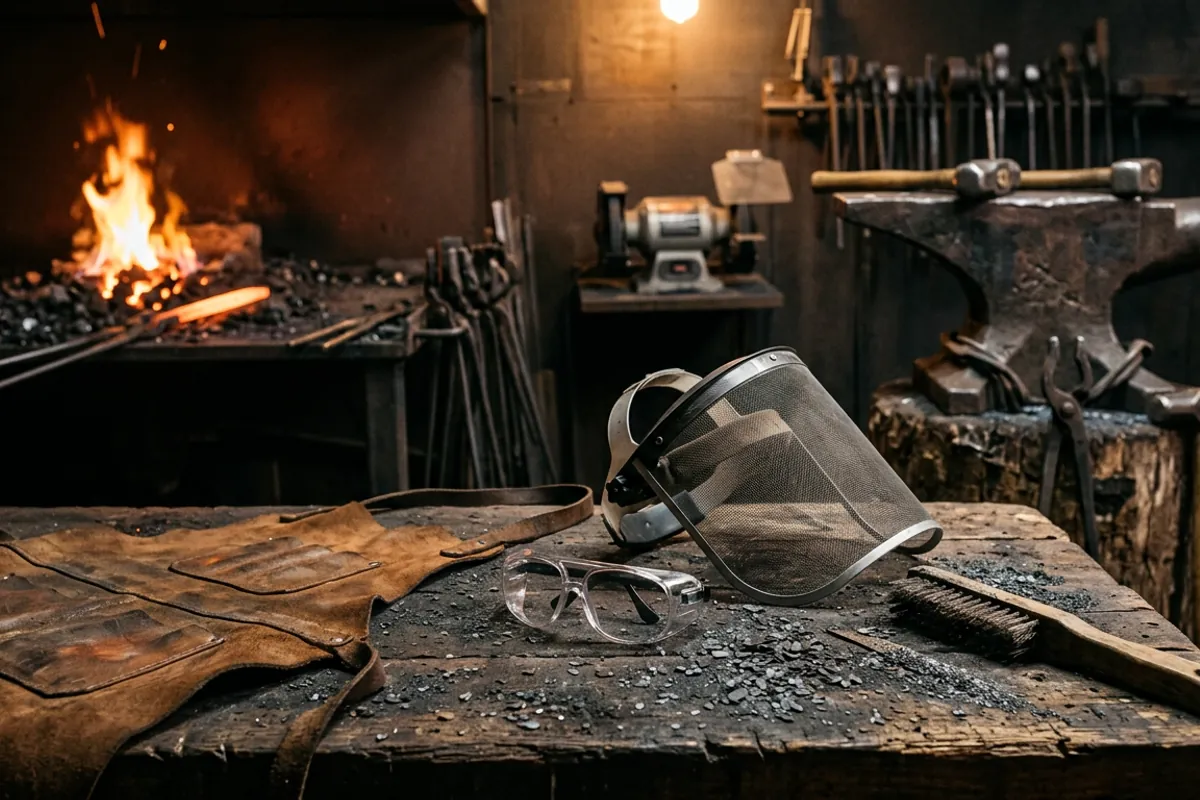
The clothing rule is just as real. Wear natural fibers, cotton, wool, leather, near heat, and keep synthetics away from the forge, because synthetic fabric melts onto skin instead of just burning. I learned this the hard way. Early on I quenched a blade in oil that was too cold, standing too close in a cotton shirt with no face shield, the oil flared, and it took my eyebrows. I kept my eyesight by luck, not by planning, and I will not pretend that was anything but a preventable mistake. So this is not me being fussy. Buy the eye protection before you buy the anvil if you have to choose an order, and read the full breakdown in what safety gear matters and what to skip.
What owners say
For the specific budget tools above, here is what the community actually reports, not my own bench time. On beginner kit generally, the long-running I Forge Iron threads on what tools a starting smith needs come back to the same short spine every time, hammer, tongs, anvil, forge, and the repeated advice that cheap imported hammers and tongs are usable once dressed and fitted, which matches everything I have seen (iforgeiron.com). The community's 25 tools list for a beginner is worth reading in full, and it is telling how much of it is "you will make this yourself" (iforgeiron.com).
On budget cross peens like the Seymour, the consistent owner note is that they arrive with a face that needs dressing and are solid workers afterward. On import wolf jaw tongs, the consistent note is that the jaws need fitting to grip properly, which owners treat as expected rather than a fault. On cheap cast anvils, the signal is genuinely mixed: some owners forge on them happily for light work, others report soft faces that mark under hammering, so I would not oversell them. Where the owner signal is thin or split, I have said so rather than manufacture a consensus.
What I would tell a friend
Buy the spine and dress it. One three pound cross peen hammer, dressed smooth. One pair of wolf jaw tongs, fitted hot to your actual stock. The most anvil you can afford, and if that means a used steel one over a light cast one, do that, because the anvil is the tool you keep. A forge chosen deliberately by fuel, not by price alone. And eye protection rated to ANSI Z87.1 on your face before the forge is ever lit.
Skip the boxed eight-piece tong sets, skip the rack of hammers, and skip anything that promises to make you a smith by arriving in one carton. The tool that matters most in this trade is the hour on the anvil, and every dollar you save by not over-buying is a dollar toward the one upgrade that pays off, a better anvil. For more from the shop, browse the More from the shop hub or the full guide list, and go make something.