I have enough verified material. Two ASINs confirmed live via search (and one via fetch), retailer specs from Caliburn, and real I Forge Iron threads. Writing now.
For most home shops, the honest verdict on a blacksmith cone mandrel is this: you probably do not need the big floor-standing one, and you can get almost everything a cone does from a small hardy-hole cone dropped into your anvil plus the horn you already own. I have shaped plenty of rings and collars on Bessie, my 148 lb Trenton, using nothing but the horn and a little patience. A dedicated cone earns its keep only when you make round work in volume, or when you want a true taper that the horn's fixed curve cannot give you. So before you go chasing a hundred-pound antique off a farm auction, let me walk through what these tools actually do, how they are sized, and which ones are worth the money.
Fair warning up front: I do not own a floor-model cone mandrel, and most of the small imported cones on the market are close enough cousins that I have handled the type without owning every listing. So the picks below lean on published specs, owner reports from the forums, and general shop experience with how conical forming works, not on a bench test of each product. Where the owner signal is thin, I will say so plainly.
What a cone mandrel actually does
A cone mandrel is exactly what it sounds like: a tapered steel or cast-iron cone you hammer round stock against. The point is to true up and size round work. You forge a ring or a collar or a band, get it roughly closed, then slide it down the cone and tap it until it seats evenly all the way around with no daylight showing under the rim. Slide it further down for a bigger diameter, back up for a smaller one. It is a sizing and truing tool first, a bending tool second.
That is the same job the round horn on your anvil does, and this matters, because the horn is why most beginners never need a separate cone. The difference is that a horn is one fixed curve. A cone gives you a continuous range of diameters along its length, and a long, gentle taper you can true a large ring against without fighting the horn's tighter radius. If you make napkin rings, bracelets, tankard bands, chandelier rings, or leaves and scrolls that need a consistent round, a cone speeds you up and makes the work more uniform. If you make knives and hooks and the occasional bottle opener, it will sit in the corner.
There are two families of these tools, and people muddle the names. A cone mandrel stands vertically, tall, and you work down its taper. A bickern (or bick iron) is a smaller horizontal horn that sits in the hardy hole or a vise, more like a detachable second horn. The little hardy-hole cones on Amazon blur the line: they are short vertical cones you seat in the hardy hole, and they do a bickern's job for round work.
How I would size one
Sizing a cone mandrel comes down to three things: the diameter range you actually forge, how it mounts, and how much mass you want under the hammer.
Diameter range is the honest starting point. Measure the largest and smallest rings you realistically make. A small hardy-hole cone with a base around two inches covers small jewelry and hardware work. A traditional floor cone runs three to four feet tall with a base up to a foot or more across, which is overkill unless you are truing wagon tires or big architectural rings.
Mount matters next. The small cones drop into a one-inch hardy hole or clamp in a vise, so they cost little and store easy. A floor cone is a standalone chunk of iron that lives on the floor and takes up real estate. Do not buy a hardy-hole tool with a shank that does not match your hole. If you are not sure what your hardy hole even is or how these stems should fit, I go through that in the hardie tools for anvils buying guide.
Mass is the last piece. A light hardy-hole cone rings and moves if it is not seated tight, and you are really relying on the anvil under it for the return. A heavy floor cone gives you dead, solid feedback but weighs what a small anvil weighs. For most home smiths, mass is not the deciding factor. Fit and diameter range are.
The field at a glance
Here is the honest state of what you can actually buy, with published specs where a maker or non-marketplace retailer states them and "not published" where nobody does.
Scroll horizontally to see all columns.
| Tool | Fits | Shank | Base diameter | Overall length | Material |
|---|---|---|---|---|---|
| Hardy-hole cone mandrel (Caliburn spec) | 1 in hardy hole or vise | 1 in x 3 in | 2 in | 9.25 in | not published |
| Small imported hardy cone mandrel | 1 in hardy hole or vise | 1 in | not published | not published | not published |
| Floor-standing cone mandrel (antique/new-cast) | free-standing on the floor | none | varies | commonly 36 to 48 in tall | cast iron or steel |
The Caliburn figures are the cleanest published numbers I found for the small-cone class: a one-inch by three-inch shank, a two-inch base, and a 9.25-inch overall length, per their product listing. Notice how much is "not published" on the import listings. That is normal for this corner of the market, and it is the first thing to hold against any seller: if they will not state the shank size and the base diameter, you are guessing whether it fits your anvil.
The hardy-hole cone mandrels
This is the buy for the vast majority of home smiths, and it is what I would tell a beginner to start with. A short cone with a one-inch shank drops into your hardy hole and turns your anvil into a ring-sizing station in about two seconds. It costs a fraction of a floor cone, stores in a drawer, and does real work.
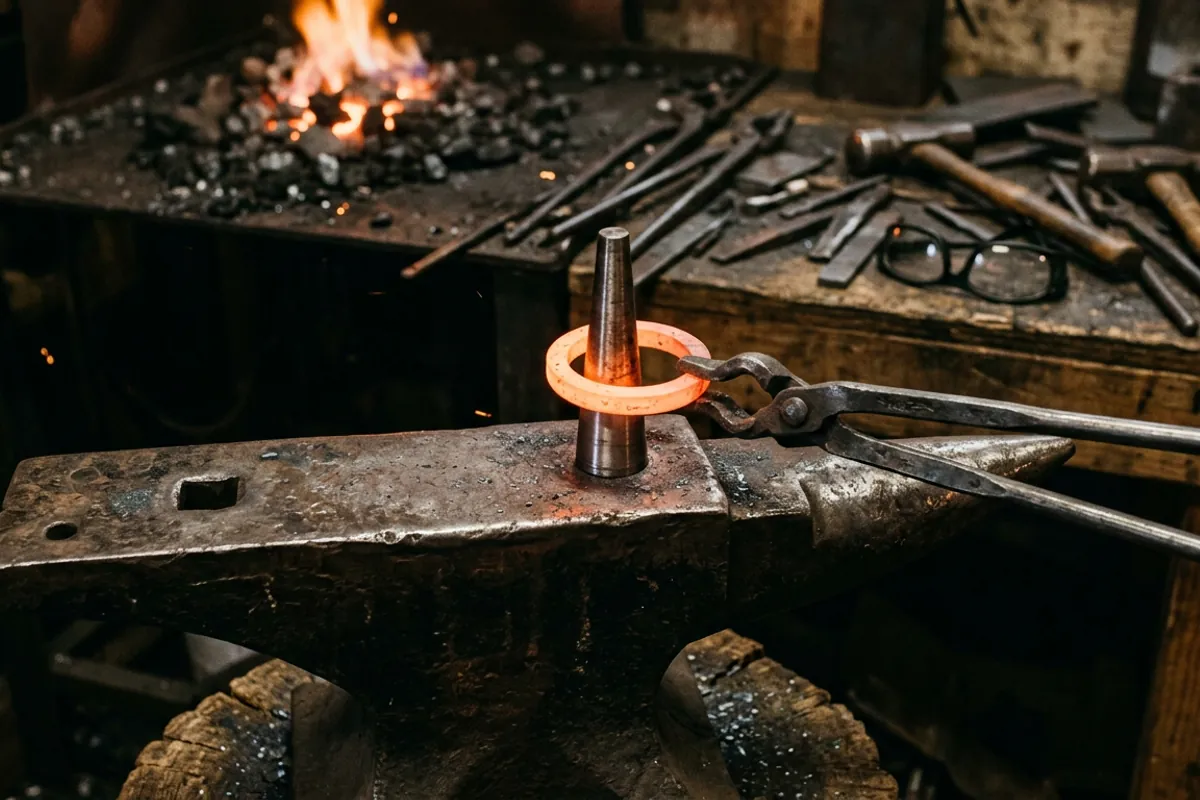
The catch with the whole category is that these are inexpensive imports, and the quality is a coin flip. Some are decent forged or machined steel; some are soft castings that will mushroom or deform if you get aggressive with a big hammer on hot stock. Treat them as light-duty forming tools, not something to sledge on. Keep your blows moderate, work the metal at a bright heat so you are not fighting cold steel, and the tool will last.
A representative one that shows up consistently in searches is this 1 inch hardy cone mandrel (paid link). It is the plain metal-forming cone that fits a one-inch hardy hole or a vise, sold for exactly the ring-and-collar work described above. A near-identical listing is this anvil cone mandrel hardy tool (paid link). I would not agonize over which specific listing you pick, because they are largely the same class of tool from the same kind of source. What I would do is confirm the shank matches your hardy hole before ordering, and inspect the cone when it arrives for casting flaws or a shank that is not square and true.
One more note on fit: a shank that rocks in the hardy hole will ring like a bell and waste your energy. If yours is a hair loose, a shim of steel or a wrap of thin sheet snugs it down. A shank that is too big for the hole is a bigger problem and usually means the listing lied about the size, which is grounds for a return.
If you would rather see how a small solid cone compares to the anvil-horn approach in more depth, I get into that tradeoff in the blacksmith cone buying guide.
The floor-standing cone mandrel
The traditional blacksmith cone mandrel is the big one: a tall cast cone, commonly three to four feet, that stands on the floor or a stump and lets you true rings of nearly any diameter along its length. These are wonderful tools if you do a lot of round work, and they are the kind of thing that gets passed down or fought over at an estate sale.
They are also mostly a used-market item. New cast cones exist from the specialty suppliers, but the bulk of what changes hands is antique. On the I Forge Iron mandrels forum, smiths discussing what these are worth these days describe them as scarce and priced accordingly, with condition and size driving the number more than anything, and at least one smith weighing a floor model around the few-hundred-dollar range. The recurring honest note in those threads is a smith admitting he always thought it would be nice to have one but was never quite sure what he would do with it, which tells you most of what you need to know about need versus want.
If you go antique, inspect it the way you would inspect an old anvil. Look for cracks, especially radiating from the base, because a cracked cast cone is a paperweight. Check that it stands true and does not wobble. Surface pitting and old paint are cosmetic and fine. A cone that has been dropped and has a chunk missing from the taper loses the very continuity that makes it useful. The same buy-it-right instincts I use on cast iron in general apply here, and if you want that mindset spelled out, the anvil buying guide is the same logic on a bigger casting.
I will be straight with you: I have never owned a floor cone, and I have never once wished I did badly enough to buy one, because the horn and a hardy-hole cone cover my work. If your work is different, a good floor cone is a joy. Just do not let the romance of a big old iron cone talk you into three hundred dollars of tool you will use twice a year.
The horn you already own
Before you buy anything, take an honest look at your anvil, because the horn is a cone you already paid for. Every ring I size, every taper I true, every scroll I start begins on Bessie's horn. For a beginner especially, the smart money is not a cone mandrel at all. It is a solid anvil with a good horn and a clean hardy hole, and then a cheap hardy-hole cone later if and when round work becomes a real part of what you make.

If you are still shopping for that anvil, a single-horn pattern gives you the horn for curves and the hardy hole to drop a cone into down the road. A budget single-horn like this one is the kind of do-everything base I would rather see a new smith spend on than a specialty cone:

That is the priority order I would defend to anyone: anvil first, tongs and a hammer, then forming tools like a swage block or a cone once you know what you actually forge. If you are building out the round-forming side of the shop more seriously, the blacksmith swage block buying guide is the natural next tool after a cone, because a swage block handles the cupping and dishing a cone cannot.
What owners say
For gear I have not run down in my own shop, here is what the forums actually report, attributed so you can read it yourself.
On the small hardy-hole cones, owner signal is genuinely thin and mixed, which is worth stating honestly. Buyers treat them as light-duty and get years out of them when they keep the blows moderate, but the recurring complaint on the import listings is inconsistent quality and vague specs, which is why I keep hammering on confirming the shank size before you order.
On floor-model cones, the consensus from the I Forge Iron mandrels forum is clearest. In the thread on floor model cone mandrels, smiths treat them as prized but genuinely optional, and the same forum's discussion of what cone mandrels are worth these days lands on scarcity and condition driving price, with more than one smith openly questioning whether they would use one enough to justify the cost. That is the useful takeaway: the people who own them like them, and the people deciding whether to buy keep talking themselves out of it. Both groups are right for their own work.
Nobody in these threads treats a cone as a first-purchase essential. The tool is a specialist, and the community reflects that.
Safety notes I will not soften
A cone mandrel is round work, and round work rolls. When you true a ring on a cone, keep your free hand and your tongs clear of where a mis-hit will send the piece, because a hot ring skidding off a cone will find your forearm. Work at a good forging heat so the steel moves under moderate blows instead of tempting you to swing hard at cold metal on a light cast cone that can shatter.
And the standing rule in my shop, cone or no cone: eye protection rated to ANSI Z87.1, every heat, no exceptions. I learned the hard way years ago quenching a blade in cold oil in a cotton shirt with no face shield, and the flare took my eyebrows and nearly my eyesight. Scale flies off round stock as readily as flat, so natural-fiber clothing over synthetics near the forge and safety glasses on your face are not optional. If you want the full rundown, the blacksmith safety gear guide is where I put it all.
What I would tell a friend
If you asked me across the bench, here is the short version. For almost everyone reading this, skip the floor-standing blacksmith cone mandrel and use your anvil's horn. When round work becomes a regular part of your shop, buy a small hardy-hole cone like the 1 inch metal-forming cone (paid link), confirm the shank fits your hardy hole, and treat it as the light-duty tool it is. Only chase a big floor cone if you make rings in volume and you find a sound casting at a fair price, and even then, inspect it for cracks like your money depends on it, because it does.
The one to skip is any cone, big or small, bought on romance instead of need. The one to buy is the cheap hardy-hole cone, later, once your own work tells you it is time. And the note that matters most is the boring one: fit the shank, keep the blows moderate, and wear the glasses. For more forming and shaping tools in the same corner of the shop, the More from the shop hub is where the rest of these live.