Here is the article.
Blacksmith cone tools trip up more new smiths than almost any other shape in the shop, because the word covers two very different tools that get sold under the same name. If you came here to buy one, here is the short version before the detail: for a home shop, the tool you almost certainly want is a one inch hardy cone mandrel that drops into the hardy hole of the anvil you already own, not a waist high freestanding floor cone. A good hardy cone does ninety percent of what a floor cone does for a fraction of the money and none of the floor space, and it forms and trues rings far more consistently than freehanding them over the anvil horn.
I want to be straight about what this guide is and is not. I own and use hardy tools, and I have formed plenty of rings and collars over both my anvil horn and a borrowed cone, so I can speak to how these tools behave under a hammer. But I have not run every model below down in my own shop, and I will not pretend I have. The picks lean on published specs from the makers, owner reports from the forums, and general shop experience about what makes a shaping tool worth owning. Where the signal is thin, I will say so.
What a blacksmith cone actually is
A blacksmith cone is a tapered round tool you hammer stock against to open, form, and true curves. Wrap a bar into a rough ring, slide it down over the cone until it wedges, and hammer the high spots. Because the cone is a continuous taper, every diameter from the tip to the base is available, so you can walk a ring up or down the cone to hit an exact size and knock it perfectly round. That is the whole trick, and it is why a cone makes rings, collars, eyes, and cuffs come out consistent in a way that fighting them over the horn rarely does.
There are two families of the tool, and the confusion between them is where money gets wasted:
- The hardy cone mandrel. A cone maybe ten to thirteen inches long on a square shank that fits a one inch hardy hole, or gets clamped in a vise. This is the everyday tool for a home shop. It sits in your anvil when you need it and goes back on the rack when you do not.
- The floor cone (also called a cone mandrel or big cone). A freestanding cast or forged cone that stands anywhere from about three to four feet tall and weighs a couple hundred pounds. This is a production and architectural tool, built for forming big rings and heavy scrollwork all day. It is a wonderful thing to own and a genuine luxury for most hobby smiths.
You will also hear "bickern" and "bick iron." A bickern is really a small horizontal horn that mounts in the hardy hole, a stand in for the anvil's horn rather than a vertical cone. Close cousin, different job. Both live in the same family of hardy shaping tools, which I cover more broadly in the anvil hardy tools guide.
How the common cones compare
Only published figures are in this table. Where a maker does not state a number, it says not published rather than a guess. The Amazon budget cone specs come from the seller listings; the forged figures come from the makers' own pages, cited below.
Scroll horizontally to see all columns.
| Cone | Type | Overall length | Base diameter | Shank | Material |
|---|---|---|---|---|---|
| Budget hardy cone mandrel (import) | 1 in hardy | about 13 in | about 4 in tapering to a point | 1 in square, ~3 in | 1018 steel |
| Front Step Forge cone mandrel | 1 in hardy | 13 in | 3 in tapering over 8 in | 1 in hardy | forged 4140 |
| Iron Mountain Forge cone mandrel | 1 in hardy | not published | not published | 1 in hardy | not published |
| Traditional floor cone | freestanding | roughly 36 to 48 in | varies | none | cast or forged steel |
Sources for the forged figures: Front Step Forge publishes the 4140, three inch over eight inch taper, thirteen inch overall on a one inch stem; Iron Mountain Forge lists a one inch hardy cone at ninety dollars but does not publish dimensions or alloy. Floor cone heights come from the range described across Blacksmiths Depot's cones and bickerns listings and the I Forge Iron mandrel threads.
The hardy cone mandrel most home shops actually want
This is the one I would put on a beginner's rack. It costs the least, stores the easiest, and it turns your existing anvil into a ring former the minute you drop it in the hardy hole. If you make hooks, rings, chain, curtain rods, hardware, or anything with an eye or a collar, this earns its keep fast.
The budget end is a flood of near identical imports, sold as a "blacksmith anvil mandrel metal forming cone" for a one inch hardy hole. The listings describe roughly a thirteen inch overall length, a cone about four inches at the base tapering to a point, a three inch square shank, and 1018 steel. That is a mild steel cone, and for a cold forming and shaping mandrel that is fine, because you are working hot stock against it and not asking the cone itself to hold an edge. Two that show up live and match their listings are the generic forming cone (paid link) and the Rogierra style anvil cone mandrel (paid link). Price talk on these stays qualitative on principle, but they sit firmly in the budget tier.
The honest tradeoff on the imports: fit and finish vary unit to unit. The common complaints are a shank that needs a little grinding to seat cleanly in a tight hardy hole, and a base that is not perfectly concentric. Neither is fatal for ring work, but you may spend twenty minutes with a file the day it arrives. If you want a cone you never have to think about, a domestic forged 4140 cone from a maker like Front Step Forge or Iron Mountain Forge is the step up. You pay more, you get published alloy, a cleaner grind, and a shank cut to actually fit. For a tool that lives in your anvil for the next twenty years, that is money I would spend without much argument.
Whatever you buy, check the shank against your hardy hole before you order. Most of these are cut for a one inch hole. If your anvil runs a different size, measure first. A cone that rocks in the hole is worse than no cone, because a loose hardy tool jumps under the hammer.
The big floor cone, and why you probably do not need one yet
The floor cone is the tool people picture when they imagine a "blacksmith cone," the tall standing spike you see in old shop photos. It is a real production tool, and if you form large rings, tire, or architectural scrollwork it is worth every pound. But for a home hobby shop it is usually the wrong first purchase, for three plain reasons.
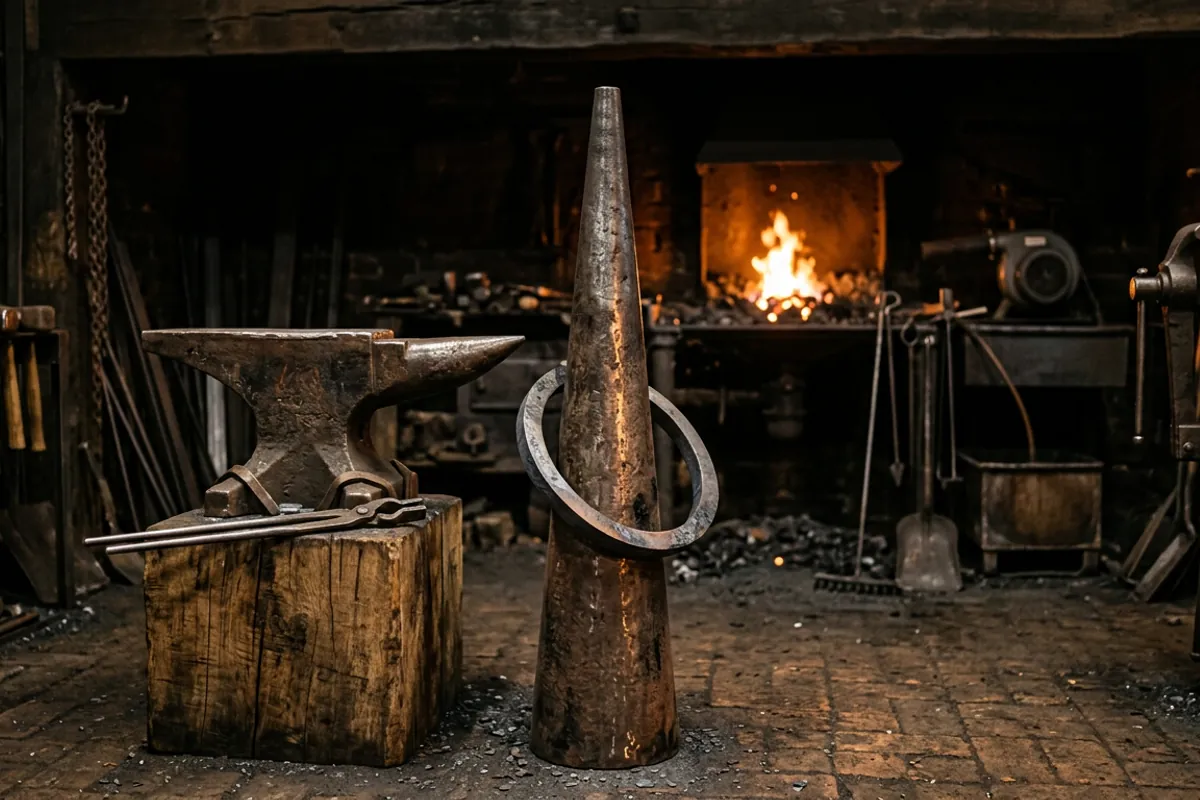
First, space and weight. A floor cone is a couple hundred pounds of steel that stakes out its own patch of floor permanently. In a two car garage shop that is a lot to give up for a tool you might use a few times a month.
Second, price and availability. Good floor cones are not cheap, and the used market for them is thin and heavy to ship. You see them come up on the forums and at hammer ins, but a decent one holds its value, so you are not going to stumble on a bargain the way you sometimes do with an anvil.
Third, and this is the one people skip: a hardy cone plus your anvil horn already covers most of what you would use a floor cone for. The floor cone wins on big diameters and on volume, and if you are doing neither, it mostly wins on looking impressive in the corner. Retailers like Centaur Forge and Blacksmiths Depot carry them if you get to that point, but I would not put it on a starter list. Buy the floor cone when a specific job you keep taking on demands it, not before.
Your anvil horn already does half the job
Before you buy any cone, understand what your anvil's horn already gives you, because it is the free version of this tool. The horn is a tapered cone lying on its side. You can start almost every ring on the horn, opening the curve and rounding the bend, and for a lot of small work that is all you need. Where the horn falls short is truing a closed ring to an exact diameter and keeping it perfectly round, because you cannot slide a closed ring down a horn that is attached to a big block on one end. That is exactly the gap a cone fills.
So the honest progression for most smiths is: learn to use the horn you have, add a hardy cone when ring work starts to feel fiddly, and only consider a floor cone if volume or size forces the issue. A bigger anvil helps here too, because a heavier anvil generally carries a longer, more useful horn. If you are still shopping for that anvil, a budget single horn anvil gives you a usable horn and a hardy hole to hang a cone in later, and I walk through choosing one in the anvil buying guide.

One safety note that matters more on cones than on flat work. When you hammer hot stock against a round tapered surface, blows deflect. A flat face throws a mishit straight up; a cone can throw it sideways, and a ring that is not seated can spring off the tip. Keep the work wedged, keep your tong hand committed, and wear real eye protection rated to ANSI Z87.1 every time, not just when you remember to. On a floor cone the tip sits at roughly waist to chest height, which is exactly where a bare point can catch you when you turn around, so mind it and cap it if you have to walk past it all day. And keep the cotton on and the synthetics off near the forge. I lost my eyebrows early on standing too close to a flare up in a shirt that should have been natural fiber, and none of that gear is optional in my shop now. More on what actually earns a place in the PPE drawer is in the safety gear guide.
What owners say
For the cones I have not run down myself, here is what the forums report, attributed and weighed against shop experience rather than dressed up as a bench test.
On the budget import hardy cones, owner signal is genuinely positive for the money, with the caveat above about fit. Buyers repeatedly report the cones hold up to hot ring work and take a beating, while also noting the shank sometimes needs cleanup to seat. The recurring theme across the I Forge Iron mandrel forum is that a mild steel cone is perfectly adequate for shaping, because the tool is a form, not a cutting or striking edge. Nobody there frets about hardness on a cone the way they would on a hardy cutter.
On floor cones, the consensus across threads like Question about floor cone mandrels leans the same way I do: they are wonderful to have and rarely essential, forged is preferred over rough cast, and the used ones are heavy, pricey, and slow to find. Several long time smiths in those threads make the same point I made above, that a hardy cone plus the anvil horn covers most hobby work, and that the floor cone is a volume and large diameter tool. I take that as solid, because it lines up with how the tool actually behaves under a hammer. If you form rings all day for a living, the story flips and the floor cone pays for itself, but that is not most of us.
Where the signal is thin is on the domestic forged hardy cones from the smaller makers. There are simply fewer of them out there, so you get maker descriptions and scattered praise rather than a deep pool of reviews. That is not a knock on the tools, just an honest read of the evidence. If you want a forged cone, buy it for the published alloy and the fit, not because a hundred strangers vouched for that exact model.
What I would tell a friend
Buy the hardy cone mandrel, skip the floor cone until a job forces it, and learn your anvil horn first. If you want to spend the least and are willing to file a shank, one of the imports like the generic forming cone (paid link) or the Rogierra style mandrel (paid link) will form rings for years. If you want to buy once and forget it, pay up for a domestic forged 4140 cone with published specs and a shank cut to fit. Either way, match the shank to your hardy hole before you order, keep the work seated so it cannot spring off the taper, and keep the Z87.1 glasses on. A cone is one of the cheapest tools that visibly improves your work, which is exactly why it belongs on the short list next to your first swage block and tongs. For more shop tool breakdowns, the More from the shop hub collects the rest.