I have enough verified material. Writing the article now.
Here is the article:
If you are buying your first anvil hardy tools, the one I would put in the hardy hole before anything else is a hot cut. It earns its keep the first day, it is cheap, and it teaches you how a bottom tool wants to be used. After that a bottom fuller, and only then the fancier stuff. That is the short version, and the rest of this guide is the long version: what these tools are, which ones are worth buying versus forging yourself, and how to keep from ordering a shank that does not fit your anvil.
One honest note before we go further. I own a hot cut and a couple of fullers I made myself over the years, so I can speak to how these tools behave on the anvil. But the specific imported sets and standalone cutters below are not tools I have run down in my own shop. What follows leans on published listing specs, owner reports from the forums, and general experience with what makes a bottom tool worth owning. I will tell you plainly where a claim is mine and where it is the forums talking.
What a hardy tool actually is
A hardy tool is any tool with a square shank that drops into the square hole near the heel of your anvil. That square hole is the hardy hole, and the square shank is the whole trick: it keeps the tool from spinning when you drive hot steel into it. The classic hardy is a hot cut, an upward-facing chisel you lay hot bar across and drive down with hammer blows until the metal parts. From there the family grows: bottom fullers for spreading and necking down stock, bending forks for scrolls and right angles, cones and stakes for shaping, and swages for rounding.
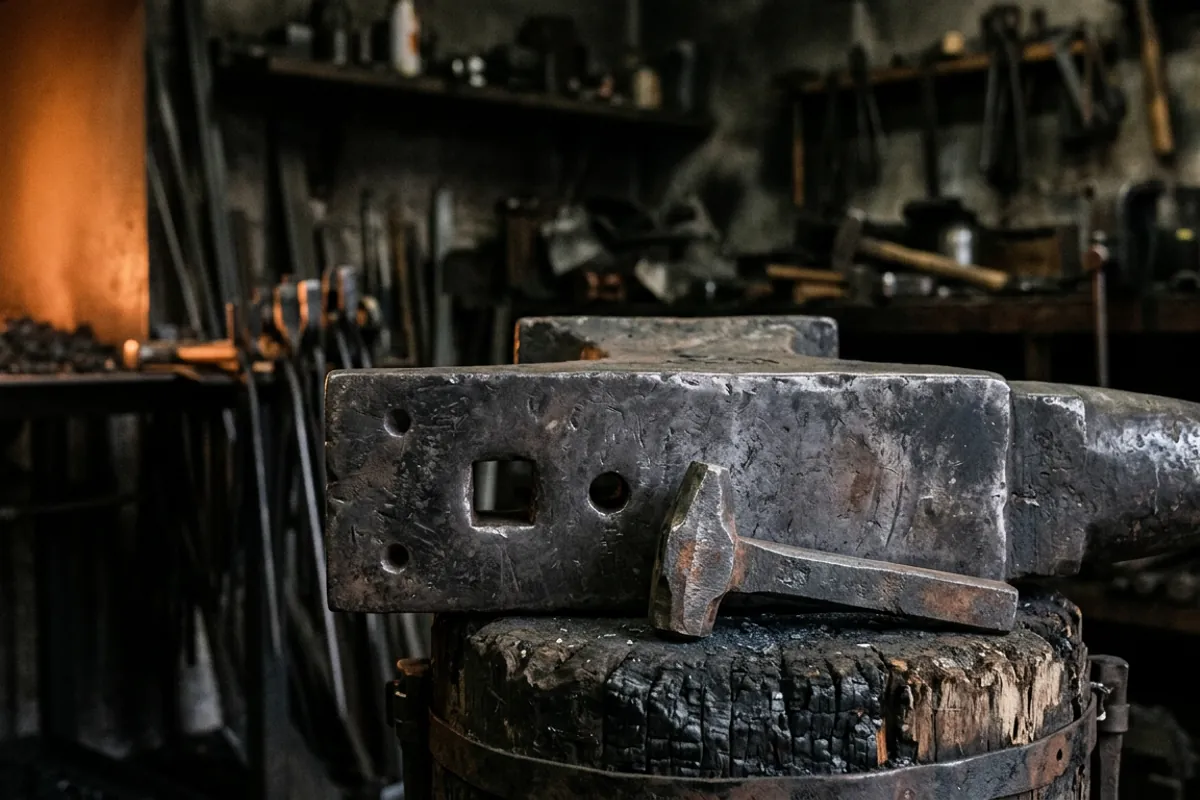
Do not confuse the hardy hole with the little round hole beside it. That round one is the pritchel hole, used for punching and as a bolster when you drift holes. Hardy tools go in the square hole only. The dimensions of both holes, and why there is no standard to appeal to, are in the pritchel hole reference. If you want the full anatomy of the tool they all live in, I walk through the horn, face, hardy hole, and pritchel hole in the anvil buying guide, and you can browse the rest of the anvils topic hub from there.
The other thing worth saying up front: a hardy tool is a consumable relationship with your anvil, not a precision instrument. It gets hammered, it mushrooms, it gets dressed with a file or grinder, and eventually it gets replaced or reforged. That framing matters when you decide how much to spend.
The field at a glance
Here is the honest state of what you can buy off the shelf. These are almost all imported, unbranded or lightly branded forged tools, and most listings publish the shank size and the piece count but nothing about steel type or hardness. Where a maker does not state a figure, I have written "not published" rather than guess it, because a made-up hardness number on a cutting tool is exactly the kind of thing that gets a reader hurt or wastes their money.
Scroll horizontally to see all columns.
| Tool or set | Shank size | Pieces | Included | Price tier |
|---|---|---|---|---|
| Standalone hot cut hardy | not published on title | 1 | Hot cut only | Budget |
| 3/4 inch 3-piece set | 3/4 in | 3 | Hot cut, creasing stake, spring fuller | Budget |
| 1 inch 3-piece set | 1 in | 3 | Hot cut, creasing stake, spring fuller | Budget |
| VEVOR single-horn anvil (for hole reference) | see feed | 1 | Anvil body with 1 in hardy hole class | Budget |
Steel type and hardness are not published on any of these listings, and I would not trust a number if it were. Treat them as functional forged tools that will need dressing, not as heat-treated tool steel with a guaranteed spec.
The hot cut hardy, the one I would buy first
A hot cut is the tool that makes the hardy hole worth having. You bring your bar to a bright working heat, lay it across the upturned chisel edge, and drive it down with the hammer until you are almost through, then break the last skin over the edge of the anvil or with a light final tap. Done right it is faster and safer than sawing cold stock, and it is the single most-used bottom tool in most beginner shops.
For a plain standalone cutter, the hot cut hardy shank cutter (paid link) is the kind of thing I mean: a single forged chisel on a square shank, nothing clever, cheap enough to be a consumable. The honest tradeoff on all of these budget cutters is the same. The steel and heat treat are unknown, so the edge will not hold like a properly hardened tool steel cutter from a name maker, and you will be dressing the edge with a file more often. That is fine for a hobby shop. Just do not lay a good hammer face or a good knife edge across a hot cut, and never cut cold on it. A hot cut is for hot steel. Cutting cold stock on a thin hardened edge is how you chip the tool and launch a shard.
Two safety points I will not soften. First, cutting hot steel throws bright scale and the occasional hot fragment, so eye protection rated ANSI Z87.1 is not optional here, and natural-fiber clothing over synthetics near that heat is the standard for a reason. I go into the whole PPE picture in the blacksmith safety gear guide, and I mean it: I lost my eyebrows to a quench flare early on because I stood too close in a cotton shirt with no face shield, and eyes are not something you get a second try at. Second, keep your holding hand and your tongs out of the line of the cut, and never cut all the way through in one spot with your hand downstream of where the piece will fly.
Bottom fullers and the multi-tool sets
Once you have a hot cut, the next tool that actually changes what you can make is a bottom fuller. A fuller has a rounded working surface, and you use it to neck down stock, spread metal in a controlled line, or set a shoulder. Pair it with a top fuller and a striker and you can move a lot of metal fast, but even solo on the anvil it is how you start tapers and isolate mass for things like hooks and hammer eyes.
This is where the bundled sets start to make sense. The 3/4 inch 3-piece hardy set (paid link) packages a hot cut, a creasing stake, and a spring fuller, and the 1 inch 3-piece set (paid link) is the same three tools sized up for a larger hole. For a beginner who wants to try a few operations without forging tools first, a set like this gets you moving for not much money. The creasing stake in particular is handy for leaf work and light forming, and the spring fuller lets you fuller without a striker because the top and bottom halves are joined.
The honest read: these are budget forged tools with unpublished steel and heat treat. Owners consistently report they work fine for hobby use but that the fit in the hole is often loose or occasionally tight, and the edges are soft. Neither is a dealbreaker. A loose shank gets shimmed, a tight one gets filed, and a soft edge gets dressed. If you are the type who would rather learn to make your own, a hardy tool is one of the best early projects there is, and I put it on my short list in the forging project guide precisely because you make a tool you will actually use while learning to draw out and set a shoulder.
Matching the shank to your hardy hole
Here is the mistake I see more than any other with anvil hardy tools: someone buys a nice hot cut and it does not fit. Hardy holes are not one size. Common sizes run roughly 3/4 inch, 1 inch, and 1-1/4 inch square, with plenty of vintage anvils landing at odd in-between measurements because the hole was drifted by hand a century ago. Small anvils tend toward smaller holes, big anvils toward bigger ones. My own 148 lb Trenton, Bessie, has a 1 inch hole, but I would not assume yours matches without measuring.
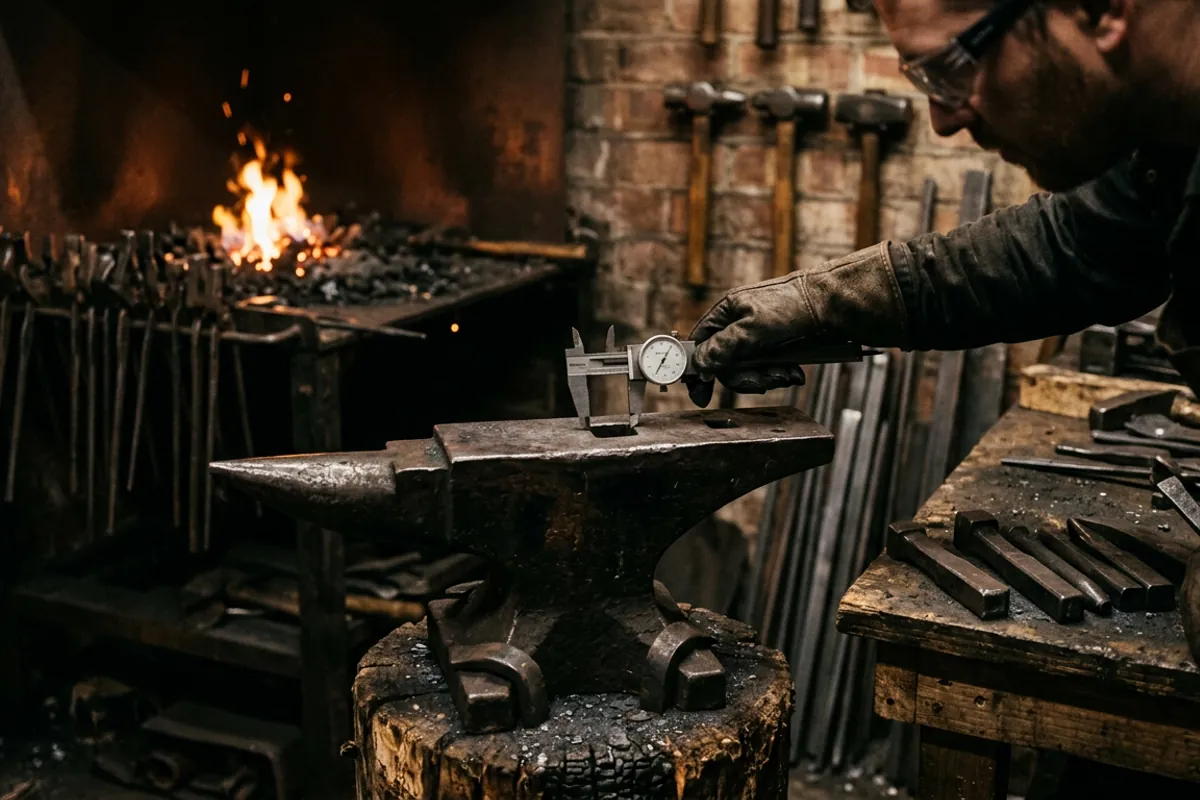
So measure first. Put a caliper or a good rule across the hole, corner to flat, and buy the shank that matches. A shank slightly under the hole is workable because you can shim it with a wrap of steel or a folded strip; a shank over the hole is a paperweight until you grind it down, and grinding a hardened shank square and true is more work than it sounds.
If you are shopping a budget cast anvil to go with these tools, the imported single-horn anvils in the VEVOR line are the usual pairing, and most of them run a hardy hole in the 1 inch class, which matches the 1 inch sets above. I go deeper on which of those anvils are worth it and which to skip in the VEVOR anvil buying guide, and how to size the anvil itself in the anvil weight guide.

One more fit note. Deep hardy holes on heavy anvils can swallow a short shank, leaving the tool wobbling on a stub. The old fix, and still the best one, is to forge or file a shoulder or flange on the shank so it seats on the anvil face and the shank locates it in the hole. The forum threads below are full of smiths doing exactly this, and it is worth reading before you assume a loose tool is a defective one.
What owners say
For the imported tools here, I did not run them down in my shop, so this is the forums talking, weighed against what I know about how bottom tools behave.
On the I Forge Iron hardy tool suggestions thread, the running consensus is the same order I gave at the top: get a hot cut first, add a fuller, and hold off on the specialty stakes until a project actually calls for one. Nobody there treats the cheap imported sets as heirloom tools, but plenty of hobby smiths report using them for years after a little dressing.
Fit is the recurring complaint, not failure. Across the I Forge Iron methods for fitting hardie tools thread, the shared wisdom is that a slightly loose shank is normal and expected, and the standard fixes are shimming, upsetting a flange, or forging the shank to fit the specific hole. That matches what I have seen: hardy holes vary enough that mass-produced shanks cannot fit them all tightly, so a good tool that arrives loose is not a bad tool.
Browse the I Forge Iron show me your hardie tools thread and you notice something else worth saying out loud: most of the tools smiths are proudest of are ones they made. That is not gatekeeping. It is that a hardy tool is simple enough to forge early and useful enough that making one teaches you real skills. The basic definition and the reason the shank is square, if you want the plain reference, is laid out well on the Wikipedia hardy tool page.
Where owner signal is genuinely thin is on the exact imported sets by listing. These get rebranded and relisted constantly, so a given ASIN rarely has a long review history, and I would not put much weight on a handful of five-star reviews on a three-month-old listing. Buy them as cheap functional tools, not as a known quantity.
What I would tell a friend
Buy a hot cut first. It is the tool that makes the hardy hole earn its place, it is cheap, and it teaches you how a bottom tool works. Add a bottom fuller when you start wanting tapers and shoulders, and let the specialty stakes wait until a project asks for one. The imported standalone hot cut (paid link) or a 3/4 inch (paid link) or 1 inch (paid link) three-piece set will all get a beginner moving, as long as you buy the shank size that matches your hole. Measure the hole before you order. That is the whole game.
Two things to skip. Skip the big specialty sets with six or eight tools you cannot yet name a use for, because half of them will sit in a drawer. And skip cutting cold stock on a hot cut, ever, no matter how much of a hurry you are in. The one that matters most is not a buying note at all: eye protection rated Z87.1 every time you drive a cut, natural fibers near the heat, and your hands and tongs out of the line the piece will fly. Cheap tools are forgiving. Hot steel and a chisel edge are not. If you want to keep going down the anvil rabbit hole, the anvils topic hub has the rest of it, from picking the anvil itself to the tongs that hold the work.