If you want the short answer first: for most home shops the best anvil stand is a hardwood stump you cut yourself, bolted hard to the anvil and set at your own working height. If you cannot get a stump, the honest second choice is a bolt together steel stand with a tool rack, and the tripod stands sold to farriers are the premium option that solves a problem most hobby smiths do not have. I have run anvils on a stump, on welded steel, and on a stack of bolted timbers over about twenty five years, so I can speak to how each behaves under a hammer. What I cannot do is claim I have run down every stand for sale today, so the specific products below lean on published specs and what owners report, weighed against shop experience.
The four jobs a stand has to do
A stand looks like the dumbest object in the shop. It is a block that holds a heavier block. But it does four jobs, and a stand that fails any one of them will cost you more sweat than a bad hammer will.
It puts the face at your height. Wrong height is the fastest way to a sore back and inconsistent hammer blows, and you feel it in the work long before you feel it in your spine.
It holds the anvil dead still. Every bit of movement is energy that went into shifting the anvil instead of moving hot steel. An anvil that skates, rocks, or thumps on its stand is stealing from you on every blow. This is the whole ballgame, and it is the thing beginners skip.
It couples the anvil to mass. A light anvil bolted tight to something heavy behaves like a heavier anvil. A heavy anvil sitting loose on a good stand behaves like a lighter one.
It keeps your tools where your hand already is. Hardy tools, a hot cut, a brush, tongs. A stand with a rack on it saves a hundred steps a day. If you are still sorting out which hardy tools you actually need, I went through that in the hardie tools guide.
Everything else, including how pretty it is, comes after those four. More on the anvil side of the equation lives on the anvils topic hub.
Setting the height, and why knuckle height is only a starting point
The old rule, the one printed in the old blacksmithing manuals, is knuckle height: stand up straight, let your arm hang, clench your fist, and the anvil face should just touch your knuckles. Shady Grove Blacksmith's stump preparation writeup puts it at top knuckle height, which is a touch higher and matches what most smiths I know settle on.
Treat that as the starting point, not the law. Height is personal, and it moves with the work:
- Heavy stock and sledge work want the face lower. You need to get over the hammer and use your body weight.
- Knife work and small detail want it higher. You are watching a bevel, not swinging from the shoulder, and a low anvil will have you hunched over all afternoon.
- Your boots and your floor count. A rubber mat and a pair of work boots can move the face an inch or more, so set the height wearing what you actually wear at the forge.
The way I do it: put your hammer in your hand, stand square to where the anvil will live, and have somebody measure from the floor to your knuckles. Then build the stand about an inch low. Shimming up with plywood or washers is a ten minute job. Cutting a stump shorter is permanent, and cutting it twice is how you end up with firewood.
One thing that trips people up when they shop: some makers publish the stand height, and some publish the floor to face height with an anvil already on it. Alec Steele's shop, for instance, lists its tripod stand at 30, 32, or 34 inches measured floor to anvil face, including the 11 inch height of their anvil. Know which number you are reading before you order, or you will be an anvil height off.
Bessie, my 148 lb Trenton, sits so her face lands right at my knuckles. She has been there long enough that anything two inches off feels wrong within ten minutes.
The field, compared
Only published figures below. Where a maker does not state a number, it says so, because guessing at a load rating and printing it is how somebody gets hurt.
Scroll horizontally to see all columns.
| Stand | Type | Published height | Material | Hold down provision | Price tier |
|---|---|---|---|---|---|
| Shop built hardwood stump | Solid wood | You cut it to fit | Elm, sycamore, honey locust, walnut, mulberry, sugar maple (Shady Grove) | Lag screws 1/2 inch diameter, 5 to 8 inches long, or through bolts | Cheapest |
| Bolted timber stack or sand box | Laminated wood, or a box filled with sand | Built to fit | Construction lumber, sand, threaded rod | Through bolts, banding, straps, or sand packed around the base | Cheap |
| Imported bolt together steel base, sold under several names | Welded and bolted steel | Not published by the maker | Steel, powder coat | Not published, plan to drill and bolt | Budget |
| Imported steel stand with adjustable legs | Steel, adjustable legs | Not published by the maker | Steel, powder coat | Not published, plan to drill and bolt | Budget to mid |
| Anvil Brand AB steel tripod | Steel tripod | Legs adjust 18 1/2 to 24 1/2 inches | Steel, with tool tray and adjustable vise mount | Capacity not published | Premium |
| Steele anvil tripod | Steel tripod | 30, 32, or 34 inches floor to face with their 11 inch anvil | 2x3 tube, 0.125 wall | Mounting holes for the anvil, 5/8 inch holes in the feet for staking or bolting to concrete | Premium |
The shop built stump, still my default
A dense hardwood stump is the best anvil stand most people will ever own, and it is usually free. Wood damps the ring, it does not transmit shock back into your wrist the way a thin steel frame can, and it is dead simple to cut to your height.
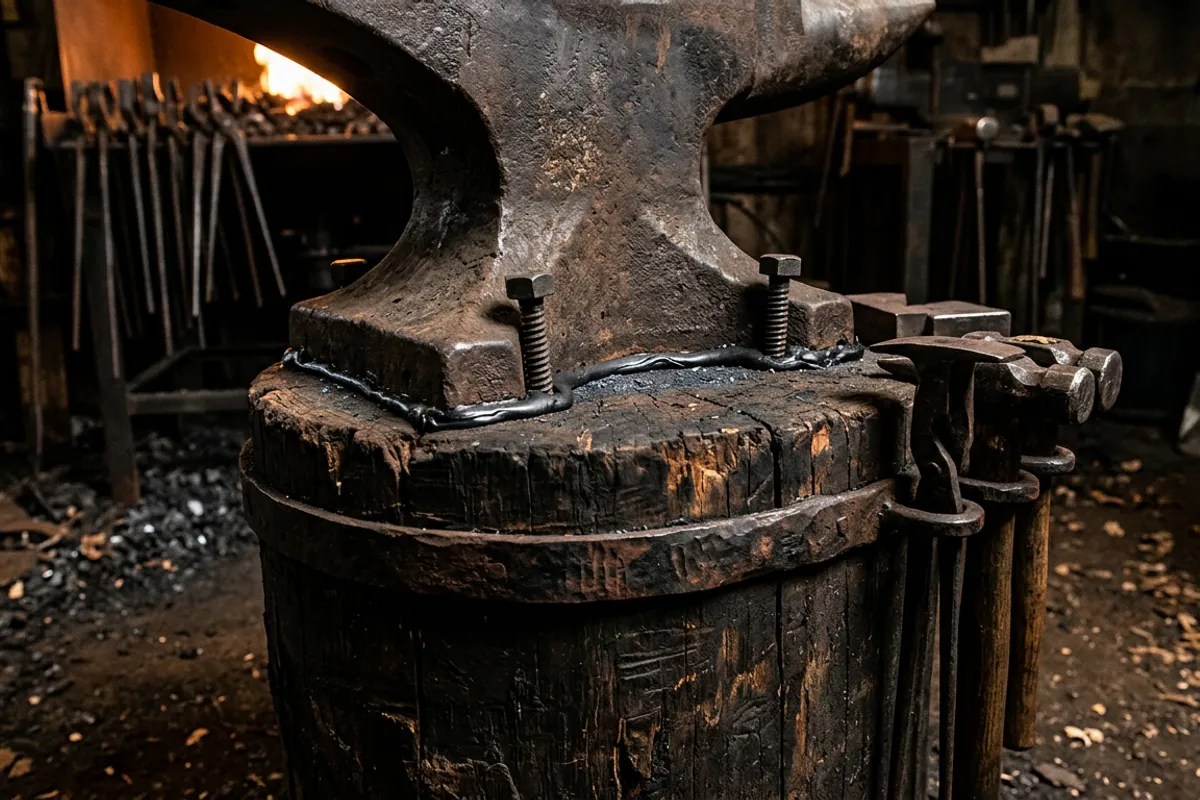
Species matters more than people expect. Shady Grove's guide names American elm as the best if you can find it, then sycamore, honey locust, walnut, mulberry, and sugar maple, and points out that oak and ash are heavy but split easily, while pine and cottonwood are too light to bother with. If your stump is a splitter, hoops around the top and bottom will hold it together, tightened or replaced as the wood dries.
Fastening is where the job is won or lost. That same guide calls for lag screws 1/2 inch in diameter and 5 to 8 inches long in wood that will not split, and through bolts in wood that will. A box of 1/2 by 6 inch hot dip galvanized structural lag screws (paid link) covers a normal stump for the price of a couple of burgers, and galvanized is worth it in a damp shop. Drill your pilot holes, do not just drive them.
Bed the anvil before you tighten anything. A layer of leather, thin lead, or silicone caulk between the foot and the wood lets two imperfect surfaces mate, kills a surprising amount of ring, and stops the anvil from working itself loose. Then tighten the lags down hard and re-tighten them after a week of forging, because the wood will compress.
Two more things I would not skip. Keep the stump off dirt, on concrete or a mat, because a stump wicking ground moisture will rot from the bottom and you will not see it coming. And sweep the top. Hot scale sitting on a wood stand can smolder for a long time before it decides to be a fire, so a bucket of water within reach is not paranoia.
Timber stacks and sand boxes when you cannot get a stump
No stump, no problem. The bolted timber stack is a proven build: 6x6 timbers or doubled 2x12s, drawn together with threaded rod or hex bolts and washers, cut square, anvil lagged to the top. It gives you stump behavior out of lumberyard material.
The variation I like for anyone still fiddling with height is the sand box: build a box on top of your base, set the anvil inside it, and pack sand around the base. Add or remove sand and the height moves, and the sand takes a real bite out of the ring. The cost is maintenance, since sand settles and needs topping up.
Wood does move. One maker on the KnifeDogs anvil stand thread reported his oak tie stand shrinking over about four years in a dry climate until the gaps made it look like an old bridge about to fall down. It still worked, but that is the tradeoff you are accepting with a laminated wood build in dry country. Check the bolts once a year and pull them up snug.
The bolt together steel stands you can actually buy
If you have no stump, no welder, and no interest in becoming a carpenter this weekend, a bolt together steel stand is the practical answer. Two are commonly available:
The fixed height steel anvil and vise base stand with a built in tool holder (paid link) is the plain version: a steel base that ships flat and bolts together, with drop in holders for hardy tools and a tray. The same style with adjustable legs (paid link) costs more and lets you dial the height, which matters if you share a shop, if you switch between heavy work and knife work, or if you are simply not sure yet what height you want.
Honest read on both. The maker does not publish a spec sheet or a load rating I could find outside the sales listings, which is why the table above says not published rather than inventing a number. Owner signal on these specific stands is thin: I could not find forum discussion of them by name, only general discussion of imported bolt together stands, so treat my comments as a read on the type and not on the individual model.
What I would do the day one arrives: put a straightedge across the top, check every weld, tighten everything with the anvil dry fitted, then bed the anvil on silicone or leather and bolt it down. If the whole thing rings like a bell, pack the legs or the base cavity with sand. If it walks on a smooth concrete floor, anchor a foot to the slab or set it on a rubber mat. Steel stands are lighter than wood ones, and light is exactly what you do not want under an anvil.
Tripod stands and who they are really for
Three legs cannot rock. That is the whole argument for a tripod, and on a cracked, sloped, or gravel floor it is a good one. Farriers buy them because they get set down in a different place every day and never wobble.
The Anvil Brand steel tripod publishes legs adjusting from 18 1/2 to 24 1/2 inches, with a tool tray and an adjustable vise mount, which is a genuinely useful pairing if you are also mounting a post vise nearby. The Steele tripod is built from 2x3 tube with 0.125 inch wall, in three floor to face heights, with mounting holes for the anvil and 5/8 inch holes in the feet so you can stake it into dirt or bolt it to concrete. Both are premium priced compared to a stump and a box of lag screws.
The tradeoff is mass. A tripod is a frame, not a block, so unless it is heavily built it will feel livelier under the hammer than wood. Bolting the feet down, per those 5/8 inch holes, is what turns a good tripod into a stand that feels solid. If you never move your anvil and your floor is flat, you are paying for portability you will not use.
Matching the stand to the anvil you own
Stand and anvil are one system, and the lighter your anvil, the harder your stand has to work.
Under 100 pounds, the stand is doing half the job. A 66 lb anvil bolted tight to a heavy stump feels like a different tool than the same anvil sitting loose on a light frame. This is the weight class where beginners most often blame the anvil for what is really a mounting problem.
From 100 to 200 pounds you are in normal home shop territory, and any properly built stand will do. Bessie is 148 pounds and has never asked for more than a stump and four lag screws.
Past 300 pounds the questions change: can you get it up there safely, and will the stand tip while you are trying? Big anvils want a wide base and a low center of gravity, and they want a lifting plan before they want a stand. I go through the sizing question in more detail in the anvil weight guide, and the buying side in how to buy an anvil without wasting your money.
Ring, noise, and the safety side of a stand
An anvil under a hammer is loud. NIOSH sets its recommended exposure limit at 85 dBA averaged over eight hours, and hammer on anvil impacts blow past that without trying. Hearing damage is cumulative and it does not grow back, so muffs or plugs go on before the hammer comes out. Same for eyes: ANSI Z87.1 rated protection, every session, no exceptions. Scale comes off hot steel fast enough to find your eye from across the shop.
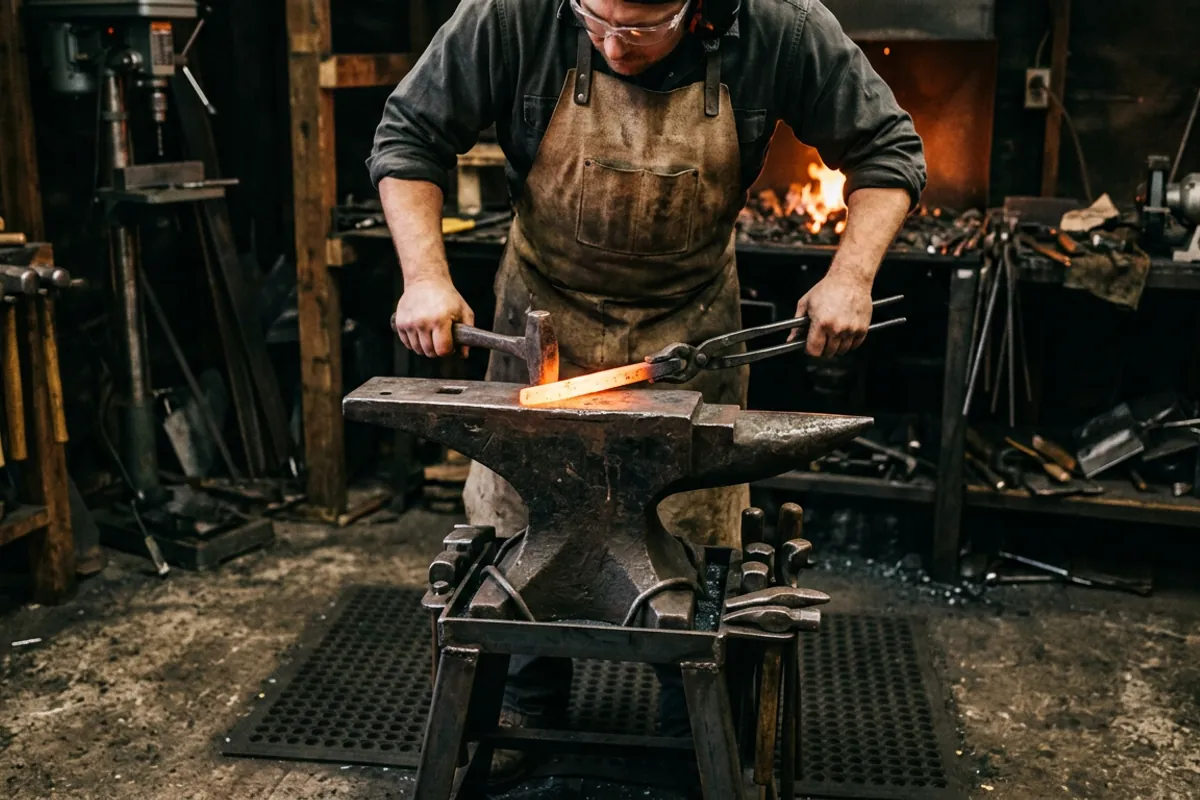
The stand contributes to the noise, and you can fix a lot of it for free. Bedding the anvil with silicone caulk or leather, tightening the hold downs, packing sand around the base, or hanging a length of chain over the waist all take the ring down. A loose anvil is the loudest anvil, so the fix for the noise and the fix for the poor rebound are the same fix.
The mechanical hazards are worth naming plainly. An anvil that overhangs its stand top can tip when you lever on the horn. A stand that walks across a smooth floor ends up somewhere you did not expect, with a couple hundred pounds of steel on top. Anvils get dropped during mounting, which is why boots matter and why two people or a lever with blocking beats being a hero. And keep the stand far enough from the forge that you are not reaching over hot steel to grab a hardy tool.
A 3/4 inch rubber stall mat (paid link) under the stand and in front of it is a cheap upgrade: it stops a steel stand skating on concrete, it saves your knees, and it saves whatever gets dropped. It is not hearing protection and it does not replace bolting the anvil down. For the rest of the kit, see blacksmith safety gear.
What owners say
For gear I have not run down in my own shop, here is what the forums actually report.
On wood versus metal, the long running I Forge Iron thread on the question covers all three camps: logs as the traditional answer, welded steel stands used with rubber pads under the anvil, and box style stands filled with sand. The sand fans make two claims worth repeating, that it damps the ring noticeably and that it lets you adjust height by adding or removing sand, at the cost of sand needing to be topped up over time.
On builds, the KnifeDogs let's see your anvil stand thread is the best photo record I found. Members report 6x6 pressure treated timbers bolted with hex bolts and washers, 2x12 lumber drawn together with threaded rod, 10x10 posts held with ratchet straps, and a concrete filled wooden box that its builder says produces no ring at all. One member wraps logging chain to cut vibration. The complaint side is honest too: the shrinkage problem noted above, and more than one smith who tried a metal stand and went back to wood because the metal felt springy.
On fastening and prep, Shady Grove Blacksmith's stump guide is the most specific source I found, down to lag screw diameter and length, the species list, iron hoops for woods that split, and the note that a shrunk on hoop needs redoing or re driving as the stump dries, and the separate warning to leave room when you rout the anvil's recess, because a tight pocket in a green stump can split it.
Where the signal is thin, I will say so: I found no meaningful forum discussion of the imported bolt together steel stands by name. Plenty of smiths use stands of that general type and are content once they bolt the anvil down properly, but do not read that as a review of a specific model.
What I would tell a friend
Buy nothing yet. Find a dense hardwood stump, cut it so the face lands at your knuckles with your boots on, bed the anvil on silicone or leather, and pull it down with four 1/2 inch lags. That stand will outlast most of the tools you buy this year and it will not cost you a dime beyond the fasteners.
If you have no stump and no way to make one, the bolt together steel stand is the right compromise, and the adjustable leg version is the one to take if your working height is not settled yet. I cannot tell you which brand, because nobody on the forums has said a word about any of them by name, so buy on return policy and check every weld the day it lands. Add sand or a mat if it rings or skates. If you are a farrier, work off a truck, or fight a floor that no four legged stand will sit flat on, a tripod earns its keep, and the ones with staking holes in the feet are the ones to look at.
The safety note I would not let you skip: bolt the anvil down, hard, before you take a single heat. A loose anvil hits worse, sounds worse, and eventually moves when you do not want it to. And put the muffs and the Z87.1 glasses on first, because the stand is the only part of this setup that cannot hurt you and everything else can.