Every new smith I meet asks the same question in some form: what should I make first? Not what anvil, not what forge, not what hammer. Those questions come later, once the shop is half built and the real problem shows up, which is that a pile of tools does not teach you anything until you point it at a job. A forging project is that job. It is a piece of steel with a shape you have decided on before you light the fire, a sequence of moves to get there, and a way to tell whether you got there or not. That last part is what separates a project from an afternoon of hitting hot metal, and it is the whole reason projects are how people learn this craft.
I have been at the anvil for about twenty five years, starting self taught on a cut length of railroad track clamped to a stump, and most of what I know came out of finishing projects badly and then finishing them again. This is a plain explainer, not a shopping list. If you want gear, the getting started hub has the buying side covered. What follows is how to think about the work itself.
What a forging project actually is
A project has four parts, and if any one of them is missing you are just making scrap.
First, a defined finished shape. Not "a hook," but "a J hook, six inches long, from quarter inch round, with a scrolled tail and a flattened, punched mounting tab." You need enough detail that you can look at the cold piece afterward and say whether you hit it.
Second, a stock choice. What alloy, what section, what starting length. Stock is not a detail you sort out at the fire. If you cut your bar too short you cannot un cut it, and beginners cut short constantly because they do not account for the steel that moves sideways when you draw out.
Third, a sequence of operations. Draw, taper, upset, bend, punch, twist, scroll. Written down or at least walked through in your head, in order, with a note about which heat does what.
Fourth, a way to check the result. A ruler, a square, a line scribed on the anvil face, or just the previous one sitting next to it on the bench.
Most beginner frustration comes from having part one and skipping parts two through four. You know what you want it to look like, you grab whatever bar is nearest, and you improvise at the fire until the steel is too short, too cold, and too chewed up to save. That is not a skill problem. That is a planning problem, and planning is free.
Why the first projects are boring on purpose
The classic beginner ladder is boring, and it is boring for a reason. Every one of the traditional first projects isolates one skill so you can fail at it cheaply.
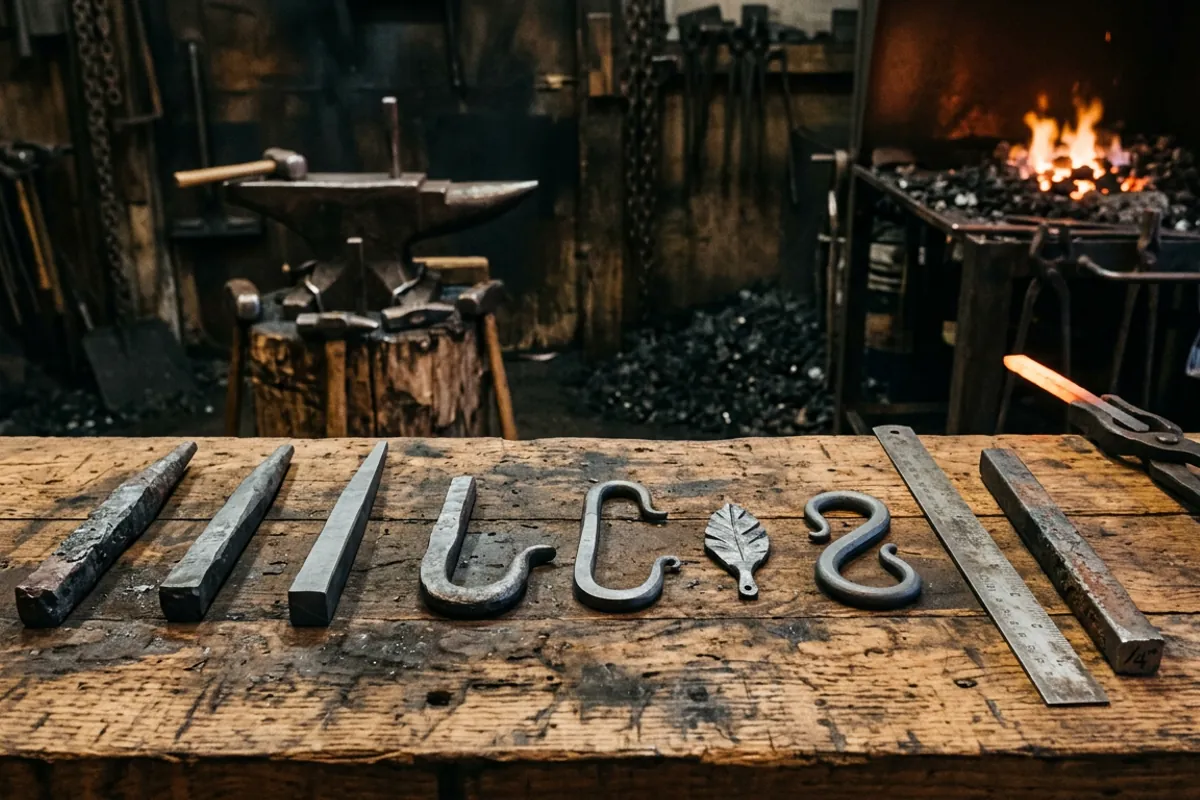
A drawn taper, a square point on the end of a bar, teaches hammer control and how steel behaves under the face. A hook adds a bend and a scroll on top of a taper. A leaf teaches you upsetting and then spreading a mass of steel in a controlled direction. An S hook teaches you symmetry, which is far harder than it sounds. A bottle opener teaches punching and drifting. A fire poker teaches you to work long stock without letting the far end wander.
If you skip that ladder and go straight to a knife, you will spend four hours forging a blade with a wavy spine, an uneven bevel, and a tang you had to weld back on, and you will learn almost nothing except that you are bad at forging knives. Which you knew. Do twenty tapers first. Tapers are cheap, they take ten minutes, and the twentieth one will be visibly better than the first, which is the feedback loop the whole craft runs on.
I still start cold winter mornings with a taper or two on scrap before I touch anything that matters. It is not superstition. It is checking that my hammer is landing flat before I put a piece I care about on Bessie, my 148 pound Trenton, which is the anvil I measure every other anvil against.
Picking stock, and why mild steel is the honest answer
For nearly every early project, plain mild steel is the right material. A36 hot rolled is what most suppliers sell as generic bar, and it forges in a wide, forgiving heat range, does not care much if you overheat it a little, does not harden, and costs little enough that you can throw away a failed piece without flinching. That last property matters more than people expect. If your stock is precious, you will keep hammering on a piece that should have gone in the scrap bucket ten minutes ago, and you will practice your mistakes instead of your corrections.
Round bar and square bar behave differently under the hammer, and it is worth doing the same project in both. Square draws faster and holds a crisp corner. Round wants to roll and needs you to work it toward square before you draw it, then take the corners back off if you want it round again. Quarter inch and three eighths inch stock is the sweet spot for hand forging small work. Half inch is real work with a hand hammer and will teach you what a heavier hammer is for. Anything over five eighths by hand, alone, and you will spend most of the heat moving very little steel.
Two rules about stock that are not negotiable.
Do not forge galvanized or plated steel. Zinc coating burns off as zinc oxide fume and gives you metal fume fever, which feels like a bad flu and puts people in urgent care. Old galvanized pipe, plated hardware, and a lot of salvaged fasteners are coated. If you cannot confirm the coating, do not put it in the fire.
Do not assume salvage is what you hope it is. Leaf springs are usually a medium carbon alloy, coil springs likewise, but "usually" is not a heat treat spec. Railroad spikes marked HC are around 0.30 percent carbon, which is high for a spike and low for a knife, and that is exactly why spike knives look great and cut poorly. I wrote about that honestly in the railroad spike knife guide. Use salvage for practice and for decorative work. Buy known steel when the performance of the finished piece matters.
Planning the heats
The single biggest difference between a smith who has done a project ten times and one who has done it once is how much work comes out of each heat.
Mild steel forges well from roughly a bright yellow orange down to a dull red. Practically, you are working from about 2100 F down to about 1600 F, and once the piece is a dull cherry you are done for that heat. Keep hitting it below that and you get poor movement, you beat the surface up, and on higher carbon steels you risk cracking. Steel goes back in the fire. It always goes back in the fire. Beginners are weirdly reluctant to reheat, as if it were cheating.
So plan the piece in heats. A simple J hook might be: heat one, draw the taper. Heat two, finish and refine the taper, start the point curl. Heat three, scroll the tail. Heat four, flatten the tab and punch it. Heat five, bend the hook body over the horn. Heat six, adjust and true everything up. Six heats, and if the first one takes you three tries, that is fine, that is what the number is for.
Thinking in heats also tells you where to stand and what to have in reach before the steel is hot. Punch on the bench, drift next to it, wire brush by the anvil, quench bucket where you can reach it without turning around. Fumbling for a tool with a yellow hot bar in your tongs is how people get burned and how projects get ruined, in that order.
The moves every project is made of
Nearly all forging is a small vocabulary combined in different orders.
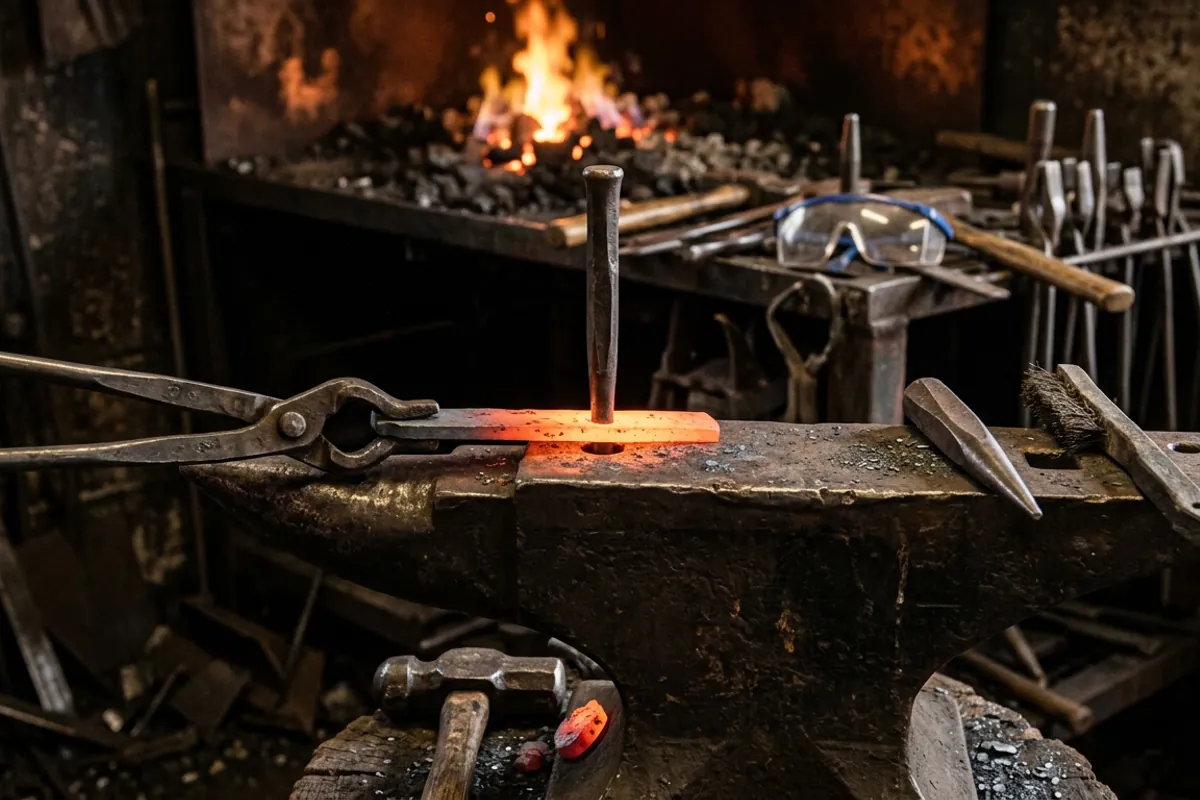
Drawing out makes stock longer and thinner. You work over the far edge of the anvil or the horn to move metal fast, then flatten on the face to true it up.
Upsetting makes stock shorter and fatter, usually by heating a local spot and driving the bar into itself, either on the anvil face or by striking the end. It is the slowest move in the book and the one beginners avoid, which is why so many hand forged leaves are thin and sad.
Bending is either over the horn for curves, over the edge for sharp corners, or in a vise for controlled angles.
Punching and drifting makes holes without removing steel. You punch most of the way through from one side, flip, punch the slug out over the pritchel hole, then open the hole to shape with a drift.
Twisting is done in a vise with a wrench, on an even heat, and it is unforgiving. A cold spot in the bar will not twist and a hot spot will twist twice as much, so you heat the whole twist zone evenly and go quickly.
Cutting on the hardy, hot, with the piece supported, and never with your hand over the blade.
If you can name which of those a project needs before you start, you have effectively written the plan. If you cannot, you do not understand the project yet, and the fire is not the place to figure that out.
The failures you will actually have
Cold shuts are the classic one. That is a fold of steel hammered over onto itself, which does not weld, and it shows as a dark line or seam. They happen when you hit an unsupported edge, when you draw a taper unevenly and fold the shoulder over, or when you try to move too much metal at once. A cold shut in decorative work is ugly. A cold shut in a blade is a crack waiting to open.
Burnt steel is next. Push mild steel far past yellow into white and sparkling and you are burning it. The grain opens up and the piece crumbles under the hammer. There is no fixing it. Cut it off and start over from good steel.
Dead ends from bad sequencing come third. Punching a hole and then trying to draw the bar past it, or scrolling the tail before you flatten the tab and finding you can no longer get the piece flat on the anvil. This is what the written sequence prevents.
And decarburization, which just means the surface layer loses carbon after long soaks in an oxidizing fire. On mild steel nobody cares. On a knife, that soft skin has to be ground off, which is one more reason to keep high carbon work to short, controlled heats.
None of these are signs you picked the wrong project. They are the project. If you want the deeper metallurgy on any of it, real testing beats forum lore, and Knife Steel Nerds is where I send people for heat treat and steel science rather than guessing at numbers myself.
Safety that belongs to the work, not the wall
Safety gear is not a category you buy once and forget. Each project brings its own hazard, and the discipline is asking what this one throws at you.
Eye protection rated ANSI Z87.1 goes on before you pick up a hammer and stays on. Scale flies off hot steel at speed and it is hot when it lands. Wear natural fibers, cotton, wool, leather. Synthetics melt onto skin and turn a small burn into a graft.
I say this with more feeling than most because of a quench. Early on I put a blade into oil that was too cold, standing too close, in a cotton shirt with no face shield. The oil flared up into my face. It took my eyebrows and I kept my eyesight by luck, not by judgment. If your project ends in a quench, that is its own operation with its own rules: enough oil for the volume of steel, warmed rather than cold, a lid within reach, the blade going in point first and vertical, and you not leaning over the top of it. Face shield over the safety glasses, not instead of them.
Ventilation matters for coal and for propane. Both burn to carbon monoxide, and carbon monoxide gives you no warning at all. Forge outdoors or with real cross ventilation and a working detector, never in a closed garage. The rest of the gear discussion, including what is worth money and what is theater, is in the safety gear guide.
Hearing protection deserves one line of its own. Hammer on anvil is loud, and hearing loss is cumulative and permanent. Cheap foam plugs are fine. Wear them.
Finishing, and knowing when it is done
A project is not done when the hot work stops. Hot work leaves scale, and scale under a finish will flake off and take the finish with it. Wire brushing at a black heat knocks most of it loose. From there, decorative pieces usually get a wax finish applied warm, which soaks in and leaves a low sheen, and that finish will hold indoors for years and fail outdoors in a season. Paint outdoor work or accept the rust.
Then compare. Put the new one next to the last one you made. Not next to a photo of somebody else's, next to yours. The point of a project ladder is a visible trend, and the only way to see the trend is to keep the evidence. I have a shelf of first attempts I have never thrown away, and the ugliest hook on it is a better teaching tool than anything I could say here.
Building your own ladder
Once you have a handful of projects done, stop taking your next one from a list and start choosing it deliberately. Pick the move you are worst at, and pick a project that is mostly that move.
Bad at symmetry, forge a pair of matching S hooks and hang them side by side. Bad at upsetting, forge a leaf with a real fat base. Bad at punching, make a bottle opener where the hole has to be clean and centered. Never forged long stock, make a poker and find out how fast the far end goes cold. Never done a joint, make a small trivet and rivet it.
Two more things about scaling up. Heavier stock is not just harder, it changes what the shop needs to be. Moving half inch and up by hand tells you very quickly whether your anvil has enough mass under the hammer, which is the real subject of the anvil weight guide, and whether your hammer weight and handle suit you, which the hammer guide covers. And longer projects mean longer time at heat, which is where the fuel question starts to matter in practice rather than in theory. I run a coal forge for heavy stock and forge welding and a propane forge for fast, even heat and most day to day work, and the honest comparison is in coal or propane.
The tool list stays shorter than people expect for a surprisingly long time. Anvil, forge, hammer, tongs, a vise, something to cut with, and eye protection. The starter kit is the version of that argument with the reasoning attached.
Everything else is projects. Pick one, write down the shape, cut the stock long, plan the heats, and go make it badly. Then make it again.