Blacksmithing for beginners looks like a wall of gear and jargon from the outside, and it scares people off before they ever light a fire. It should not. I started twenty-five years ago on a cut length of railroad track clamped to a stump, a cheap hammer, and a hole in the ground full of charcoal. I made every mistake worth making and slowly turned it into a real skill. This is the guide I wish someone had handed me on day one: what the craft actually is, what you truly need to begin, how to not hurt yourself, and where the money matters versus where it does not. I teach weekend beginners now, and almost every question they bring me is answered below.
What blacksmithing actually is
Strip away the romance and blacksmithing is one thing: heating steel until it moves, then moving it with controlled blows before it cools. That is the whole craft. Everything else is detail. You take a bar of steel, bring it to a working heat somewhere in the orange-to-yellow range, and use a hammer against a hard surface to draw it out, spread it, bend it, upset it, or punch it. Then it cools, you put it back in the fire, and you do it again. A finished hook or knife or set of tongs is just that loop repeated a few dozen times with intent.
The reason people overcomplicate it is that the internet is full of gear talk written by folks who have never lit a forge. You do not need a power hammer, a swage block, a hydraulic press, or a wall of tongs to start. Those are tools you grow into once the work tells you it needs them. A beginner who buys all that first has spent a mortgage payment to avoid learning the actual skill, which is hammer control and reading heat. Those two things live in your hands and your eyes, not in your cart.
If you want the plain-language version of the craft as a whole before you spend a dime, I wrote one at what is blacksmithing. This article assumes you have decided to actually start.
The four tools you actually need to start
There are exactly four things between you and your first piece of hot steel: a forge, an anvil, a hammer, and a pair of tongs. That is it. Everything on the long shopping lists is optional at the beginning.
A forge is the heat source. It can be a coal fire in a brake drum, a propane forge you buy, or a homemade unit built from a couple of firebricks and a torch. Its only job is to get steel to a working heat evenly and repeatably. I run two, a coal forge for heavy stock and forge welding and a propane forge for fast, even heat and most of my day-to-day work, but you need exactly one to begin.
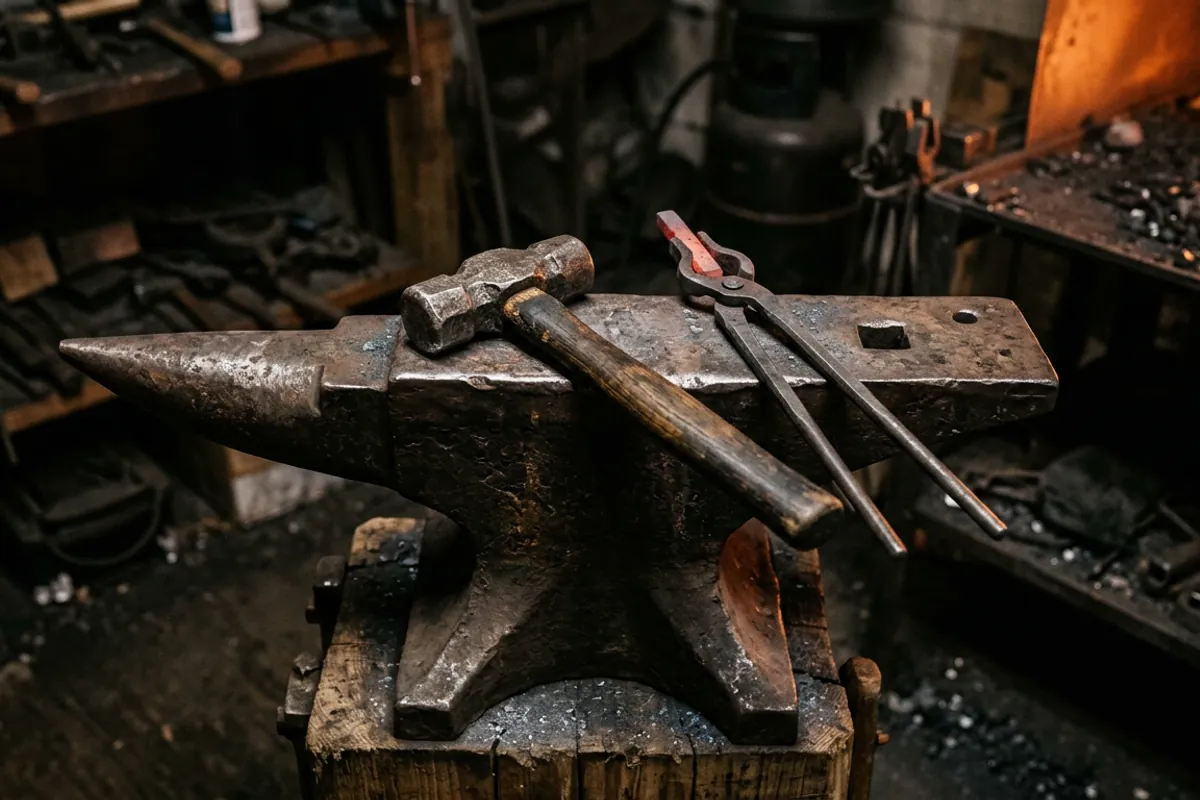
An anvil is the hard surface you hammer against. It does not have to be a "real" anvil. My first was railroad track. A working anvil has a horn for curves, a flat face for most of the work, a square hardy hole for tooling, and a round pritchel hole for punching. Weight matters because mass is what returns the energy of your blow back into the steel instead of soaking it up, but a beginner is fine in the 100 to 150 pound range, and honestly a well-mounted chunk of track will teach your hands plenty before you ever spend real money. When you are ready to buy a proper one, read what size anvil do you actually need first, because the weight question trips up nearly everyone.
A hammer is a hammer. Do not let anyone sell a beginner on a fancy hand-forged rounding hammer for a first tool. A 2 to 3 pound cross pein or ball pein from the hardware store, with the handle dressed and the face lightly rounded and polished, will do everything you need for the first year. Lighter than you think is the right answer here, because control beats mass and a heavy hammer wrecks your elbow while you are still learning.
A pair of tongs holds the hot steel. You can start with short stock held in your bare hand and no tongs at all, which is how a lot of us began, but a single pair sized to your stock makes life safer and easier. Do not buy ten pairs. Buy one that fits the steel you plan to use, or forge your own once you can, since tongs are a classic early project.
Safety comes before any of it
I am safety-serious about this and I will not soften it, because early on I quenched a blade in oil that was too cold, standing too close in a cotton shirt with no face shield. The oil flared and took my eyebrows. I kept my eyesight by luck, not by any good decision I made that day. You do not get to learn that lesson twice, so learn it from me instead.
Three non-negotiables before you strike the first blow:
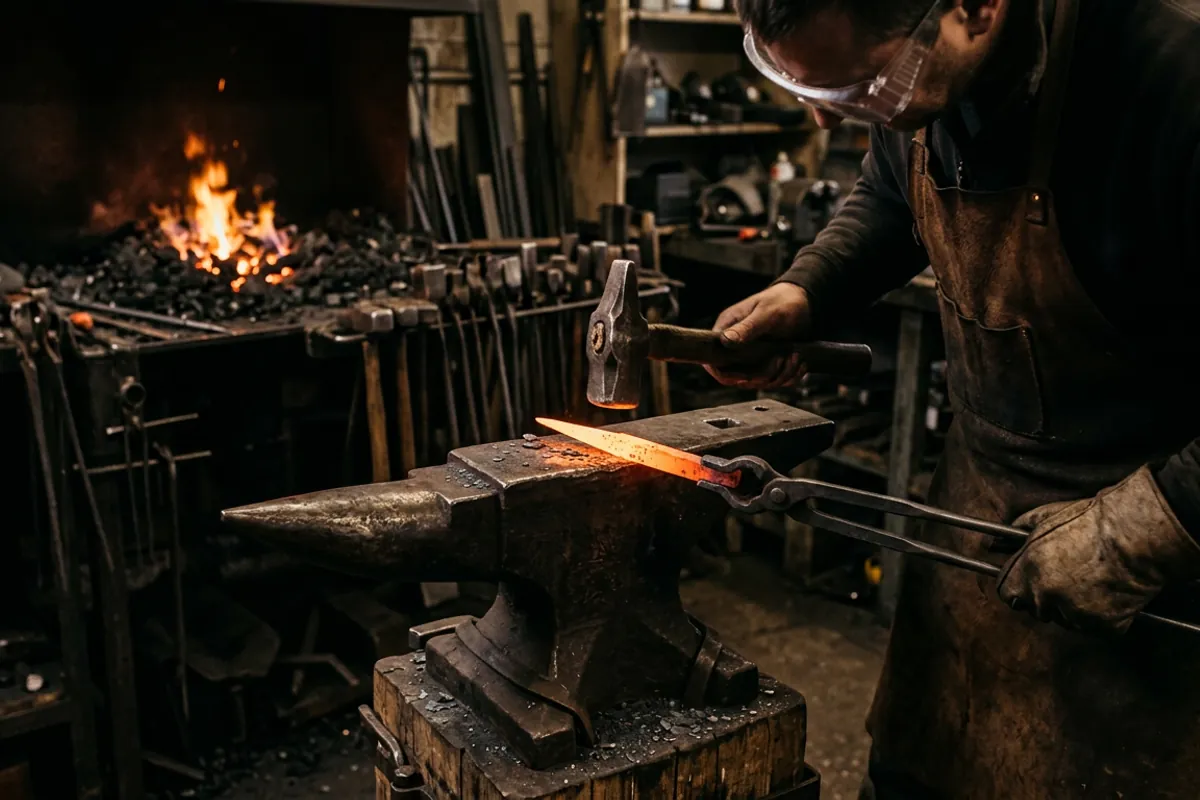
Eyes. Wear eye protection rated to ANSI Z87.1. Scale flies off hot steel, and a hammer can send a hot chip across the shop at speed. This is not optional and it is not expensive. A cheap pair of safety glasses that meets the standard beats an expensive pair that does not.
Clothing. Natural fibers only near heat. Cotton, wool, leather. Synthetics like polyester and nylon melt onto skin instead of just burning, which turns a minor burn into a graft. No loose sleeves, no frayed cuffs, and tuck in anything that dangles near the fire.
Air and hands. A coal forge and a hot propane forge both produce carbon monoxide, so you ventilate, always, and never run a forge in a closed garage. Leather gloves protect your tong hand, but I keep my hammer hand bare or lightly gloved for feel and let the tongs do the holding. I laid out the full kit, what matters and what is marketing, in blacksmith safety gear. Read it before your first session, not after your first burn.
Reading heat is the real skill
Beginners fixate on the hammer. The thing that actually separates a smith from someone banging on cold steel is reading heat by eye. Steel is only workable in a window of temperature, and you learn to see that window as a color.
Below a red heat, steel is stiff and you are just abusing your hammer and your elbow. As it climbs it goes dull red, then bright red, then orange, then yellow. Most forging for a beginner happens in the orange-to-yellow range, roughly a bright orange for general shaping. Go too hot, up into a sparking white heat, and you burn the steel, which means the carbon is literally burning out and the metal is ruined. That is why we work in a dim shop: you cannot judge these colors in bright sunlight, and getting the light wrong is a genuine way to overheat and destroy a bar without realizing it.
The rhythm is simple and it takes discipline to respect: heat the steel, take it to the anvil, work it for the fifteen or twenty seconds it stays in the window, and put it back in the fire the moment it drops out of range. New smiths always try to squeeze one more blow out of cooling steel. Do not. You cannot force cold steel to move, and you will only tire yourself out and put dents in the wrong places. Back in the fire it goes.
Coal or propane for your first forge
This is the question I get more than any other, and the honest answer is that either one will teach you to forge, so pick the one that fits your space and temperament rather than agonizing over it.
Propane is the easier start. You turn a valve, light it, and in a few minutes you have clean, even, repeatable heat with no fire to tend. For a beginner in a small shop working normal stock, propane removes a whole layer of fussing and lets you focus on the hammer. The tradeoffs are that a propane forge heats a fixed chamber, so very long or oddly shaped pieces are awkward, and running one costs fuel every minute it is lit.
Coal is more involved and, to me, more satisfying for heavy work and forge welding. You build and manage a fire, which is a skill in itself, and you get a hotter, more localized heat you can shape to the work. It is dirtier, it smokes, and it needs the right fuel, which is smithing coal, not the barbecue stuff. If you want the full side-by-side from someone who runs both, I put it in coal or propane for a first forge. For most beginners in a garage, I nudge toward propane to start and coal later once the basics are solid.
Your first projects
You learn this craft by making things, not by reading about it, so start forging real projects on day one. The right beginner projects are the ones that drill a single fundamental skill without a lot of moving parts.
Start with a simple tapered point, drawn out on the anvil face. Drawing out, making steel longer and thinner, is the most-used move in the whole craft, and a point teaches it cleanly. From there, a J-hook or an S-hook adds a controlled bend and a scroll, so now you are combining draw and bend. A leaf, a bottle opener, a small pair of tongs, a fire poker: each one stacks one new skill on the last. Nobody makes a knife first and does it well, so resist that urge until your hammer control is real.
The point of these is repetition. Make ten hooks, not one, and the tenth will be worth keeping while the first belongs in the scrap bin, and that is exactly how it should go. If you want a laid-out progression that actually teaches your hands rather than a random list, I keep one at beginner blacksmith projects.
The mistakes I see every beginner make
I teach weekend beginners, and the same handful of mistakes show up over and over, so let me save you from them.
Buying gear instead of forging. The most common way to stall is to spend months researching anvils and forges and tongs and never light a fire. You learn nothing from a shopping cart. Start with the crudest setup that gets steel hot and start hitting it.
Working cold steel. Covered above, but it bears repeating because it is the number one bad habit. If the steel is not glowing, it is not ready. Back in the fire.
Too heavy a hammer. New smiths think a bigger hammer means faster work. It means a wrecked elbow and worse control. Two to three pounds, learn to let the hammer and the heat do the work, and your joints will thank you in a decade.
Skipping the safety glasses "just this once." There is no just this once. Scale does not care that you were only making one quick adjustment.
Chasing metallurgy too early. Beginners get lost in steel-science rabbit holes before they can draw a clean taper. Heat treat and steel selection matter enormously for knives, and when you get there you should lean on real testing rather than forum lore, so I send those questions to Knife Steel Nerds by name. But that is a later problem. First, learn to move hot steel with a hammer.
Where to go from here
Once you have made a pile of hooks and your tapers are getting clean, the craft opens up. You will want a real anvil, better tongs, maybe a second forge, and eventually the specialty tools. The good news is that the skill you built on cheap gear transfers completely to good gear, so nothing you learn now is wasted.
The single best thing you can do is find other smiths. A local club, a weekend class, or an experienced smith who will let you hang around and watch is worth more than any amount of reading, mine included. Blacksmithing is a hands-on craft passed from person to person, and an hour standing next to someone who knows what a good heat looks like will teach you what a week of videos cannot.
For the full map of getting-started guides, from your first tool list to your first forge, the getting started topic hub collects everything in one place. But do not read it all before you begin. Read enough to be safe, gather the four tools, light the fire, and start hitting hot steel. That is the only way anyone has ever learned this.