Blacksmithing is the craft of heating steel until it moves and then moving it with a hammer, and once you have felt hot metal give under a blow you understand the whole thing in a way no video can teach you. I have been at it for about twenty-five years, self-taught on a cut length of railroad track clamped to a stump, and I still light a forge most weekends. This is a reference piece, not a sales pitch. I want to lay out what blacksmithing actually is, what you are really doing when you do it, the handful of tools and skills that matter, and the safety that is not optional. If you have been circling this hobby wondering where the real starting line is, this is the plain owner to owner version I wish someone had handed me on day one.
What blacksmithing actually is
Strip away the romance and blacksmithing is hot forming of iron and steel. You take a bar of steel, bring it up to a temperature where it becomes plastic, and use a hammer against an anvil to push that plasticity into a shape you want. That is the entire foundation. Everything else, the tools, the fuels, the fancy techniques, is in service of that one idea: heat steel, hit steel, repeat.
It helps to separate blacksmithing from its cousins early, because beginners mix them up and buy the wrong gear. Bladesmithing is a specialty of blacksmithing focused on knives and other edged tools, and it leans hard on heat treatment and steel science. Farriery is shoeing horses, a trade of its own. Casting pours molten metal into a mold and is a different craft entirely, not forging at all. When people say blacksmithing without a qualifier, they usually mean general forge work: hooks, tools, hardware, fire pokers, gate parts, the broad world of hot metal that is not specifically a blade. That is where most of us start and where most of us stay happy.
The reason the craft survives as a hobby is that it scales down beautifully. You do not need a shop full of machines. A heat source, something hard to hammer on, a hammer, and a pair of tongs will make real objects. I made my first year of projects on that piece of track, and plenty of good smiths still work out of a corner of a garage.
The four things you are really doing to hot steel
Under the endless list of named techniques, there are only a few fundamental moves, and once you name them the craft stops looking like magic. Drawing out is making stock longer and thinner, the move you use to taper a point or stretch a bar. Upsetting is the opposite, making stock shorter and fatter by hammering on the end of a hot bar so it bulges. Bending is exactly what it sounds like, done over the horn or the edge of the anvil or in a vise. And punching and drifting is making and opening holes, driving a punch through hot steel and then widening the hole with a tapered drift.
Almost every project you will ever forge is some sequence of those four operations plus cutting. A leaf comes from drawing out and then flattening and veining. A hook is drawing a taper, then bending. A hammer head is upsetting and punching and drifting. When you watch an experienced smith and it looks like they are doing a hundred different things, they are really chaining these basics in a practiced order. Learn to see the work this way and progress speeds up a lot, because a new project becomes a question of which known moves in which order rather than a brand new mystery.
The other thing you are always managing, underneath the shaping, is heat. Steel forges in a window. Too cold and it will not move and you risk cracking it. Too hot and you burn it, throwing sparks and ruining the metal. Reading the color of hot steel to judge that window is a skill you build over your first year, and it is why blacksmithing has to be learned by doing rather than just reading.
The tools you cannot skip
People overthink the tool list. The genuinely non negotiable core is short: a forge to make heat, an anvil to hammer against, a hammer, and tongs to hold hot steel. Add a vise, some basic hand tools, and a way to quench, and you can do a huge amount of work.
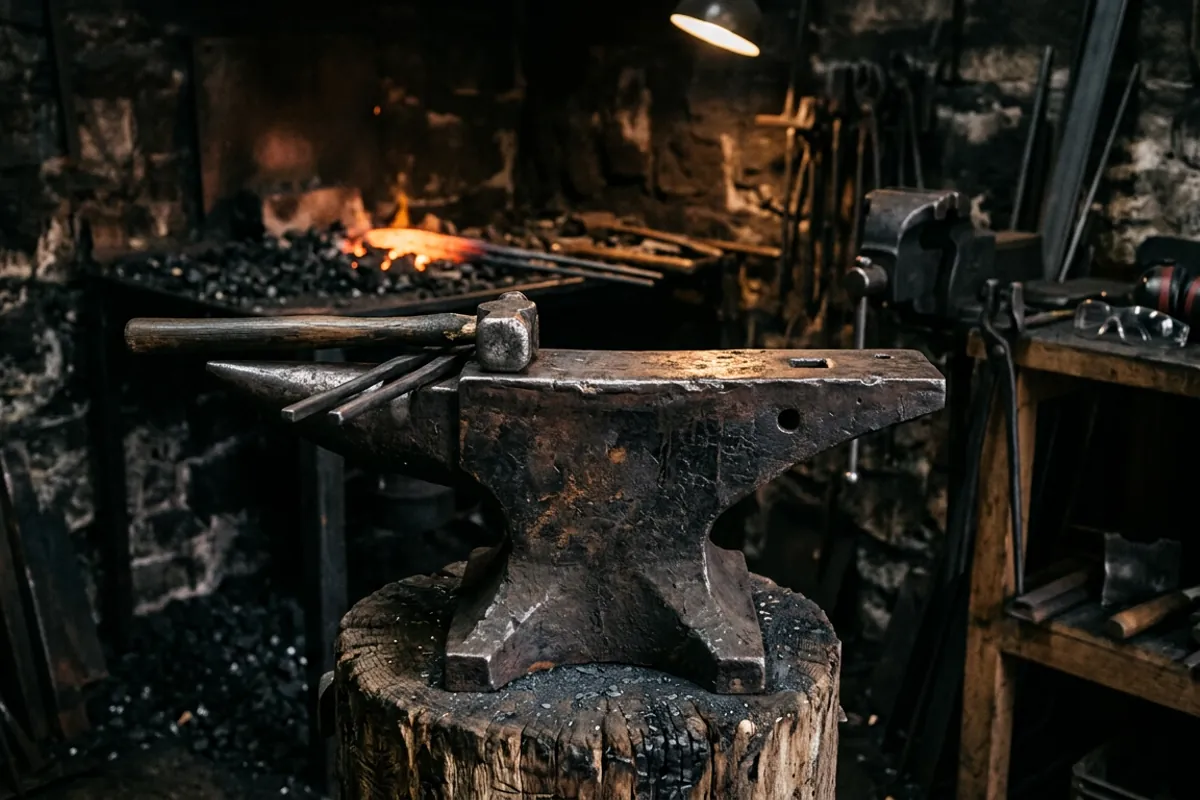
The anvil is the tool beginners obsess over, and for once the obsession is not misplaced, because a good anvil is the thing you measure everything else against. Mine is a 148 pound Trenton I call Bessie, and she is the reference I judge every other anvil by. An anvil has real anatomy worth knowing: the face is the flat hardened top you do most work on, the horn is the cone at one end for bending curves, the hardy hole is the square hole that holds tooling, and the pritchel hole is the smaller round hole used for punching. Size matters more than beginners expect. Mass is what returns your hammer energy back into the work, so a light anvil steals effort from every blow. I have written a whole piece on this because it comes up constantly, and if you are anvil shopping start with what size anvil do you actually need? and the honest budget rundown in the best anvils for beginners. If you want the wider view of buying, restoring, and reading an anvil, that guide covers it.
The hammer should be lighter than new smiths think. Something in the range of two to three pounds does most general work, and swinging a heavy hammer all day is how you hurt your elbow. Tongs need to actually fit the stock you are holding, and ill fitting tongs that let hot steel pivot are both frustrating and dangerous. Beyond that, buy tools as specific projects demand them rather than filling a wall on day one. Premature tool buying is one of the most common ways new smiths waste money.
Fire, fuel, and heat
The forge is where the craft lives or dies, because no heat means no forging. There are two common fuels for a home shop, and I have run both for years, which is the only reason I am comfortable comparing them.
Coal, or more precisely metallurgical coal or coke, burns hot and lets you concentrate heat exactly where you want it, which makes it the traditional choice for heavy stock and for forge welding. It also makes smoke and ash, needs a bit of fire tending skill, and raises real questions about where you can burn it and how the neighbors feel. A propane forge trades that pinpoint control for convenience: you turn a valve, it comes up to a fast even heat, and it is clean enough that most people can run one in a suburban garage with proper ventilation. For most beginners doing general work, propane lowers the barrier to actually getting started, and that is worth a lot, because the smith who forges every weekend improves and the one waiting for a perfect coal setup does not. I laid out the full tradeoff in coal or propane: which first forge makes sense?, and it is the first decision I would sort out before spending money.
Whatever the fuel, ventilation is a safety matter, not a comfort one. Any forge produces carbon monoxide, and a propane forge in a closed space is a genuine hazard. You need real airflow, and a carbon monoxide detector in the shop is cheap insurance. Do not treat this as optional because the forge seems clean.
Safety is the whole game
I am safety serious for a specific reason. Early on I quenched a blade in oil that was too cold, standing too close in a cotton shirt with no face shield. The oil flared up and took my eyebrows, and I kept my eyesight by luck alone. Luck is not a safety plan. That day is why AnvilTalk never treats protective equipment as an afterthought, and why I will not soften a hazard to sound friendly.
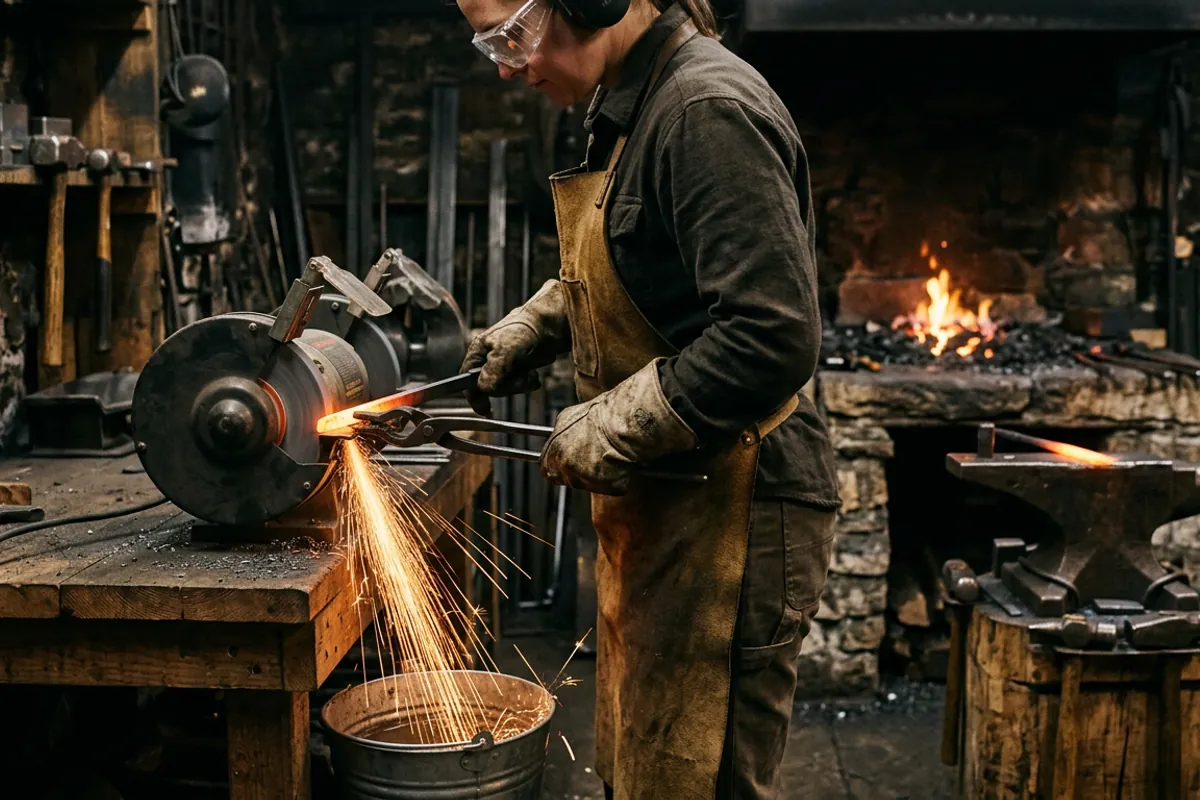
The short version of the rules that keep you whole: protect your eyes, your lungs, your ears, and your skin, in that order of how badly you will regret skipping them. Eye protection should meet the ANSI Z87.1 standard, and you want it on at the forge and absolutely at the grinder, where a thrown particle moves faster than you can blink. Wear natural fibers, cotton or wool or leather, near heat and never synthetics, because synthetics melt onto skin instead of just burning away. Keep hearing protection handy because hammering on steel is louder over the years than you think. And respect the grinder and the quench as the two spots where beginners get hurt most.
I will not repeat the whole equipment breakdown here, because I wrote it out in blacksmith safety gear: what matters and what to skip. Read that before your first heat, not after your first scare. Gear you skip because it seems like overkill is exactly the gear you will wish you had in the half second something goes wrong.
What steel actually does when it is hot
Here is where I draw a hard line about what I do and do not know. I am an experienced hobby smith, not a metallurgist, and blacksmithing sits on top of real materials science that deserves real testing rather than shop lore.
The practical version every smith needs is this. Not all steel is the same. Mild steel, the cheap stuff, forges easily and is forgiving but will not harden meaningfully, so it is great for hooks and decorative work and useless for a cutting edge. Higher carbon steels can be hardened by heating and quenching, which is what makes a knife hold an edge, but they are fussier to forge and can crack if you abuse the heat. Knowing roughly what steel you have in your hand changes everything about how you work it, and if you want a plain starting point for matching steel to a project the steel selector tool is there for that.
Where I stop is the deep metallurgy: exact hardening temperatures, quench media, tempering schedules, and grain science. Those numbers are real and checkable, and getting them wrong on a blade is how you make something that shatters or holds no edge. That is not campfire knowledge, it is tested data, and the place I send people for it is Knife Steel Nerds, which does actual laboratory work on steel and heat treatment. When a fellow smith at the club states a precise quench temperature as fact, my honest answer is that I trust tested sources over shop confidence, and you should too. Ask ten smiths for a heat treat recipe and you will get eleven answers, which is exactly why the tested sources matter.
How to actually start
If you have read this far and want to begin, the path is simpler than the internet makes it look. Get a heat source, get something hard and heavy to hammer on, get a hammer and tongs, and forge something small and useless on purpose. A hook, an S hook, a bottle opener, a leaf. The goal of your first month is not a finished masterpiece, it is learning to read heat color and to hit where you are looking.
Find other smiths if you possibly can, because this is a craft that transfers by watching and doing far faster than by reading. Most of what I know came from making every beginner mistake worth making and from other smiths at the club forge correcting me in person. A weekend of hands on time next to someone who knows the moves is worth a stack of videos. I teach weekend beginners for exactly this reason, and the same handful of questions come up every time, which is how most of these guides got written.
Expect to be bad for a while and forge anyway. The single biggest predictor of whether someone sticks with blacksmithing is not talent or budget, it is how often they actually light the forge. Set up so that starting a session is easy, keep the projects small enough to finish, and let the skill accumulate. If you want to browse the rest of what I have written, all guides lists it, the more from the shop hub collects the odds and ends, and there is a bit about the shop and how this all got started.
The mindset that keeps you in it
Blacksmithing rewards patience and punishes ego, and that is really the whole lesson under all the technique. The steel does not care how confident you are. It moves in its heat window and nowhere else, it burns if you push it too hot, and it cracks if you work it too cold. Learning to work with what the metal is doing rather than what you wish it were doing is the actual skill, and it is a slow one. Twenty-five years in, I am still learning to read a fire better and to waste fewer heats.
The good news is that the barrier to real work is low and the payoff is immediate. The first time you draw a clean taper or punch a hole that lands where you meant it, something clicks, and you understand why people have been doing this for thousands of years. It is honest work with a hammer, it makes things that last, and it does not require you to be anything other than someone willing to show up and get better one heat at a time. Start small, protect your eyes, respect the fire, and forge often. Everything else follows from that.