The first thing I ever forged that a person could actually use was a blacksmith hook. Not a knife, not a pair of tongs, a hook. I drew a taper on the end of a length of scrap, curled it over the horn, and hung it on a nail in the shop wall, and twenty-five years later I still think a hook is the best first project a new smith can pick. It teaches you the four moves that show up in almost everything else you will ever make, it fails cheaply when you get it wrong, and it gives you something at the end of the session you can bolt to a wall and look at. This is the plain, owner-to-owner rundown of what a hook is, the kinds worth learning, the steel and heat behind them, and the mistakes I watch my weekend beginners make on every single one.
Why a hook is the project I hand every beginner
A hook is small, forgiving, and honest. Small means it heats fast, so you are not standing around waiting on a cold forge, and one heat gets you real work done. Forgiving means that if your taper wanders or your curve is a little lopsided, the thing still works and still looks handmade in a good way. Honest means it hides nothing: a hook shows off a clean taper and it shows off a lumpy one just as clearly, so you learn to see your own hammer control on a part you can hold in your hand.
More than that, a hook is a bundle of the fundamental skills. Draw out a point, that is tapering. Round or square that point, that is controlling your blows. Bend the working end into a curve, that is bending over the horn. Put a decorative curl or a mounting scroll on the back, that is scrolling. Punch or drill a hole for a screw, that is one more basic. Learn to make a good hook and you have quietly learned the moves behind tongs, fire pokers, plant hangers, and the start of tool handles. I go deeper on choosing early work in my guide to picking a forging project that actually teaches you something, and hooks sit right at the top of that list for a reason.
There is also the plain fact that people want them. A row of hand-forged coat hooks or a couple of pot racks are the first things a beginner can give away or sell, and nothing pushes your skill forward like making twenty of the same hook and watching the tenth one come out better than the first.
The kinds of blacksmith hook worth knowing
The word covers a family of shapes, and it helps to know them by name because the technique changes with the shape.
An S-hook is exactly what it sounds like: a bar with a curve at each end going opposite directions, so it hangs on one thing and holds another. It is the simplest possible hook and the one I start people on, because it is nothing but two bends and two small tapers. Chain, pot racks, and hanging tools all live on S-hooks.
A wall hook or mounting hook has a flat back that sits against a wall with a hole for a screw, and a curved arm coming off it to hold a coat, a towel, or a bridle. This is the workhorse. Once you can make a clean wall hook you can make a hundred variations of it.
A J-hook is a single curve, a longer sweep than an S, used for hanging heavier or longer things. A drive hook or spike hook tapers to a point on the back end so you can drive it straight into a wooden beam or post instead of screwing it, which is a satisfying project because the point is functional and forged, not an afterthought.
Then there are the decorative treatments people put on the back end: a ram's head hook, where you split and curl the end into two little scrolled horns that read as an animal's head, a leaf hook where you forge a leaf on the end, and a scroll hook that ends in a tidy spiral. These are the same wall hook underneath, dressed up. The ram's head is the classic "now I am a real smith" project, and it is worth working toward.
The steel to forge a hook from
For everyday hooks I reach for plain mild steel, and so should you. Hot-rolled A36 bar is cheap, it moves easily under the hammer, and it does not need heat treating because a hook does no cutting and holds no edge. You are making a bent bar, not a blade, so the exotic steels have no place here and would only fight you.
Size is a matter of what the hook has to hold. For light coat and towel hooks, 1/4 inch round or square stock is plenty. For heavier work, pot racks, tool hangers, anything that takes real weight, step up to 3/8 inch. Square stock gives you crisp corners and a more traditional look and it is easier to keep from rolling under the hammer while you taper; round stock gives you a softer, more organic line. I keep both in the rack and pick by the look I want.
A word on found steel, because beginners love it. Rebar makes a rough, textured hook and it is free, but the alloy is inconsistent and the surface is scaly, so treat it as practice stock, not your best work. Old railroad spikes make a genuinely charming, chunky hook and the head becomes a natural mounting boss, though the "high carbon" HC stamp on some spikes is only medium carbon at best and does not make them good knife steel, a thing I take apart in my piece on the railroad spike knife. For a hook, none of that matters; a spike bends into a hook beautifully and the alloy is irrelevant to a part that only has to hang there.
Reading the heat, because a hook is forged hot
Every move in a hook happens at forging heat, and learning to read the color of the steel is the real skill hiding inside this simple project. Mild steel forges in a bright orange to yellow range, roughly 1500 to 2200 degrees Fahrenheit, and you want to be working in that window, not below it. When the steel drops to a dull red you are done for that heat and you put it back in the fire. Hammering steel that has gone too cold does nothing useful, wastes your effort, and on higher-carbon stock can crack it, though on mild steel the main penalty is just wear on your arm and your hammer face.
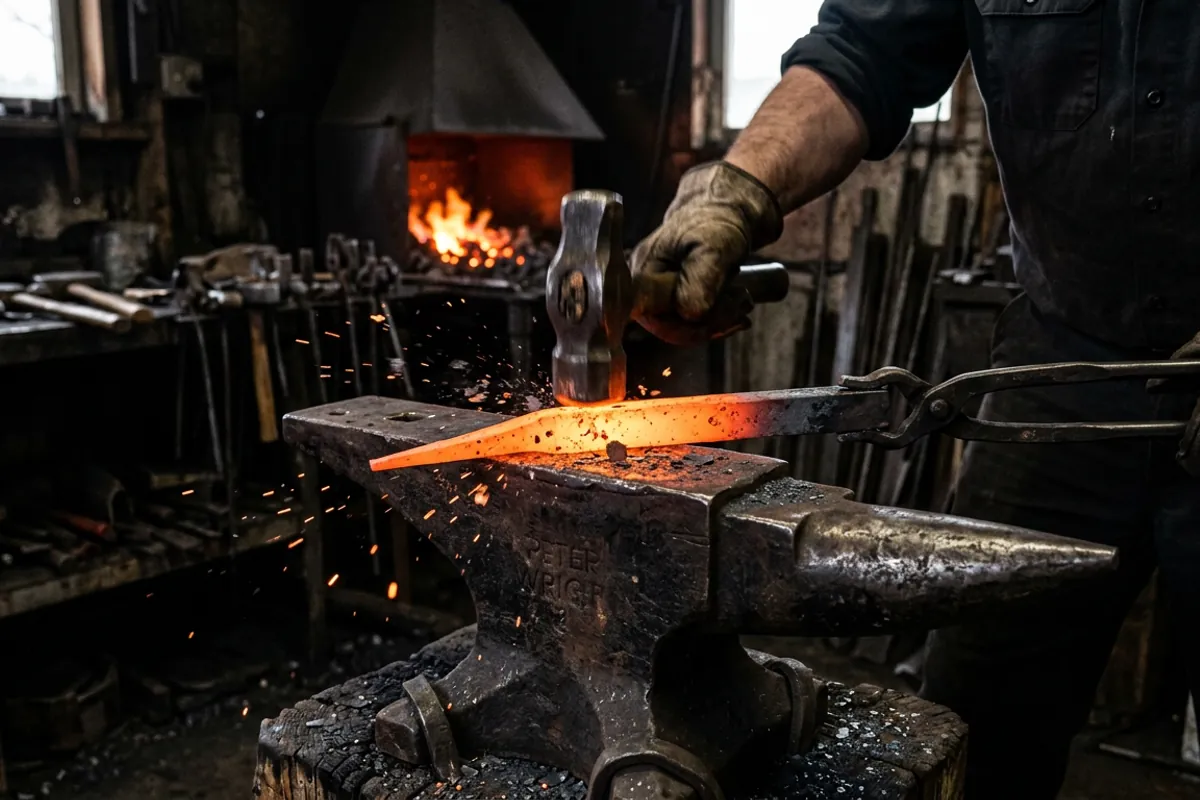
Because you are always working hot, the tapered point of a hook is the part that cools first, being the thinnest. That is the honest challenge: the tip you most need to refine loses its heat before the rest of the bar. Good hook work is partly about sequencing your blows so you shape the thin end while it is still hot enough to move, then get it back in the fire before it fights you. This is exactly the heat-reading instinct that carries over into everything, and it is why I would rather a beginner build it on a hook than learn it the hard way on an expensive bar of tool steel. The forge fuel does not much matter for this, coal or propane both get you there, and I lay out that choice in my coal or propane first forge rundown.
Forging a simple wall hook, step by step
Here is the sequence I walk a beginner through for a basic wall hook in 3/8 inch square. Read it as a map, not a recipe you follow blind, because your bar and your fire will teach you the timing.
Start by cutting a length of bar, around six to eight inches for a coat-sized hook. Bring one end to a bright orange heat and taper it. Working over the far edge of the anvil face or the near edge of the horn, hammer the last inch or so of the bar down to a point, rotating the bar between blows so you draw it evenly on all sides rather than flattening it. A good taper is smooth and centered, and getting there is nothing but reps. This is where your hammer choice starts to matter; a cross pein is the traditional tool for drawing out because the pein moves metal fast in one direction, and I explain why in my cross pein hammer guide.
Once you have a clean taper, reheat and form the hook curve. Lay the tapered end across the horn of the anvil at the diameter you want and bend it over, working it around the horn to get a smooth curve rather than a sharp kink. Bessie, my 148 pound Trenton, has a horn that tapers from fat to slim, so I just slide the work up or down the horn to find the radius I want. If you have the point curling back toward the bar you have a finished hook end; if you want it to flare open, curl less.
Now the mounting end. Flatten the last inch of the back end on the anvil face to make a flat pad, then either punch a hole hot over the pritchel hole or, for a beginner, simply drill it cold after the piece is finished. Punching is the traditional way and it leaves a nicer, forge-formed hole, but drilling is faster to learn and there is no shame in it. Reheat once more and put a gentle back-curve into the shank so the hook stands off the wall and gives a coat somewhere to sit. That standoff bend is the detail that separates a hook that works from a flat bar with a curl on it.
The ram's head and other dressed-up ends
When a beginner has ten clean wall hooks behind them, the ram's head is the next rung, and it is more satisfying than hard. You take the back end of the bar, forge a short taper, then split the very tip into two prongs with a hot chisel or forge two small tapers if you upset the end first. Curl each prong into a tight little scroll facing outward and you have the two horns of a ram. Punch two small dots for eyes if you want and you have a face that reads instantly. It is the same wall hook underneath, and that is the point: the dressed-up hooks are variations, not new projects, which is why I lean on hooks so hard for building a foundation.
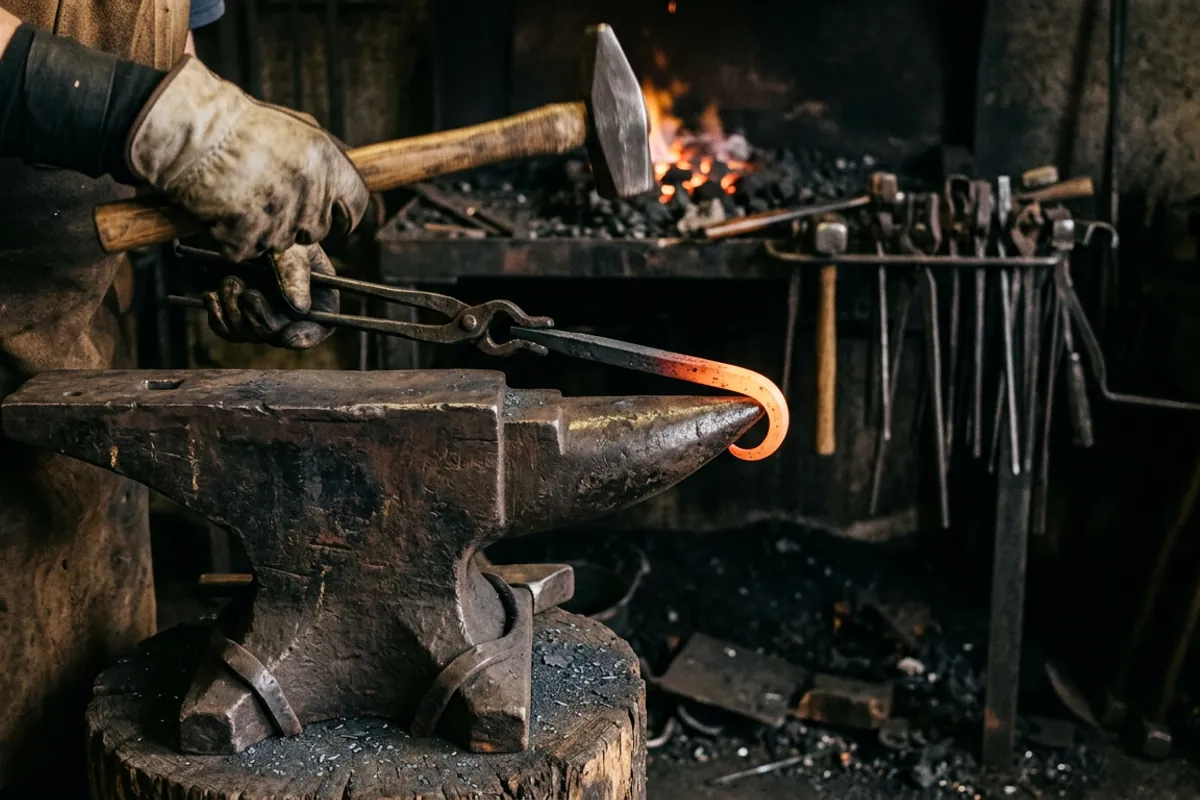
A leaf hook takes the opposite approach, spreading and veining a flattened end into a leaf shape, and a scroll hook just ends in a clean spiral formed over the horn and refined with a pair of scrolling tongs or bent-tip pliers. All of these are worth learning slowly. The common thread is that the decorative end and the working end are both just controlled bends and tapers, and the more hooks you make the more your hands own those moves.
Finishing a hook so it lasts and looks right
A forged hook comes off the anvil covered in gray-black scale, the flaky iron oxide that forms on hot steel. Knock the loose scale off with a wire brush while the piece is still warm, not hot enough to burn the brush but warm enough that the scale releases. From there you have choices. The simplest and my usual is to heat the finished hook to a low black heat, then wipe it down with a rag holding beeswax or a beeswax-and-oil paste; the wax burns into the surface and leaves a soft, dark, water-resistant finish that is food-safe enough for pot racks and pleasant to the hand. Plain oil works too, thinner and needing more upkeep.
If you want a blacker, more uniform look you can heat the piece and quench it in used motor oil in a well-ventilated space, but I will be blunt about that: oil and hot steel is exactly how I lost my eyebrows early on, standing too close in a cotton shirt with no face shield when the oil flared up. If you finish in oil, stand back, wear a face shield over your safety glasses, keep the oil in a lidded steel can you can smother a flare with, and never do it in a cluttered corner. For indoor hooks that never see weather, honestly the wax finish is plenty and far safer.
The safety that a hook does not let you skip
A hook is a small project, but the forge does not care how small your work is. Everything I make my beginners wear on a knife I make them wear on a hook. Eye protection rated to ANSI Z87.1 goes on before the forge is lit and stays on, because scale flies off hot steel under the hammer and a flake in the eye ends your day at best. Natural fibers only near the fire, cotton, wool, or leather, never synthetics, because polyester melts onto skin instead of just burning away, and a leather apron earns its keep. I go through the whole kit in my blacksmith safety gear writeup, and none of it is optional just because you are "only" making a hook.
Hold the work with tongs, not fingers, once it has seen the fire, and remember that a piece of steel that has gone black on the surface can still be over a thousand degrees inside; a forged hook cooling on the anvil looks harmless and will still brand you. Match your tongs to your stock so the work sits secure and does not launch when you hammer it, which is a whole subject in my blacksmith tongs guide. Keep a slack tub of water within reach, keep your floor clear, and treat every bar as hot until you have proof otherwise.
Where the hook leads
The reason I keep coming back to the humble blacksmith hook is that it is a doorway. The tapers you learn making hooks become knife tangs and tool points. The bends become handles and hangers. The scrolls become gate work and hardware. The heat reading becomes the thing that lets you forge anything at all. Make a hundred hooks and you will not just have a hundred hooks, you will have hands that know what hot steel does under a hammer, which is the only skill in this craft you cannot buy. Start there, keep the safety gear on, and let the simple project teach you the hard lessons cheaply. If you want to keep browsing the odds and ends of shop knowledge, the rest of my more from the shop writeups pick up where this one leaves off.