The 1,968 words already clears the hard 1,800 minimum, but I'll expand to comfortably land in the 2,000 to 2,600 target with real content, not padding. Re-outputting the full article.
What a hot cut hardy tool does sounds simple until you own a bad one: a hot cut hardy tool is just a chisel that stands blade-up in the hardy hole of your anvil so you can lay hot stock across it and drive the cut down with a hammer. That is the whole job, and it is one of the first bottom tools I hand a weekend beginner after tongs, because cutting bar to length over the far edge of the anvil with a cold chisel is slower, more dangerous, and harder on your knuckles. I have run one version or another next to Bessie, my 148 lb Trenton, for most of twenty-five years. What follows is not a bench test of these specific listings. It is published specs and owner reports from the blacksmithing forums, weighed against what I know about how these tools behave in a real shop.
Here is the honest framing up front: for a beginner, the single most important thing about a hot cut hardy is not the brand, it is whether the shank actually fits your hardy hole. Get that wrong and the best steel in the world rocks in the socket and cuts crooked. So this guide spends as much time on measuring as on picking.
What a hot cut hardy tool actually is
The hardy hole is the square hole in the heel of your anvil. A hardy-shanked tool has a square post forged or machined to drop into that hole, and a hot cut has a chisel edge sitting up above it. You bring your stock to a bright forging heat, lay it across the edge, and strike straight down. Because the steel is soft and orange, the edge sinks through fast with far less force than cold work needs.
The word "hot" in the name is not decoration. These edges are ground for cutting hot steel, not cold bar. Hot cutting at a good heat is easy on the edge. Try to chop cold stock on the same tool and you will roll or chip that edge in a hurry, and you will also drive a hardened cutting edge down into your anvil face, which is the fastest way I know to ruin both. More on that in the safety section, because it matters.
It helps to know what a hot cut is not. It is not a knife, and it is not a top tool you swing. A hardie-mounted hot cut stays put while you bring the work and the hammer to it, which is exactly why beginners cut straighter with one than with a hand-held hot chisel: the edge does not wander because it cannot. If you want the wider picture of what lives in the hardy hole beyond the hot cut, I wrote that up in the anvil hardy tools I would buy first and again in the hardie tools for anvils guide. The hot cut is usually the first of that family worth buying.
How I would size one to your anvil
Measure your hardy hole before you spend a dollar. Put a rule or a caliper across the flats of the square hole. Common sizes on the anvils beginners actually own run from about 5/8 inch on small imports up through 3/4 inch, 1 inch, and 1-1/4 inch on bigger old anvils. Bessie's is a hair over 1 inch. Write your number down and shop to it.
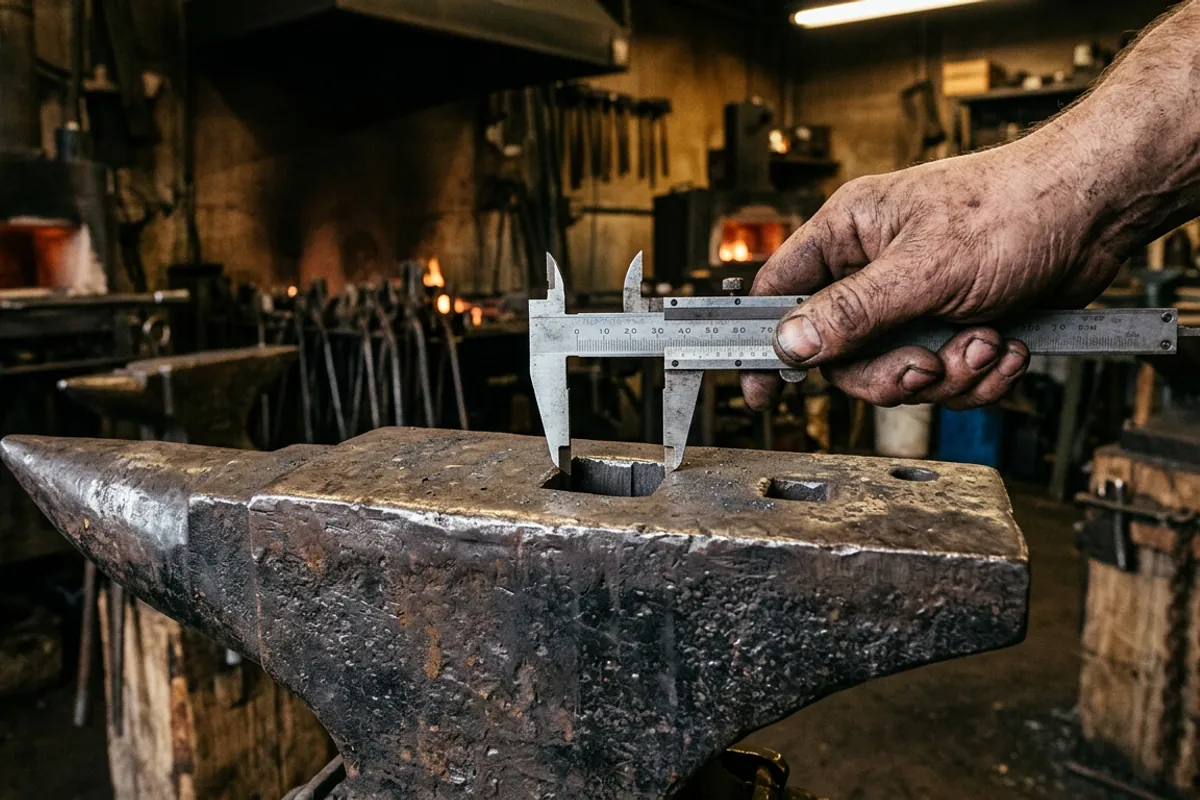
A shank a touch small can be shimmed or wedged and lived with. A shank too big does not fit at all, and grinding a hardened shank down is miserable work. If a listing sells a "2 inch" tool, read carefully: that number often describes the length or the taper of the shank, not a 2 inch square hole, because almost no home anvil has a hole that big. When in doubt, buy the tool whose stated shank matches your measured hole, or buy one you can also clamp in a post vise, which sidesteps the fitment question entirely.
That vise trick is worth knowing. Any of these hot cuts can be stood up in a good blacksmith vise and used the same way, which is how a lot of smiths with an odd hardy hole get by. One more sizing note beginners miss: a shank that fits snug but not tight is what you want. If it drops in loose and rattles, every hammer blow wastes energy rocking the tool instead of driving the cut, and a loose tool can walk up and out of the hole as you work. A wrap of steel shim or a light peen on the shank corners tightens a slightly small shank; nothing fixes a shank that is too big except a bigger anvil or the vise.
The specs that actually matter
Here is the field, with only what the sellers and makers actually publish. Where a figure is not stated, I say so rather than guess, because a made-up hardness number on a cutting tool is exactly the kind of thing that gets a beginner hurt or disappointed.
Scroll horizontally to see all columns.
| Tool | Shank | Pieces | Material published? | Price tier |
|---|---|---|---|---|
| 3/4 in three-piece hardy set (hot cut, creasing stake, spring fuller) | 3/4 in | 3 | Steel, hardness not published | Budget |
| Single 3/4 in hot cut hardy | 3/4 in | 1 | Forged steel, hardness not published | Budget |
| 2 in shank hot cut (anvil or vise) | 2 in shank | 1 | Steel, hardness not published | Budget to mid |
Notice the pattern: none of these budget imports publish a hardness or a specific steel grade. That is normal at this price, and it is the honest reason I treat them as usable starter tools rather than heirloom cutlery. The published spec you can actually trust is the shank size, which is exactly the spec that decides whether the thing works on your anvil. A hardness number would be nice, but on tools in this tier it is usually either absent or a marketing figure with no test behind it, so I weight it at zero and judge the tool by fitment and edge geometry instead.
The budget three-piece hardy set
If you are outfitting a first shop and your anvil takes a 3/4 inch hardy, a small set gets you the most learning per dollar. The three-piece 3/4 inch set pairs a hot cut with a creasing stake and a spring fuller, so you cover cutting, spreading a shoulder, and starting a groove without buying three separate tools. The maker publishes the 3/4 inch shank and the three pieces; it does not publish a steel grade or a hardness, which is what I would expect in this tier.
For a beginner who is still deciding which bottom tools they will actually reach for, a set like this is a reasonable way to find out cheaply. The hot cut in it will cut mild steel and rebar and light bar stock fine at a bright heat. The creasing stake and spring fuller are honestly the better part of the deal, because those are shapes a beginner will not forge for themselves early on, while a plain hot cut is the easiest of the three to make later.
Check price on Amazon (paid link)
The single 3/4 inch hot cut
If you only want the cutter and not the extra pieces, the single 3/4 inch hot cut hardy does one job. Same fitment logic applies: it suits an anvil with a 3/4 inch hole, and it can be clamped in a vise otherwise. Published spec is the 3/4 inch shank and "forged" steel; hardness and grade are not published, so I would not treat it as a precision knife-cutoff tool. As a shop hot cut for stock to length, it is the plain, useful thing it claims to be.
The one honest caution on all of these single cutters is the edge. Out of the box the grind is usually serviceable but not fussy. I would touch it up on a stone or a belt to a clean, slightly rounded chisel edge before the first use, and never take it thin like a knife. A hot cut wants a stout included angle so the edge survives the strike. Think in terms of a sturdy wedge, somewhere in the neighborhood of a cold chisel's included angle, not a razor. A too-thin edge cuts beautifully for a dozen heats and then folds over or chips, and now you are dressing it again with less steel to work with.
Check price on Amazon (paid link)
The larger shank hot cut for bigger holes or a vise
For anvils with a bigger hardy hole, or for smiths who would rather stand the tool in a post vise, there is a heavier hot cut sold with a longer, larger shank. The listing markets it both for a larger hardy hole and for vise use, which is the pitch that makes it flexible. Read the shank number against your measured hole before buying; if your hole is 3/4 inch, this is not your tool, and the vise is how you would use it instead.
I like having a vise-mountable hot cut in a shop regardless of anvil, because it frees up the hardy hole for a bending fork or a bottom fuller while you are cutting. A vise-mounted hot cut also sits lower and steadier for cutting heavier stock, and it keeps your cutting away from the anvil face entirely, which is no bad thing for the anvil.
Check price on Amazon (paid link)
What owners say
I have not run these exact import listings down in my own shop, so here is the forum signal, attributed honestly. The through-line on the I Forge Iron hot cut boards is that a hot cut hardy is one of the tools experienced smiths most often make rather than buy, precisely because it is simple and because a known steel beats an unknown one for a cutting edge. In the "what should I use" thread on I Forge Iron, members talk through starting from a known bar and hardening and tempering the edge, and note the old debate about whether hot cutting draws the temper (their read: harden and temper it anyway, it holds up). Another I Forge Iron "make a hot cut hardy" thread has smiths starting from a couple inches of 1-1/4 inch axle forged down to fit the hole.
On the budget imports specifically, owner signal is thin, and I will say so plainly rather than dress it up. What buyers report on tools in this class generally is what you would expect: fitment complaints when the shank does not match the hole, and soft or rough factory edges that want a touch-up before real use. Neither is a dealbreaker for a starter tool if you go in knowing it. What I have not found is anyone claiming these listings ship a documented, tested steel, which is why I keep the recommendation modest.
For the metallurgy side of "will hot cutting ruin the temper" and how tool edges actually behave, I trust real testing over shop lore. Larrin Thomas at Knife Steel Nerds is where I send anyone who wants numbers on steel and heat treat instead of forum opinion. And if you decide to harden and temper a homemade one, I walked through the tempering step in plain terms in tempering of metal explained.
Making one instead of buying
I will be straight with you: a hot cut hardy is one of the best first tools to forge yourself, and doing so teaches you more than the tool costs. A short length of a known medium-carbon or spring steel, a coil spring or an old axle shaft or a leaf spring, forged to fit your hole and drawn to a chisel edge, then hardened and tempered, gives you a cutter in a steel you can trust. That is the forum consensus and it matches my experience.
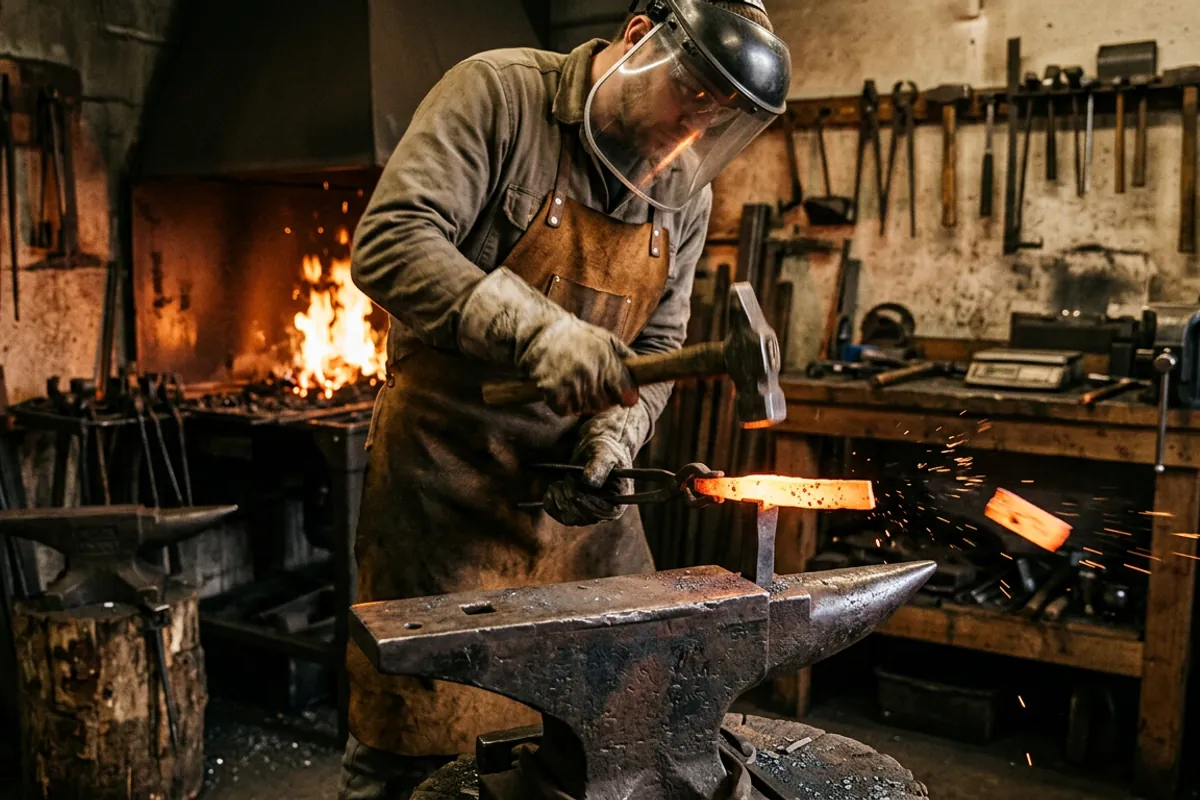
The catch is that you need heat, a way to hold it while you forge the shank, and enough control to keep the edge from getting too thin. If you are not there yet, a budget bought hot cut is a fine bridge. Buy it, use it, and forge your own once you can hold a heat and draw an edge. If you want a first forging project that actually builds skill, this is a good one, and I have a broader list in how to pick a forging project that teaches you something.
One more reason to make your own eventually: you can forge the edge to the exact profile your work wants. A slightly crowned edge, higher in the middle, starts the cut cleanly and shears the last web instead of pinching it. That kind of tuning is easy on a tool you forged and awkward on a hardened import.
Safety, because this tool throws hot steel
This is the part I never soften. Cutting hot steel over a sharp edge sends bright, sticky bits flying, and the last hammer blow is the one that flicks the offcut. Wear eye protection rated to ANSI Z87.1, and I put a face shield over the glasses for cutting work. Wear natural fibers, not synthetics, near the forge and the cut; I lost my eyebrows early on to a quench flare in a cotton shirt, and I have never once regretted dressing for the fire since. The full rundown of what actually matters is in blacksmith safety gear.
Two technique rules protect you and the tools. First, never cut all the way through onto the edge. Cut most of the way, then rotate and snap the piece off, or cut over a soft cutting plate. Driving a hardened hot cut edge into your hardened anvil face damages both and can spall a chip at your face. Second, keep the offcut side pointed away from you and anyone else in the shop, and clear the immediate area of anything flammable, because that little orange nub lands somewhere. I ease off the last couple of hammer taps for the same reason: a light final blow parts the web without launching the piece across the shop.
What I would tell a friend
If your anvil has a 3/4 inch hardy hole and you are starting out, the three-piece 3/4 inch set is the most learning per dollar, and the single 3/4 inch hot cut is the pick if you only want the cutter. If your hole is bigger or you would rather work off a vise, the larger shank hot cut covers you. Buy in the tier that matches your measured hole, dress the edge before first use, and treat any of these as a good starter you will eventually replace with one you forge yourself from a steel you can trust. Measure the hole, respect the flying steel, wear the Z87.1 and the face shield, and this cheap little tool will earn its keep. For where the hot cut sits among the rest of the bottom tools, start with the More from the shop hub and the anvil hardy tools guide.