Stainless steel is the point where a lot of home smiths run into a wall, and the honest reason is simple: you cannot heat treat stainless the way you heat treat a piece of 1084 or a railroad spike. Everything a self-taught smith learns first, judging heat by color, checking with a magnet, quenching in warm oil, quietly stops working once you move to a martensitic stainless like 440C or AEB-L. The steel needs tighter temperature control than a forge can give, it usually needs a cold treatment most shops are not set up for, and it punishes guessing with soft blades, cracked blades, or blades that look finished and hold an edge like a butter knife. This is a reference on what heat treating stainless actually involves, why it is different, and what a home shop can and cannot do honestly.
I want to be plain up front. I am a hobby smith, not a metallurgist, and I do not run a full stainless line in my shop. Most of what I forge and harden myself is simple carbon steel, because that is the steel you can control with the gear a home smith owns. What follows is the owner-consensus understanding of stainless heat treat, the same thing you will hear from any maker who has actually done it, plus pointers to the people who publish the real numbers.
Why stainless is not a forge-and-magnet steel
With plain high-carbon steel, the beginner method works because the steel is forgiving. You bring it up past its magnetic point, which lands close enough to the right austenitizing range, hold it a moment, and quench. Color and the magnet get you into the ballpark, and the ballpark is wide enough that a blade comes out hard.
Stainless closes that window hard. The chromium that makes it stainless, usually 12 percent or more, changes how the steel behaves at temperature. The austenitizing temperatures are higher, the correct range is narrower, and the soak time at temperature actually matters because the chromium and carbon have to go into solution before the quench. Get it too cool or too short and the carbides never dissolve, so the blade quenches soft. Get it too hot and you grow grain and trap so much retained austenite that the edge stays weak. A forge flame swinging 100 to 200 degrees while you watch color is nowhere near tight enough for that. The magnet trick is useless here too, because the temperatures you need are well above the point where the steel loses its magnetism, so the magnet tells you nothing about whether you have hit the target.
That is the whole problem in one sentence: stainless demands a held, known, repeatable temperature, and an open forge does not give you one.
What actually happens inside the steel
The mechanism is the same family of changes I walk through in heat treatment of metals, explained from the forge floor, just with less margin for error. When you heat a hardenable steel into its austenitizing range, the crystal structure changes and carbon dissolves into it. Quench fast enough and that structure is trapped as martensite, which is hard and, at that stage, brittle. Temper it and you trade a little hardness for toughness so the blade survives use. Every steel goes through that arc.
Where stainless differs is in the details of each step. The chromium carbides are stubborn, so the soak has to be long enough and hot enough to dissolve the right amount of them, but not so aggressive that you dump too much carbon and chromium into solution and end up with a slushy mess of retained austenite after the quench. Retained austenite is the villain in stainless. It is soft, it is unstable, and if you leave too much of it in the blade it costs you hardness now and can shift later, changing the blade under you. Beating it down is why stainless usually needs a cold treatment that carbon steel never asks for. If the softening side of this is fuzzy for you, what annealing steel actually does, and how I do it covers the opposite end of the same physics.
The equipment reality: you need a controlled oven
Here is the part nobody likes to hear. To heat treat stainless yourself, honestly and repeatably, you need a heat treat oven, a kiln with a PID controller that holds a set temperature within a few degrees and lets you program a soak. Not a forge. Not a forge with a thermocouple stuck in it. A proper oven.
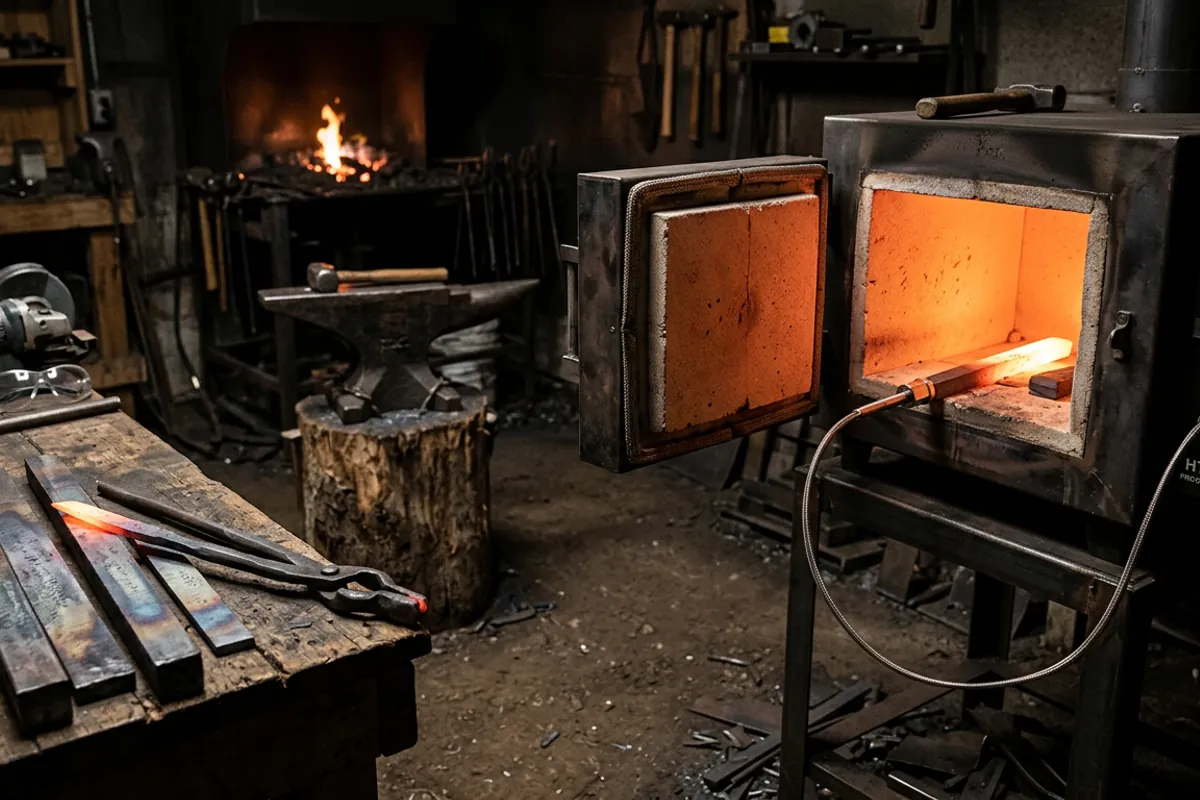
The reason is everything above: narrow ranges, real soak times, and repeatability. A PID oven will bring the chamber to 1950 degrees, or whatever the data sheet calls for, hold it flat for the soak, and do it the same way every time. A forge cannot, and pretending otherwise is how people end up with a drawer of soft blades they cannot explain. I run a coal forge and a propane forge, and both are wonderful for forging and for hardening simple carbon steel. Neither one is a stainless heat treat setup, and I will not tell you it is.
This is the honest fork in the road. If you are committed to stainless and want to do your own heat treat, budget for the oven as part of the deal, the same way you would budget for a grinder. If that is not in the cards, there is a completely respectable second path, and I will get to it.
Austenitizing: temperature and soak time
Austenitizing is the heat-and-hold that sets everything up. For stainless the two knobs are temperature and time, and both come from the steel maker, not from your eye.
Every stainless knife steel has a published data sheet, and reputable makers and testers publish specific austenitizing temperatures and soak times for each one. Those numbers are the whole game, so use the ones for the exact steel you have and hold them as published. Do not average two steels, do not round to a temperature your oven likes better, and do not borrow a number off a forum post that does not name your alloy. A steel like AEB-L behaves differently than 440C, which behaves differently than one of the powder steels like S35VN, and their sheets say so.
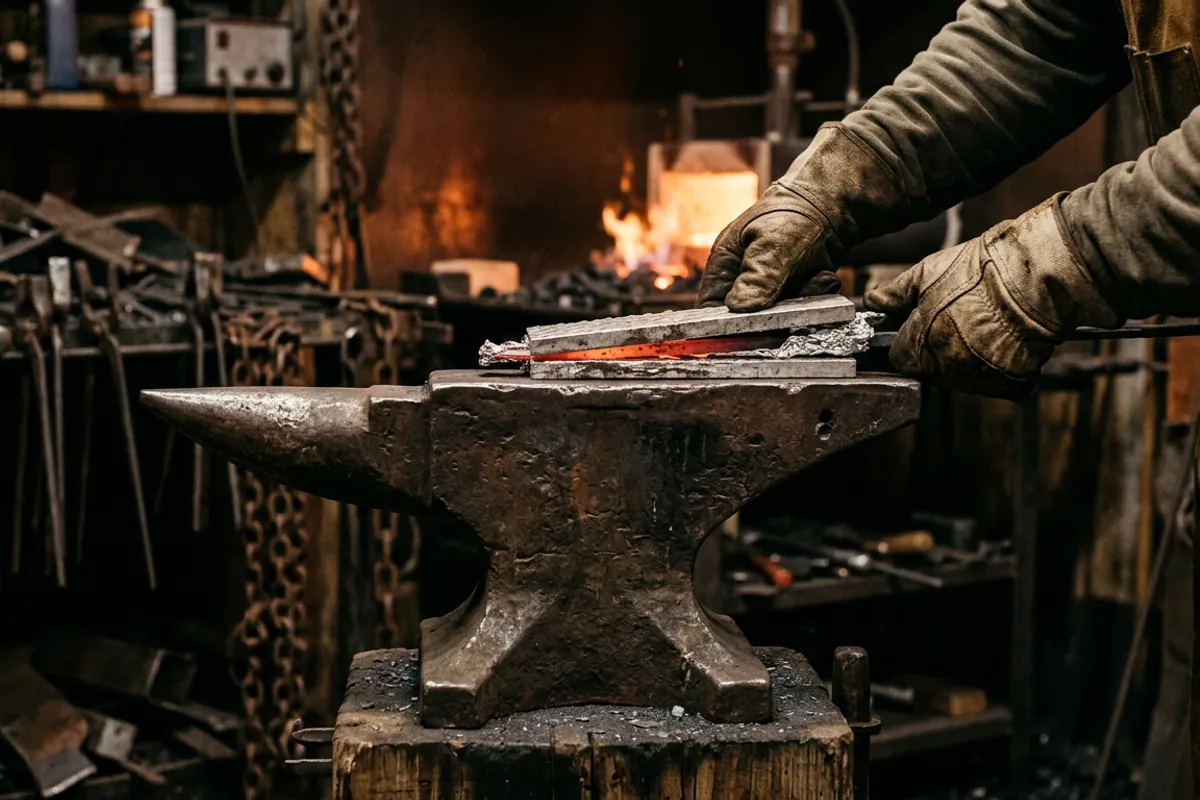
Two things bite people at this stage. First, oxidation and decarburization. At stainless temperatures, bare steel scales and loses carbon at the surface, which wrecks the edge you just spent hours grinding. The standard fix is to wrap the blade in stainless heat treat foil, a tight little envelope that keeps air off the steel through the soak. Handle that foil package with tongs and gloves the whole time, because it comes out at full heat and it is sharp at the folds. Second, thin edges overheat and grow grain faster than the spine. Some makers back the edge off slightly before heat treat and grind it in after, precisely so the delicate part is not the first thing to cook.
The quench: plate quenching and stainless foil
Many stainless and semi-stainless knife steels are air hardening or close to it, which changes how you cool them. Instead of plunging into oil, a lot of makers plate quench: pull the hot foil package and clamp it fast between two chunks of aluminum plate, sometimes with a fan or compressed air moving heat away. The plates pull heat out of a thin blade quickly and evenly and, just as important, keep the blade flat while it hardens so it does not warp.
Whether a given steel wants a plate quench, an oil quench, or air is, again, a data sheet question. What matters for a reference is the principle: the cooling has to be fast enough to trap martensite and even enough to keep the blade straight, and for the thin, air hardening stainless steels most home makers use, plates do that better than a wild plunge into oil. If you do quench stainless in oil for a steel that calls for it, every oil-quench safety rule still applies, and I mean every one.
I will not soften this part, because I have the scar for it. Early on I quenched a blade in oil that was too cold, standing too close in a cotton shirt with no face shield, and the oil flared and took my eyebrows. I kept my eyesight by luck. Quench oil catches fire. Stand to the side, not over it, wear a face shield and natural fibers, no synthetics that melt, and keep a lid within reach to smother a flare. This is not optional and it never becomes optional with experience.
Cryo and subzero: dealing with retained austenite
This is the step that separates stainless from carbon steel more than any other. After the quench, a martensitic stainless blade still holds a chunk of that soft retained austenite, and to convert it you take the blade cold, well below freezing, before you temper. Two common routes: a dry ice and solvent bath, or liquid nitrogen for a deeper cold. The colder subzero treatment converts more of the austenite, which is why so many stainless recipes call for it and why the results measurably improve.
Timing matters. The cold treatment generally comes soon after the quench, before the first temper, because austenite that sits and stabilizes is harder to convert later. The exact sequence, how cold, how long, before or between tempers, is once more a per-steel thing.
Both media are genuine hazards, so treat them like it. Liquid nitrogen and dry ice cause instant cold burns on skin contact, so wear cryo-rated gloves and eye protection and never seal either one in a closed container, because they boil off to gas and can burst it. Work in ventilation, because in a closed space that gas displaces oxygen and you will not feel it happening. If you are not set up to handle cryogens safely, that alone is a good reason to send stainless out.
Tempering stainless
Tempering is where you pull the brittleness back out of the hardened blade, and the mechanics are the same ones I lay out in tempering of metal, explained from the forge floor. You heat the blade to a modest temperature, hold it, let it cool, and usually repeat for a second cycle. What changes with stainless is the temperature and the fact that you do it in the oven by the numbers, not by watching temper colors run across bare steel the way you might on a carbon blade.
Stainless steels also have their own tempering quirks. Some show a secondary hardening hump, where a higher tempering temperature actually brings hardness back up, and some have a temperature range you specifically avoid because it hurts the corrosion resistance the steel exists for. That is exactly the kind of alloy-specific detail you do not want to guess at. Pull the tempering schedule from the data sheet for your steel and follow it, including the number of cycles.
Sending it out is a legitimate answer
Here is the second path I promised, and there is no shame in it. A very large share of working knifemakers, including full-time professionals, send their stainless blades to a commercial heat treater rather than run their own oven and cryo line. You grind the blade, mail it out, and it comes back hardened, cold treated, and tempered to a target hardness by a shop with calibrated equipment and a documented process. I walk through what that service actually buys you in what commercial steel heat treating actually does for a smith, and for stainless specifically it is often the smarter call.
Think about what you would have to buy to match a commercial line: the PID oven, the stainless foil, aluminum quench plates, a cryo setup, and a hardness tester to verify you got what you paid for. For someone making a handful of stainless blades a year, sending them out costs less than that gear and delivers more consistent results. If you are choosing which stainless to even work with, the steel selector tool is a decent place to compare what different alloys ask of you before you commit.
Where to get real numbers
I have deliberately not printed a table of temperatures in this article, and that is on purpose. The right austenitizing temperature, soak time, quench method, cryo step, and tempering schedule are specific to the exact alloy in your hand, and the responsible source is the steel maker's published data sheet plus independent testing. For the science behind why a given recipe works, and for hardness data measured rather than guessed, Knife Steel Nerds is the reference I point people to. They test steels properly and publish the results, which is exactly the kind of real, checkable data you want standing between you and a soft blade.
That is the whole honest picture. Stainless heat treat is a precision job that rewards controlled equipment and punishes eyeballing. Decide early whether you are buying into the oven-and-cryo path or sending blades out, learn the steps so you can judge the result either way, and get your numbers from testing, not from memory or from me. The broader context for all of this lives in the steel and metallurgy hub, and if you are still working mostly in carbon steel while you build up to stainless, that is the right order to do it in.