Most of the questions I get about annealing steel come from somebody standing over a piece of leaf spring with a smoking drill bit and a look on his face. He wanted a hole. The steel had other ideas. Annealing is the answer to that problem, and it is also the answer to a half dozen other problems that show up the moment you stop working with mild steel and start working with anything that can harden. It is one of the least glamorous things you will do at the forge and one of the most useful, because it is the process that puts steel back into a state where you can cut it, drill it, file it, and bend it without fighting.
I have been at this about twenty five years, most of it self taught and all of it in a home shop, and I still anneal something most months. What follows is the plain version: what annealing does inside the steel, how it differs from the other heat treatments people confuse it with, the temperatures that matter, and how I actually do it with a forge and a bucket instead of a programmable kiln. If you want the deep metallurgy, I will point you at people who do real testing, because I do not run a lab and I am not going to pretend otherwise.
What annealing actually does to the steel
Steel is iron with carbon in it, and what makes steel useful is that the carbon can be arranged in different ways depending on how you heat and cool it. Heat plain carbon steel past its critical temperature and the crystal structure changes to austenite, which can dissolve carbon. Cool it fast from there and the carbon gets trapped in a strained, hard structure called martensite. That is hardening. Cool it slowly and the carbon has time to move out and settle into layered plates of iron carbide and soft ferrite, which is pearlite. That is annealing.
The practical translation: a full anneal is heating above critical and then cooling as slowly as you possibly can, so the steel ends up in its softest, most workable, lowest stress condition. Slow is the whole point. Not "let it sit on the bench," but slow in the sense of hours, ideally a hundred degrees an hour or less through the range where the transformation happens.
Three things come out of that. The steel gets soft, so drills and files bite. Internal stresses from forging, rolling, or welding relax, so the part is less likely to warp or crack later. And depending on how you do it, the carbides can be broken up into rounder, more scattered particles instead of hard plates, which is the softest condition steel gets and the reason machinists like properly annealed stock.
What annealing does not do is fix everything. It will not undo decarburization, it will not close a crack, and if you get it wildly too hot and hold it too long you can coarsen the grain badly enough that you have to normalize the piece a few times to get it back. Annealing is a tool with a specific job.
Annealing is not normalizing, and neither one is tempering
This trips up nearly every beginner I have taught, so here it is plainly.
Annealing is heat above critical, then cool as slowly as you can manage. Result: softest, most machinable, coarsest structure. Purpose: workability.
Normalizing is heat above critical, then cool in still air on the bench. Result: harder than annealed, finer and more uniform grain. Purpose: refining grain and evening out the structure after forging, usually done in two or three cycles at descending temperatures before a knife goes to hardening. Air cooling is faster than annealing but far slower than a quench, so plain low alloy steels come out pearlitic and reasonably soft, just not as soft as annealed.
Stress relief, sometimes called a sub critical or process anneal, is heating below critical, holding, and cooling slowly. Nothing transforms because you never entered the austenite range. It softens work hardened metal and takes the stress out of a welded or heavily worked part without touching the grain structure much.
Tempering happens after hardening, not instead of it. It is a low temperature reheat of already hardened steel to trade a little hardness for toughness. It is a completely different operation with a completely different purpose, and I have written about it separately in tempering of metal, explained from the forge floor. If somebody tells you to "anneal" a hardened blade at 400 degrees, they mean temper, and the sloppy vocabulary is how people ruin work.
The temperatures that actually matter
Two numbers anchor everything else.
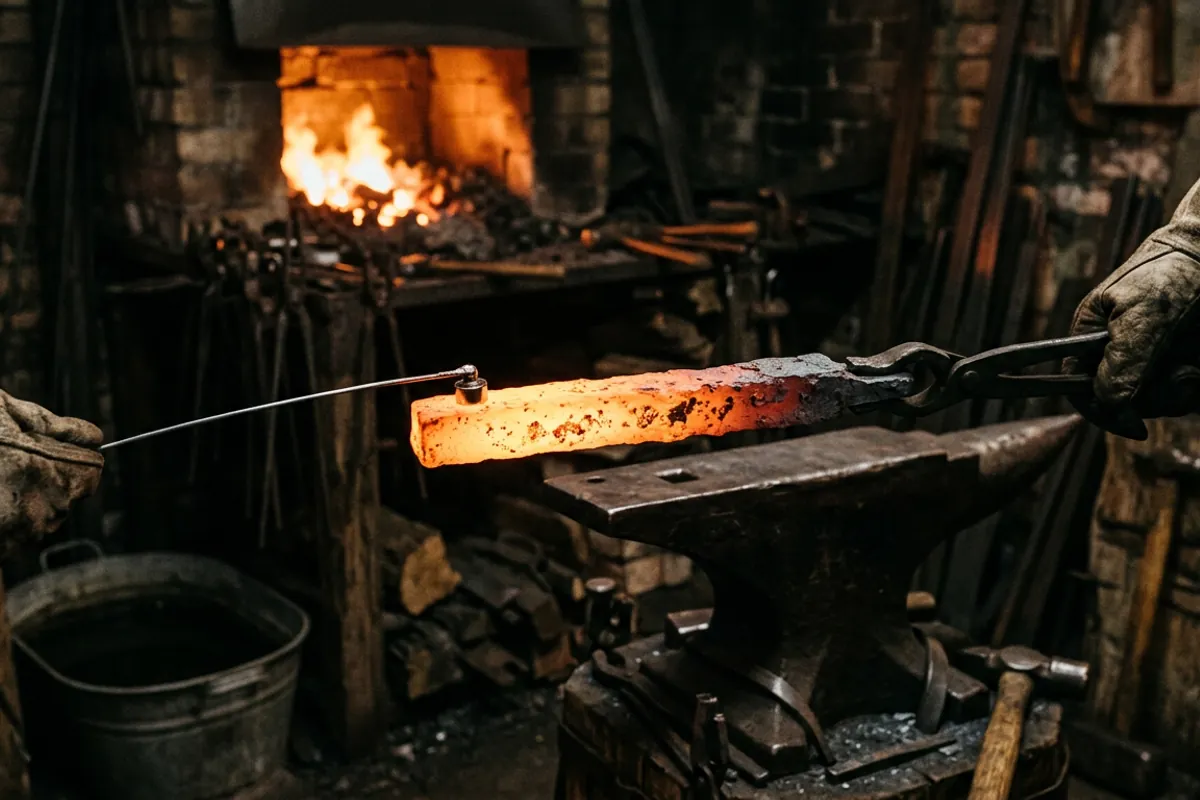
The lower critical temperature for plain carbon steel, the point where pearlite starts turning into austenite, sits at about 1333 F. That is the floor. Below it, nothing transforms, no matter how long you hold.
The upper critical temperature is where the last of the ferrite goes into solution, and it depends on carbon content. For a steel right at the eutectoid composition, around 0.8 percent carbon, upper and lower critical are effectively the same point. Below that carbon level, the upper critical climbs, which is why a low carbon steel needs more heat to fully austenitize than 1084 does. A full anneal means going somewhere modestly above the upper critical for that particular steel, not blasting it as hot as the forge will go.
Then there is the magnet. Iron loses its magnetism at its Curie point, commonly cited around 1414 F, and every smith learns to touch a hot bar with a magnet on a wire and watch it stop sticking. The magnet is genuinely useful and it is also approximate. It tells you that you are in the neighborhood of critical for plain carbon steel. It does not tell you which critical, it does not account for alloy content, and it means very little on a stainless or high alloy tool steel where the transformation temperatures are somewhere else entirely. Treat non magnetic as a landmark, not a measurement.
The other rule of thumb worth knowing is soak time: roughly one hour at temperature per inch of thickness. Most of what a home smith anneals is a quarter inch or less, so that is fifteen minutes, not an afternoon. Longer soaks buy you nothing and cost you scale and decarburized surface.
Judge color in a dim shop. Bright overhead light or daylight through the door makes hot steel read cooler than it is, and the correction people make is to add heat they did not need. I do color work with the shop lights down, same as I do when I am watching for a forge welding heat.
How I anneal in a home shop
I do not have a programmable kiln with a controlled ramp down, which is the textbook way to anneal. What I have is two forges and some patience, and that covers most of what a hobby shop actually needs. Both of my forges do this fine, though they behave differently, which I get into in coal or propane: which first forge makes sense?.
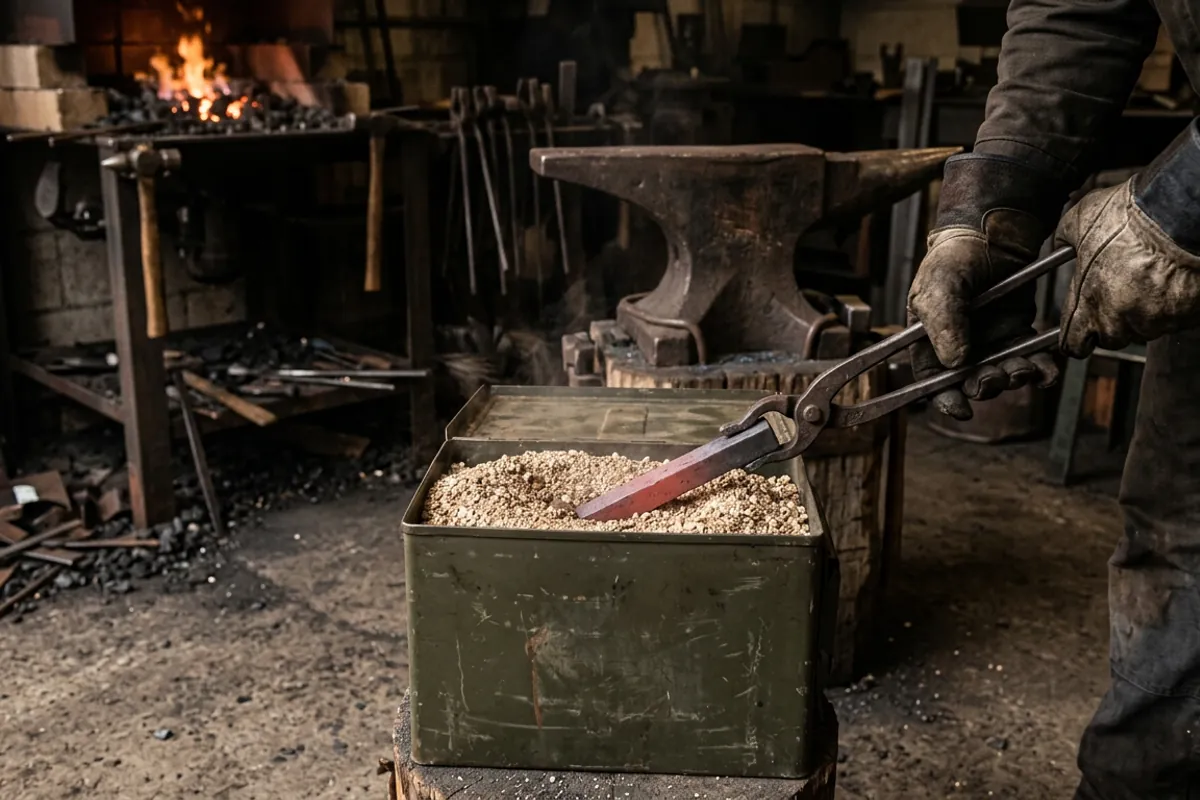
The vermiculite can. This is my default. A steel can or an old ammo box packed with vermiculite, dry sand, or dry wood ash, sitting ready before I bring the steel up. Heat the piece evenly to just past non magnetic, give it a short soak, then bury it deep in the medium with tongs and put the lid on. The insulation slows the cooling to a crawl. I leave it overnight and pull it out the next morning. For 1084, 1075, 5160, and most simple carbon steels this gets me soft enough to drill and file, which is all I am after.
Depth matters. A bar tossed on top of the vermiculite cools far faster than one buried six inches down with material packed around it. If your can is shallow, your anneal is mediocre.
The dying coal fire. With a coal forge I can bank the fire, bury the work in the hot coke bed, shut the air off, and let the whole fire die around it. This is the old way and it works well because the fire itself is a big thermal mass cooling slowly. A propane forge is less suited to it, since the chamber is small and the shell sheds heat, though shutting the burner off with the work inside and the openings blocked is better than nothing.
The double heat trick. If a piece comes out harder than I want, I will bring it back to just below critical, hold it a few minutes, and slow cool again. Repeated sub critical cycles will keep nudging the carbides toward a rounder, softer form. It is a poor man's spheroidizing anneal and it is slow, but on a stubborn piece of scrap it beats guessing.
What I do not bother with. I do not anneal mild steel. It is already soft, and if it has work hardened from cold bending, a sub critical stress relief handles it. I also do not anneal every scrap I plan to forge, because forging heat plus normalizing afterward gets me where I need to be. Annealing is for when I need to cut, drill, or machine.
The steels that will not anneal in a bucket of ash
Here is where the bucket method quits, and it is worth knowing before you waste an evening.
Air hardening tool steels are the obvious case. A2, D2, and their relatives have enough alloy content that they harden on cooling in still air. Bury one in vermiculite and you have not annealed it, you have given it a nice slow quench and it can come out harder than it started. These steels need a controlled furnace cool at a specified rate, and if you do not have a kiln that can ramp down on a program, buy the stock annealed and keep it that way.
Stainless steels are the other case. The martensitic stainless knife steels have annealing cycles that involve specific hold temperatures and controlled cooling that a forge and a can of sand cannot deliver. Trying to freehand it is how people end up with stock that is neither properly soft nor properly hard. Buy stainless annealed, do your drilling and profiling before heat treat, and send it out or use a real kiln for the hardening.
High carbon, low alloy steels are the friendly ones. 1075, 1084, 1095, 5160, 52100, W1, O1, and most spring and file scrap respond well to slow cooling in an insulated medium. O1 sits at the edge of that group, oil hardening but slow enough that a well insulated cool gets it soft. This whole family is what most home smiths are working with anyway, and the steel selector tool will tell you which camp a given steel falls into before you commit fuel to it.
Unknown scrap is unknown. Leaf spring, coil spring, and old files are usually simple carbon or low alloy steels and usually anneal fine, but "usually" is doing work in that sentence. If a piece will not soften after a proper cycle, you probably have more alloy in it than you thought.
When you actually need to anneal, and when you are wasting fuel
The honest list of reasons to anneal, from a hobby shop:
You need to drill it. This is the number one reason. Hardened or as rolled spring steel eats bits. Anneal, drill, then heat treat.
You need to file, cut, or machine a profile. Same logic. All stock removal happens in the annealed state. Any decent walkthrough of knife making, explained from the first bar of steel puts the shaping before the hardening for exactly this reason.
You recovered a hardened piece of scrap and want to forge it. Forging hardened steel is a good way to crack it. Anneal first, forge, normalize after.
You made a mistake in heat treat and need to start over. Annealing resets the steel so you can normalize and re harden cleanly.
You have a part that will be welded or heavily cold worked and you are worried about cracking. Stress relief, not a full anneal, but the same family of thinking.
And the list of times you do not need it: mild steel, anything you are just going to forge hot and then normalize, and anything already sold to you in the annealed condition. Fuel and time are not free, and lighting a forge for an anneal you do not need is a beginner habit worth breaking.
Reading the result, and what went wrong
The test is a file. A sharp file should bite into properly annealed carbon steel and take a curl, not skate. Skating means it is still hard. A drill bit is a slower and more expensive way to learn the same thing.
If it came out hard, the usual suspects, in order: the cool was too fast, the piece was not fully up to critical, or the steel has more alloy in it than you assumed. Fix the first by burying deeper in more insulating medium. Fix the second by getting a proper even heat all the way through, not just a hot skin. The third you cannot fix with a bucket.
If it came out soft but the surface behaves strangely under a file or the edge crumbles later in the build, suspect decarburization. Long soaks in an oxidizing atmosphere pull carbon out of the surface, and that skin will never harden properly. Keep soaks short, keep the forge on the reducing side, and plan to grind past the affected layer.
If the piece is soft but the finished blade later comes out coarse and brittle, you may have coarsened the grain with too much heat or too long a soak. Two or three normalizing cycles at descending temperatures before hardening will bring it back. Grain refinement is one of those areas where owner opinion runs way ahead of evidence, so I keep my cycles simple and let the testing people settle the fine points.
Safety around a slow cool
A can of steel and vermiculite that has been sitting for four hours does not look hot. It is hot. That is the single hazard people underestimate about annealing, because everything else in the shop announces itself with a glow and this does not.
Set the can on concrete or steel, never on a wood bench, and never within reach of rags, sawdust, or a fuel can. Treat it as a live heat source until the next morning. I have picked up a bar out of ash the following day that was still warm enough to be unpleasant.
The rest of it is standard forge discipline and it is not optional. ANSI Z87.1 rated eye protection, every heat, no exceptions. Natural fibers only near hot work, because synthetics melt onto skin instead of burning away; I learned my lesson about heat and clothing when an oil quench flared into my face early on and took my eyebrows off, and I kept my eyesight by luck rather than judgment. Ventilation, especially with a coal fire, because carbon monoxide gives you no warning at all. If you are still assembling gear, I went through what actually matters in blacksmith safety gear: what matters and what to skip.
Two annealing specific notes. Wear a dust mask when you are packing or stirring vermiculite; there was a real asbestos contamination problem with vermiculite from one historic mine, and while current horticultural product is a different supply, breathing any fine mineral dust is a bad habit. And when you bury a hot bar, do it deliberately with tongs and a clear path, because a hot piece dropped into a can of loose ash throws a cloud.
Where to send the questions I cannot answer
I can tell you what works on my floor with the steels I use. I cannot tell you the precise transformation temperatures for a specific alloy, the exact carbide morphology you get from a given cycle, or whether one normalizing schedule beats another by any measurable margin. Nobody working from a home shop can, and the ones who claim to are usually repeating something they read.
For that level of question, go to people who actually run the tests. Knife Steel Nerds publishes real metallurgical work on heat treatment, grain size, and steel behavior, and it is where I send anybody who wants numbers instead of opinions. Steel manufacturers also publish datasheets with specified annealing cycles for their products, and those sheets are the right authority for a named alloy. Use the published cycle for the steel you actually have, not a general rule you found on a forum.
Everything else on the metallurgy side of this shop lives on the Steel and metallurgy hub, which is where I keep the explainers on steel selection, hardening, and tempering in one place.
The short version, if you take nothing else: anneal when you need the steel soft enough to work on cold, get it evenly past critical, and then cool it slower than feels reasonable. Most failed anneals are just impatience wearing a lab coat.