Heat treating steel is the part of smithing where the shape stops mattering and the steel starts. You can forge a blade with a perfect profile, clean grind, and a handle that fits your hand, and if the heat treat is wrong you have made an expensive letter opener. Heat treating steel means controlling how you heat it and how you cool it so the metal ends up hard where you want it hard and tough where you want it tough. That is the whole game. It sounds simple, and the theory is, but the difference between a blade that holds an edge and one that chips or bends is a couple hundred degrees and a few seconds at the quench. I have been doing this on a home shop floor for about twenty-five years, and I still respect that margin.
This is a plain explainer, owner to owner, of what actually happens in the steel and how a home smith gets it right. It is not a recipe card for one alloy. If you want my numbers for a specific steel, I have written those up separately, and I will point you there. What you want first is the picture of what you are doing, because once you understand what the heat is doing to the grain, the recipes stop being magic and start being logic.
What heat treating actually changes in the steel
Steel is iron with a little carbon in it, and the carbon is the whole story. At room temperature the carbon and iron sit in one arrangement of atoms. Heat the steel past a certain point, called the critical temperature, and the atoms rearrange into a structure that can dissolve the carbon evenly through the metal. Metallurgists call that hot structure austenite. If you cool it slowly, the carbon has time to migrate back out and the steel goes soft again. If you cool it fast, you trap the carbon in place and the steel locks into a hard, strained structure called martensite. That trapped, stressed martensite is what a hardened blade is made of.
So every heat treat is really three questions. Did I get the steel hot enough, and evenly enough, to turn the whole working area to austenite? Did I cool it fast enough to trap the carbon and form martensite? And did I then pull some of that hardness back so the blade is not glass? Hardening without tempering gives you a file-hard edge that will snap. Everything else is detail on top of those three questions. If you want the longer view of how heat changes metal in general, I have a broader piece on the heat treatment of metals, but the three questions above are the bones of it.
Knowing your steel before you light the forge
You cannot heat treat mystery metal and know what you got. The single most common beginner mistake I see is picking up a leaf spring or a chunk of unknown bar, forging a knife, quenching it in whatever oil is around, and hoping. Sometimes it works. Usually it does not, and you never learn why, because you never knew what the steel wanted.
Every steel has its own critical temperature, its own soak time, and its own quench speed. A simple high carbon steel like 1084 is forgiving and hardens in oil at a modest heat. An air hardening steel like A2 wants to be held at temperature and cooled in still air, and quenching it in oil the way you would a simple steel can crack it. Stainless is a different animal again, needing tight temperature control that a coal fire simply cannot give you. Buy known steel with a datasheet, and match the steel to the job. I keep a running reference and a steel selector tool for exactly this, and the whole steel and metallurgy section exists so you are not guessing. Guessing at the quench is guessing with the most expensive part of the blade.
Normalizing and annealing: getting the steel ready
Forging beats up the grain structure. When you draw out a bar under the hammer, especially if you finish forging at a low red or hammer cold, you leave the steel with uneven, coarse grain and internal stress. If you harden it in that state you can get warping, cracking, and a weaker edge. So before the real hardening heat, most blade steels want normalizing, and sometimes annealing.
Normalizing means heating the steel to its critical temperature, pulling it out of the fire, and letting it cool in still air. You often do this two or three times, each time from a slightly lower heat. It refines the grain, evens it out, and relieves the stress from forging. It costs you nothing but a few extra heats and it is the cheapest insurance in the whole process.
Annealing goes further. You heat to critical and then cool as slowly as you can, burying the piece in vermiculite or wood ash, or letting it cool inside a shutting-down forge over hours. That leaves the steel dead soft, which is what you want for filing, drilling pin holes, and grinding before you harden. I have a full piece on annealing steel because smiths mix up normalizing and annealing constantly, and they do different jobs. Short version: normalize to fix the grain, anneal to make it soft and workable.
The hardening heat and the quench
This is the moment everything else was leading to. You bring the steel up to its austenitizing temperature, hold it there long enough for the carbon to go into solution evenly, and then cool it fast in the right quench so the carbon has no time to escape.
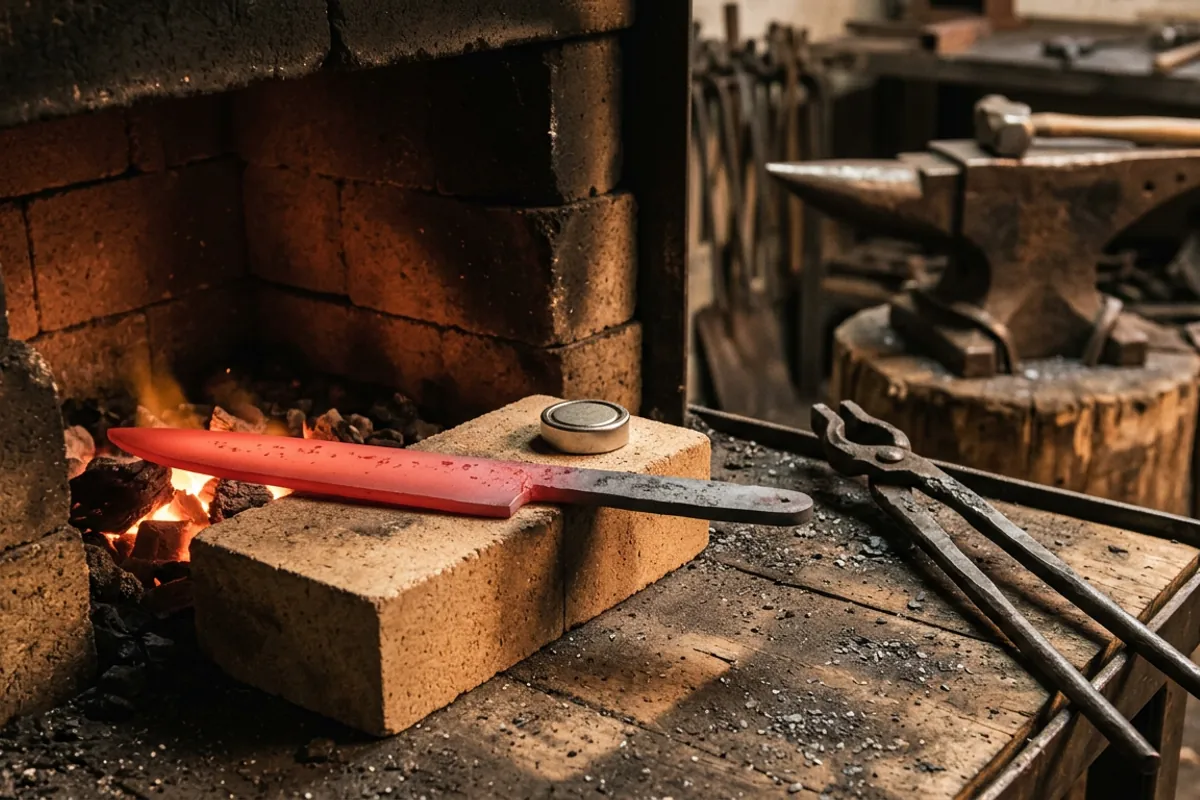
Getting the heat right is the hard part in a home shop, because you usually cannot read the actual temperature. The old trick is a magnet. Steel loses its magnetism at the Curie point, which for plain carbon steel sits around 1414 degrees Fahrenheit, just below the temperature where most simple carbon steels finish converting to austenite. So you heat until a magnet no longer sticks, then take it a shade hotter and hold it there. In a dim shop the color at that point is a clean, even cherry to orange with no dark shadows anywhere in the blade. Shadows mean cold spots, and cold spots do not harden. Even heat matters as much as the right heat, which is why a propane forge, with its steady even soak, is easier to heat treat in than a coal fire that runs hot in one spot.
The quench is where the blade lives or dies, and where you can get hurt. Different steels want different quench speeds. Water and brine cool fastest and are unforgiving, cracking any steel not meant for them. Most simple blade steels want oil, either a fast commercial quench oil or something like warm canola. Air hardening steels want no liquid at all. Use the quench the datasheet calls for, get the oil to the temperature it wants, usually gently warm rather than cold, and move the blade in straight, edge first, along its length. Do not stir it sideways or you will warp it.
Now the safety part, and I mean this. Early on I quenched a blade in oil that was too cold, standing too close in a cotton shirt with no face shield. The oil flared up the side of the blade and took my eyebrows off. I kept my eyesight by luck alone, and luck is not a plan. Quench oil flashes. Warm oil flares less than cold oil because a cold blade dunked in cold oil can still boil the surface, and cool oil is closer to its flash point behavior in ways that surprise people, so warm the oil to the range the maker specifies and no colder. Stand to the side, not over it. Wear a face shield rated to ANSI Z87.1 and natural fiber clothing, wool or cotton that chars instead of synthetics that melt into your skin. Keep a metal lid nearby that fits the quench tank, because the way you put out an oil fire is smother it, never water. I say all this flat because I have the scar tissue that earned it.
Tempering: trading hardness for toughness
Straight out of the quench your blade is as hard as it will ever be, and it is also brittle enough to shatter if you drop it. It is full of internal stress and locked-up martensite. Tempering is how you buy back toughness by giving up a little hardness, on purpose, in a controlled way.
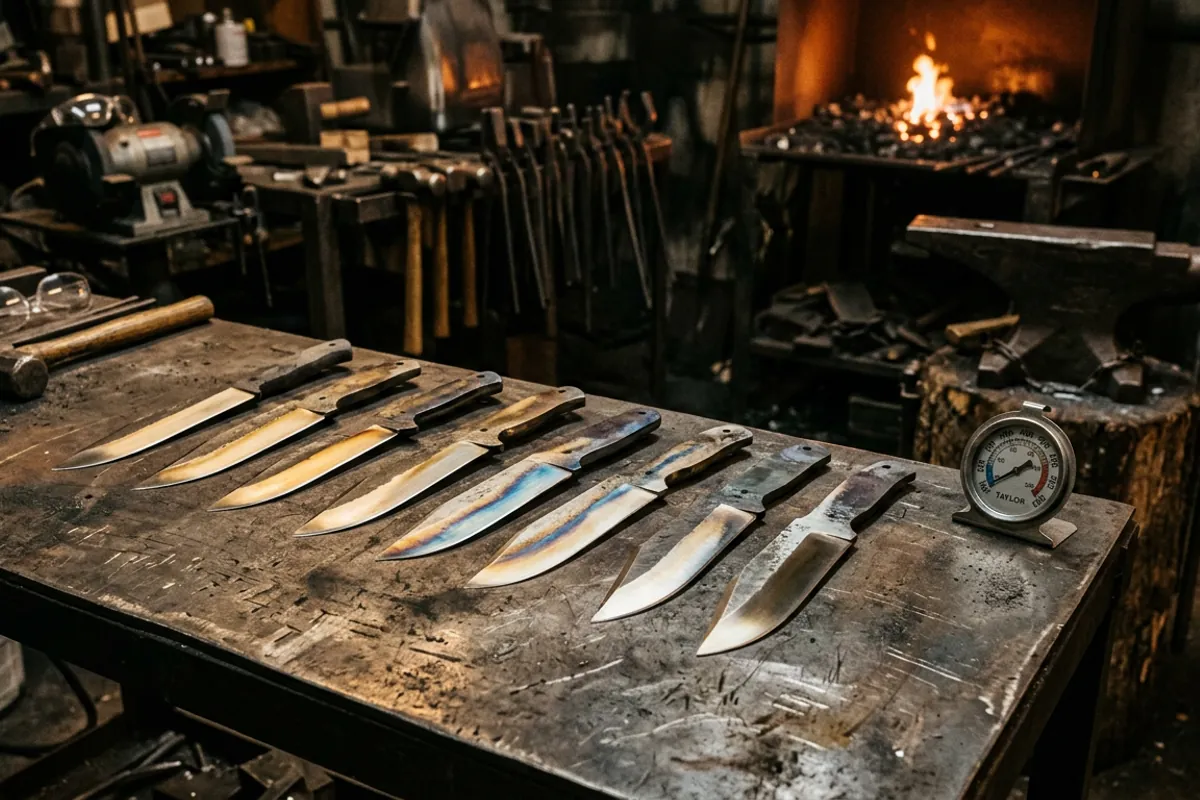
Tempering means reheating the hardened steel to a low temperature, far below critical, and holding it there. A kitchen oven does this fine for most simple steels, and it holds temperature far better than a torch or a forge. The usual approach is two cycles of one to two hours at the tempering temperature, letting the blade cool between them. The temperature you pick sets the final hardness, and it is specific to the steel and the job. A kitchen knife tempered around 400 degrees Fahrenheit keeps a hard edge; a tool that must take shock, like a hardy or a hot cut, gets tempered hotter and softer so it bends instead of chipping.
Do the tempering as soon as the blade is cool enough to hold after the quench, because a fully hardened blade sitting untempered can crack on its own from the trapped stress. Do not skip it, do not rush it, and do not guess the oven temperature; check it with a separate thermometer, because oven dials lie by fifty degrees all the time. I go deeper on the how and why in my piece on tempering steel by heating and cooling, but the principle is simple: harden fully, then temper back to the toughness the tool needs.
Reading color, and why color lies
Two different colors matter in heat treating, and beginners run them together. There is the glowing color of hot steel in the forge, which tells you roughly how hot the steel is when you are trying to reach critical. And there is the oxide color that appears on clean, hardened steel when you gently reheat it to temper, running from pale straw through brown and purple to blue as the temperature climbs. Straw is cooler, blue is hotter.
Both are useful and both will lie to you. Forge glow depends on how much light is in your shop. The same orange looks hotter in a dark smithy than in daylight through the open door, and I have watched people overheat blades badly because they judged color at noon with the doors open. Heat treat in consistent, dim light and learn what your steel looks like there. Oxide temper colors only work on bright, clean steel and only tell you the temperature of the surface at that spot, not the core, and once you have tempered in an oven the colors are not a reliable readout at all. Use color as a cross check, not as your only instrument. A magnet for the hardening heat and a real oven thermometer for the temper will beat your eye every time.
Where the forge floor stops and real testing begins
I want to be honest about the limits of a home shop, because that honesty is the whole point of this site. I can get a simple carbon steel to harden and temper reliably by feel, magnet, and oven, and so can you with practice. What I cannot do on my floor is tell you the exact austenitizing temperature, soak time, and hardness curve for a given alloy to the degree a datasheet or a lab can. Those numbers come from controlled testing, not from a smith eyeballing cherry red.
So when the question gets deep, into precise soak times, cryo treatment, the behavior of the fancier alloy and stainless steels, send it to people who actually test steel under controlled conditions. Knife Steel Nerds does that work with real equipment and publishes the results, and I would rather point you to their measured numbers than invent a figure that sounds authoritative and gets your blade wrong. For the steels I run myself I have written down what actually works, like my 4140 heat treat writeup from the forge floor, and those are the ones I will vouch for from experience. Everything past what I can test, I will tell you plainly is owner consensus or published data, not my own bench. That line matters, because a wrong heat treat number does not just waste steel, it can hand someone a blade they trust that fails when they use it. Heat treating steel rewards patience and known materials, and it punishes guessing, so know your steel, control your heat, respect the quench, and always temper.