Knife blacksmithing is just blacksmithing pointed at one narrow job: taking a bar of hardenable steel, moving it into the shape of a blade with heat and a hammer, then heat treating it so it holds an edge instead of bending like a butter knife. I have been at the forge about twenty-five years, started self-taught on a chunk of railroad track clamped to a stump, and most of what I know about knives came from ruining steel and figuring out why. This is the plain version of the whole process, start to finish, written for the person who has watched a dozen videos and still is not sure what actually matters. No product picks here, just how the work goes. If you want the wider context of the craft, the knife making topic hub collects the rest of it.
What knife blacksmithing actually is
There are two ways to make a knife. You can grind one out of flat bar stock, which is stock removal, and it is a legitimate craft that produces excellent knives. Or you can forge one, which means heating the steel to a working temperature and moving it with a hammer until it is roughly blade shaped, then grinding away much less material. Knife blacksmithing is the second one.
Forging does not automatically make a better knife. Anyone who tells you a forged blade is inherently superior is selling something. What forging gives you is control over shape and distal taper without wasting half the bar in grinding dust, the ability to start from stock that is not already the right dimension, and honestly, the reason most of us do it, the fact that it is a good time. A hammer, a hot bar, and an anvil is a satisfying way to spend a Saturday in a way that a belt grinder is not.
What forging does not do is fix bad steel or bad heat treat. The blade's performance comes almost entirely from what steel you picked and what you did to it in the heat treat. Everything with the hammer is shape. Keep that clear in your head and you will make decisions in the right order.
The steel comes first
You cannot harden steel that has no carbon in it. Mild steel from the hardware store, structural angle, rebar, most scrap you will find in a bin, none of it will make a knife that holds an edge. You need a steel with enough carbon, roughly 0.6 percent or more, to form a hard martensitic edge when quenched.
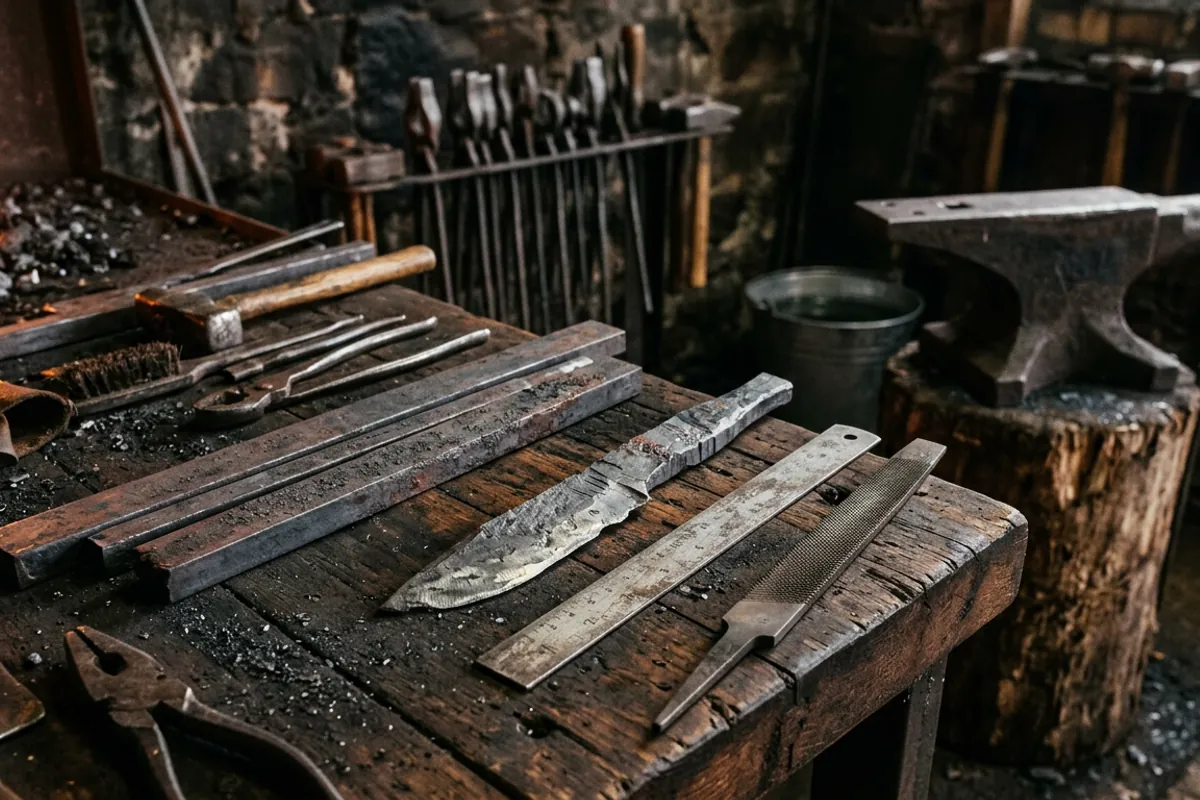
For a first knife, buy a known simple carbon steel from a supplier who tells you exactly what it is. The common beginner choices are 1084, 1080, 5160, and 80CrV2. They are cheap, they forge easily, they harden in oil, and every one of them comes with a published data sheet giving you the hardening and tempering numbers. That data sheet is the single most useful thing in this whole process, because it turns heat treat from guesswork into following instructions.
Mystery steel is where beginners lose months. Leaf springs, files, and old tools can all make knives, but you do not know the alloy, so you do not know the correct quenchant or temperatures, and when the blade cracks or comes out soft you cannot tell whether it was the steel or you. Railroad spikes are the classic trap. Spikes stamped HC are only specified to a minimum of about 0.30 percent carbon, well under what a hardening blade wants, so a spike knife is a fun forging exercise and a decorative object, not a working cutter. I wrote about that in more detail in the railroad spike knife, honestly explained.
Stainless steels are a separate world. They need long soaks at high temperature, usually foil wrap or a controlled atmosphere, and often cryo treatment. They are not a forge and eyeball proposition. Leave them alone until you have a heat treat oven and a reason.
For anything deeper than that, the metallurgy questions, grain size, alloy comparisons, actual measured toughness numbers, go read Knife Steel Nerds. That site runs real tests. I do not, and I am not going to pretend otherwise.
What the forge has to do
The forge has one job for knife work: get a section of bar evenly to a working orange, and do it again reliably. That is it.
A propane forge does this well. The heat is even along the chamber, you can hold a temperature reasonably steady, and even heat matters more for blades than for almost anything else, because a long thin blade heated unevenly will forge unevenly and warp in the quench. I run both fuels in my shop, a coal forge for heavy stock and forge welding and a propane forge for most day to day work, and for knives the propane forge gets used far more.
Coal will absolutely make knives, and it gives you something propane does not, which is localized heat. You can bury just the tang area in the fire and leave the rest cool. The cost is fire tending, ash, clinker, and a much bigger range of temperatures in the fire, which means it is easier to burn a thin blade. If you are deciding which to build a shop around, I laid out the tradeoffs in coal or propane: which first forge makes sense.
Whichever you burn, both produce carbon monoxide. Forge outdoors or in a space with real cross ventilation, not a closed garage with the door cracked, and put a carbon monoxide detector on the wall. That is a cheap piece of gear that has no downside.
Forging the blade, in the order it happens
Work hot but not sparking. Plain carbon steel forges well in the orange to bright orange range. Yellow and white are where you start burning the steel, and you can hear and smell it when it happens. On the other end, stop hitting when the steel drops to a dull red. Forging cold carbon steel cracks it, and the cracks often do not show up until after the quench, when it is far too late.
The usual sequence goes like this. Draw the bar out to rough length and thickness first. Then forge the bevels, working from the spine side down toward the edge, which pushes the steel into the blade profile and starts your distal taper. Leave the edge thick, no thinner than a dime, and thicker than that is fine. A thin forged edge overheats fast in the fire and warps or cracks in the quench, and you are going to grind it thin later anyway.
Then set the plunge or the shoulder, forge the tang, and straighten. Straightening is easier hot than cold and much easier before heat treat than after.
Two things eat beginner blades here. The first is soaking the steel at high heat while you decide what to do next, which grows grain and makes the finished blade brittle. Get the piece in, get it hot, work it, put it back. The second is hammering the edge thin and then leaving it in a hot fire, where a thin section reaches burning temperature long before the spine does.
Anvil weight matters less than people think for this work. Blades are light stock, and a 100 to 150 pound anvil is plenty. My Bessie is a 148 pound Trenton and I have never once wished she were heavier for knives. What matters is that the face is flat, hard, and solidly mounted so the rebound goes into the steel instead of into the stand. There is more on sizing in what size anvil do you actually need.
Heat treat is where knives are won or lost
You can forge a beautiful shape and end up with a knife that will not cut cardboard. Heat treat is what turns forged steel into a blade, and it is three separate stages that people constantly blur together.
Normalizing
Forging leaves the grain structure uneven and stressed. Normalizing means heating the blade to just above critical, holding briefly, and letting it air cool to black. Common practice is three cycles at descending temperatures. This refines the grain and relieves the stress that would otherwise warp the blade in the quench. Skipping it is one of the most common reasons a first knife comes out banana shaped.
Hardening
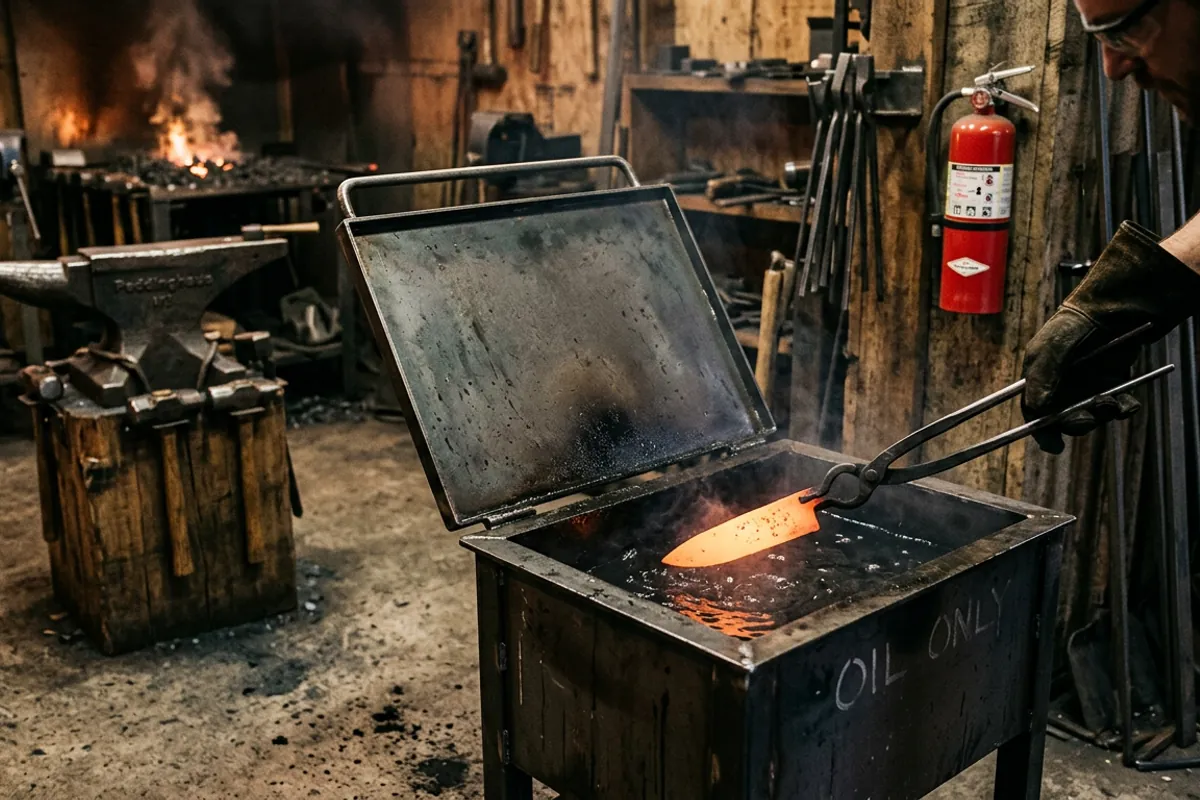
Heat to the austenitizing temperature listed on the data sheet for your steel, hold as directed, then quench in the specified medium. For the simple carbon steels above, that is oil, not water. Water quenching a steel that wants oil is a reliable way to hear a ping and find a crack.
A magnet is a useful field check because steel loses its magnetism at the Curie point, right around the critical range. When the blade stops sticking to a magnet you are close. Close is not exact, though, and the published data sheet number is better than any color you judge by eye in a dim shop.
Quench point first, spine last, moving the blade edge down through the oil, and keep it moving. When it comes out, a file should skate across the edge without biting. If the file cuts, it did not harden, and you go back and figure out why before doing anything else.
Tempering
A freshly quenched blade is glass hard and glass brittle. Drop it on concrete and it can shatter. Temper it within an hour or so, in a kitchen or toaster oven set to the data sheet temperature, usually two cycles of two hours with a cool to room temperature between. Verify the oven with a separate thermometer, because cheap ovens swing badly and a hundred degrees off changes the blade. I went into the how and why of this in more depth in tempering of metal, explained from the forge floor.
Temper colors on cleaned steel, straw and bronze and purple, are a rough guide only, and they are misleading on a blade that heats unevenly. Use the oven.
Grinding, filing, and the finish
Rough grinding happens before heat treat, when the steel is soft. Finish grinding happens after, when it is hard, and that is where heat becomes the enemy. Every second the edge spends against a belt is heat going into a thin section of steel. If you take the edge above your tempering temperature, you have locally softened it and no amount of sharpening will fix it. Grind light, keep the blade moving, and dunk it in water often.
You do not need a belt grinder to start. Files, a vise, and patience make good knives, and a filing jig is how a lot of people made their first dozen blades. It is slow, and hand filing a hardened blade is not happening, which is exactly why rough shaping goes before heat treat. If you do end up buying a grinder, the honest tradeoffs are in the belt grinder I would buy for knife making.
Grinding dust is not harmless. Wear a respirator, not a paper dust mask, and do not grind in the same space where you eat or where sparks can reach your quench oil.
The tool list that actually matters
Knife blacksmithing needs less than the internet suggests. A forge, an anvil or a solid hard steel face of some kind, a 2 to 3 pound hammer with a smooth crowned face, tongs that actually grip flat stock, a vise, a quench tank with a lid, and files. That is a working setup.
The tongs point is worth repeating, because flat bar in the wrong tongs is genuinely dangerous. A blade blank that squirts out of a loose grip is a hot piece of steel moving fast at your body. Tongs need to fit the stock you are holding, and one universal pair does not exist. There is more on that in smithing tongs that actually grip.
What you do not need in year one: a power hammer, a forge welding setup for damascus, a heat treat oven, an anvil over 200 pounds, or a rack of specialty hammers. Every one of those solves a problem you do not have yet.
Safety, said plainly
I will tell this one straight because it is the reason I write about safety the way I do. Early on I quenched a blade in oil that was too cold, standing close in a cotton shirt with no face shield. The oil flared up and took my eyebrows. I kept my eyesight by luck, not by anything I did right.
So, the real rules. Eye protection rated ANSI Z87.1, all the time, not just at the grinder. Natural fibers only near the forge, cotton, wool, or leather, because synthetics melt into skin instead of burning away. A quench tank made of steel with a lid that can smother a fire, sized so the oil does not overflow, warmed to the temperature the oil wants, and never placed where a spark shower can land in it. A fire extinguisher within reach and not behind the fire. Ventilation and a carbon monoxide alarm. A respirator for grinding.
Hot steel looks exactly like cold steel. Assume every piece on the anvil is hot until you have watched it cool, and never set a hot blade down where someone can put a hand on it. The full rundown of what gear matters and what is a waste is in blacksmith safety gear: what matters and what to skip.
What the first year looks like
Buy ten feet of known steel. Make ten knives from it. Do not make one knife ten times better in your head before you start.
Your first blade will be thick, the grind will wander, and the handle will be too big. Your fourth will be noticeably better. Somewhere around the eighth you will start seeing the mistakes before you make them, which is the actual skill. Test every blade you make before you hand it to anyone: flex it, cut something abrasive, take the edge into a piece of hardwood. A knife that fails on your bench taught you something. A knife that fails in a friend's hand cut a friend.
Keep notes. Steel, forge, temperatures, quench, temper, and how it performed. Six months in, those notes are the only way to know why the good ones were good. That is how you go from following a process to understanding one, and it is worth more than any tool you can buy. If you want the same ground covered from a different angle, knife making, explained from the first bar of steel walks it through without the hammer focus.