What a diy forge really costs, and what it buys you
If you want the short version: for a first diy forge I would build a propane shell lined with two layers of 1 inch, 8 lb density ceramic wool, rigidize it, cast a Kast-O-Lite 30 floor over the top, and feed it with one cast venturi burner and an adjustable 0 to 30 psi regulator with a gauge. That is the build that gets a beginner welding heat without a machine shop, and every part of it can be bought off a shelf. Build the shell, buy the burner, and do not improvise the gas plumbing.
Here is the honest framing before we go further. I have lined forges, cast floors, and run both fuels in my own shop for a long time, so I can tell you how wool behaves when you skip the rigidizer and what a flux soaked floor looks like after a season. What I have not done is bench test the specific listed products below against each other. Those picks lean on published specs from the makers and retailers, plus what owners report on the forums, weighed against what I know from the shop floor. Where the owner signal is thin, I say so.
The money question people actually ask is whether building beats buying. It does, but not by as much as the videos suggest. Materials for a decent single burner propane forge land in the same neighborhood as an entry level ready made unit once you have bought wool, rigidizer, castable, a burner, a regulator and hose, and something to make the shell out of. What you get for the extra weekend is a forge sized to your work, a lining you know the thickness of, and the ability to repair it yourself forever. What you do not get is a shortcut. If you want the bought path instead, I laid it out in the propane forge guide, and the fuel decision itself is its own argument in coal or propane.
The parts list, with published specs
Everything below is a published figure from the maker or a non marketplace retailer page, linked in the section that covers it. Where nobody publishes a number, the table says so rather than guessing.
Scroll horizontally to see all columns.
| Part | Published spec | Where it goes | Price tier |
|---|---|---|---|
| Ceramic fiber blanket, 8 lb density | 2400F rated, 1 inch x 24 inches x 150 inches, 43 to 47 percent alumina and 53 to 57 percent silica | Two 1 inch layers inside the shell | Budget |
| Colloidal silica rigidizer | 2300F rated surface coating for fiber blanket and board | Sprayed or brushed into the wool before first fire | Budget |
| Kast-O-Lite 30 insulating castable | 3000F rating, density 90 lb per cubic foot, sold in a 20 lb bag, mixes at 9.9 lb or 1.2 gallons of water per 55 lb | Hard flux resistant floor over the wool | Budget to mid |
| Insulating firebrick | 2500F rated, 2.5 inches x 4.5 inches x 9 inches, box of 8 | Floor, door blocks, adjustable openings | Budget |
| Adjustable propane regulator with gauge | 0 to 30 psi adjustable outlet, 4 foot hose | Tank to burner | Budget |
| Cast venturi burner with air choke | Air choke adjustable; BTU and thread size not published on a maker page I could verify | Through the forge shell at a tangent | Budget |
Specs above come from Simond Store's fiber blanket page, High Temp Tools' Kast-O-Lite 30 listing, and Simond Store's 2500F firebrick page.
Insulation: ceramic wool and the rigidizer that keeps it out of your lungs
The lining is the whole forge. A well insulated chamber reaches heat fast on a small burner and holds it; a badly insulated one burns propane all afternoon and never gets past orange. Two layers of 1 inch, 8 lb density blanket is the standard home shop recipe, and the reason is simple: 8 lb wool holds its shape under its own weight where the cheaper 6 lb material slumps, and two thin layers conform to a curved shell better than one thick one.
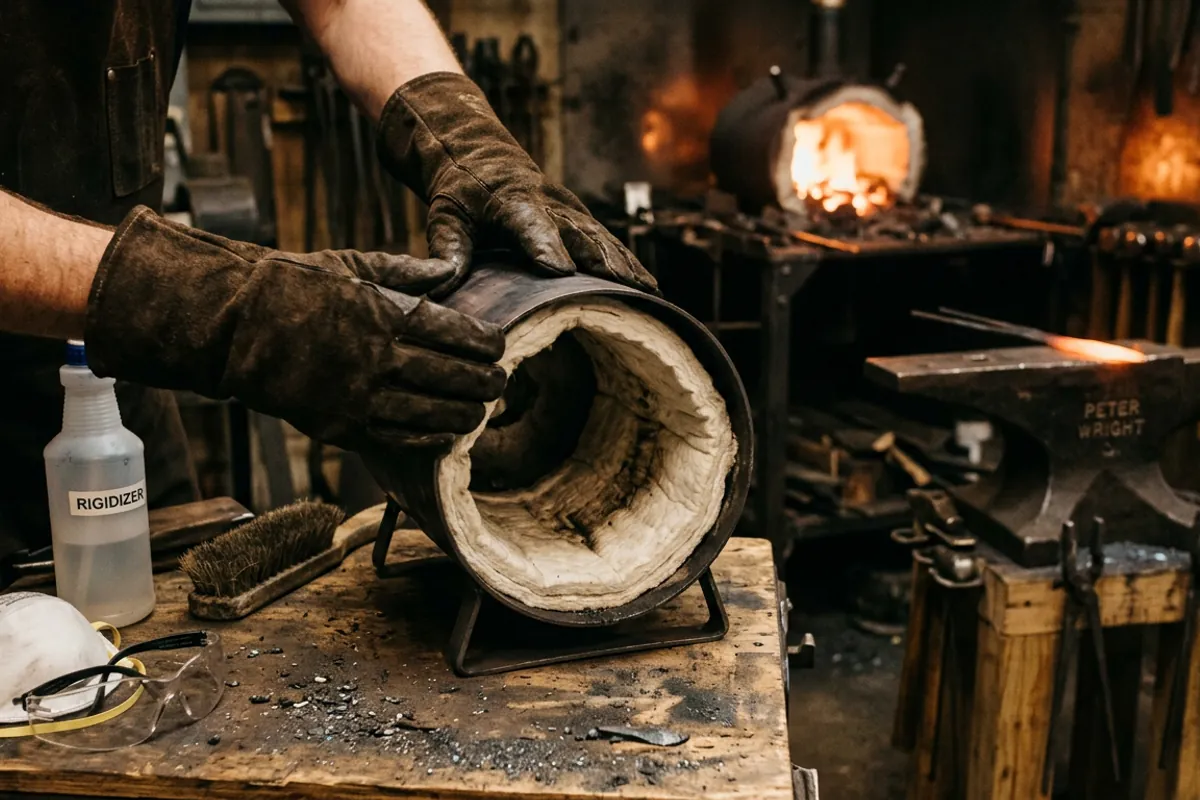
A 1 inch x 24 inch x 150 inch roll lines a small forge with material left over for the door blocks and a rebuild later. Simond Store publishes the 2400F rating and the alumina and silica split on their own site, so you are not taking a marketplace listing's word for it.
Check price on Amazon (paid link)
Now the part nobody should skip. Refractory ceramic fiber is a respiratory hazard. It is classified by IARC as Group 2B, possibly carcinogenic to humans, on the basis of lung cancer and mesothelioma in animal studies, and inhalation also causes plain old respiratory irritation, while skin contact causes itching and contact dermatitis. That summary is CAREX Canada's profile of refractory ceramic fibres, and OSHA's page on synthetic mineral fibers says much the same. Cut and handle wool in a fitted particulate respirator, long sleeves, and gloves, outdoors if you can, and never with a shop fan blowing the fibers around. After the forge has run hot, the fiber in it has partly converted, and the dust from a used lining is worse than new material, not better.
Rigidizer is what stops that fiber from shedding into the air every time you slide a bar in. It is colloidal silica, sprayed or brushed into the wool until it is damp through, then dried and fired. Simond Store rates theirs to 2300F. It hardens the surface, takes the erosion from the burner's flame, and cuts the loose particle problem substantially. It is cheap, it takes twenty minutes, and skipping it is the single most common mistake I see in a first build.
Check price on Amazon (paid link)
The floor: castable refractory and firebrick
Wool alone will not survive a forge floor. Scale grinds it, dropped stock punches through it, and forge welding flux dissolves it outright. You want a hard layer between your work and your insulation.
Kast-O-Lite 30 is the material most smiths land on. High Temp Tools publishes a 3000F rating, a density of 90 lb per cubic foot, and a mix ratio of 9.9 lb or 1.2 gallons of water per 55 lb of material, and they describe it as highly flux resistant and suitable for casting either a full liner or just the floor. A half inch of it across the floor, feathered up the sides an inch or so, is plenty. Mix it stiff, not soupy, tamp it, cure it slowly, and do not rush the first fire. Water trapped in an under cured castable turns to steam and blows chunks out of your new floor.
If casting a floor sounds like more of a project than you want on day one, insulating firebrick is the shortcut. The 2500F rated soft brick at 2.5 inches x 4.5 inches x 9 inches lays flat in the bottom of most shells, and a couple of spares make adjustable door blocks so you can choke the openings down for small work. Soft brick is fragile and flux eats it too, but it is replaceable in ten seconds and it cuts easily with a hacksaw blade for pass throughs.
Check price on Amazon (paid link)
A note on flux: if you plan to forge weld, plan on rebuilding the floor. Borax at welding heat is a solvent for refractory. Owners commonly add a kiln wash or a sacrificial firebrick under the weld zone for exactly this reason. Nothing in a forge lasts forever, and the floor goes first.
The burner: build the Frosty T or bolt on a cast one
Here is where a diy forge splits into two honest paths.
The build path is the naturally aspirated venturi burner made from plumbing fittings and a MIG contact tip. The best documented version is the Frosty T. On a BladeForums build thread, a maker documented a complete 3/4 inch Frosty T for 21 dollars in fittings, using a tee, nipple, coupling, flare fittings and a 0.030 MIG tip, and reported it gave much better control than the blown burner it replaced. Other smiths in that thread describe the flip side, which is that dialing a burner down to heat treating temperature means running it nearly closed. Zoeller Forge's parts and burner pages, now carried through Blacksmith Supply, are the other reference most people work from, and their T-Rex is what you buy when you want a tuned burner and not a project.
The buy path is a cast venturi burner with an air choke, which is what most first time builders actually end up using. It drops through a hole in the shell, the choke lets you lean or richen the mixture, and you spend your weekend on the lining instead of on burner geometry. I have not run this particular unit, and I could not find a maker page publishing a BTU figure or thread size for it, so treat the specs as unverified and the choke as the feature that matters.
Check price on Amazon (paid link)
Whichever you pick, aim the burner tangentially into the chamber so the flame swirls rather than blasting a hole straight into the opposite wall, and give yourself an opening at both ends. A forge you can only load from the front is a forge that limits your work forever.
Gas plumbing: regulator, hose, and the parts not to improvise
This is the one place in a diy forge where I get flatly unhelpful about creativity. Buy a proper adjustable high pressure regulator with a hose rated for propane, use a gauge so you know what pressure you are actually running, and leak check every joint with soapy water before you ever put a flame near it. A grill regulator will not do it; those are low pressure by design and a forge burner wants adjustable pressure well above that.
The 0 to 30 psi adjustable regulator with a gauge and a 4 foot hose is the common home shop answer, and the gauge is the part worth paying for. Once you know your forge runs at, say, 8 psi for general work and higher for welding, you can repeat a heat instead of guessing.
Check price on Amazon (paid link)
Keep the tank outside the shop, or at minimum well away from the forge and out of the radiant heat. Shut the tank valve, not just the needle valve, when you are done. And run a forge with real ventilation. A propane forge makes carbon monoxide, and a closed garage with the door down is how people get hurt without ever touching hot steel.
The solid fuel side: brake drums, side blast, and why I stopped recommending drums
Half the people searching for a diy forge do not want propane at all, they want to burn coal or charcoal in something they welded together. That is a legitimate and cheap path, and my coal forge still gets lit for heavy stock and welding.
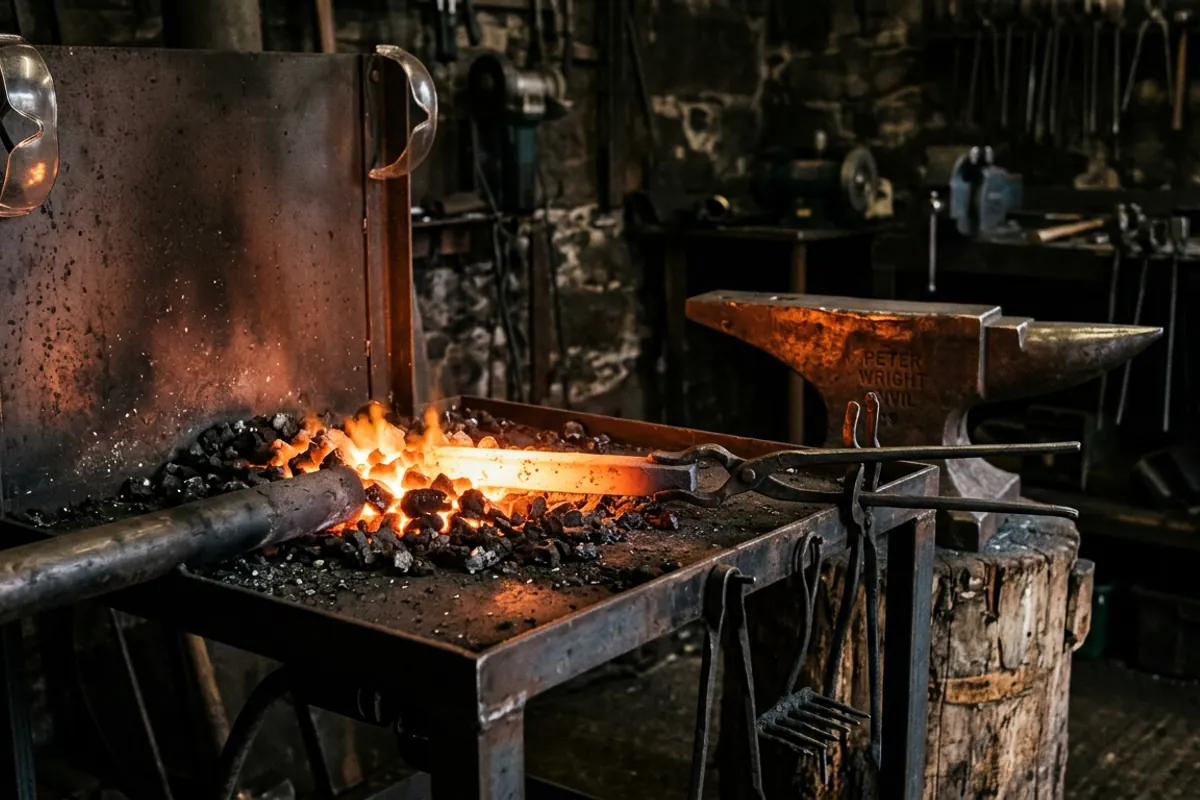
The classic beginner build is the brake drum forge, and it is worth reading the case against it. The Beautiful Iron piece on brake drum forges argues that a drum is too small to serve as a hearth and too large to serve as a firepot, that the square corners catch your fire tools, that fuel spills off the edges, and that you cannot get the seven or so inches of fire depth that good work wants. I do not agree with every word of it, but the core complaint matches what I see from students: a drum forge works, and it fights you the whole time.
The better cheap build is a shallow steel table with a proper firepot, or a side blast. Smiths have argued side blast against bottom blast on I Forge Iron for years, and the practical difference is that a bottom blast uses a firepot with the tuyere entering from below, while a side blast feeds air horizontally through a water cooled or heavy wall pipe. Side blast is easier to build from scrap, more forgiving of clinker, and traditional across most of the world. Bottom blast concentrates a hotter, smaller fire. Both work. Neither needs a brake drum.
For air, an old hair dryer on a dimmer is the universal starter blower, and it is fine until it is not. It is worth knowing the fuel decision before you cut steel, which is covered in the coal forge guide and, if you are burning lump instead, the charcoal forge guide. More forge builds and comparisons live on the forges hub.
What owners say
I have not run the specific listed products head to head, so this section is forum consensus, attributed.
On burners, the BladeForums thread above is the clearest signal: the homebuilt Frosty T style burner is cheap, well documented, and gets praise from working knifemakers for simplicity, with the recurring complaint being low end control when you want heat treating temperatures rather than forging temperatures. That matches what I hear at the club forge. A naturally aspirated burner is happiest near its design pressure and sulky well below it.
On solid fuel builds, the I Forge Iron side blast and bottom blast discussions and their side blast charcoal forge build thread come back to fire control over raw temperature. The repeated complaint about wide shallow vessels like a brake drum is that they make a big, sprawling fire that eats fuel and is hard to keep tight around the work.
On lining materials, owner reports on wool and castable are consistent enough to be boring: 8 lb wool over 6 lb, rigidize it, put something hard over the floor, and expect flux to destroy whatever you use if you weld often. Where the signal is genuinely thin is on individual budget burner listings. They come and go under different brand names, and I would not put much weight on any one product's reviews.
Safety I will not soften
Three things, and none of them are optional.
Eye protection first. ANSI Z87.1 rated safety glasses at minimum, a face shield over them at the grinder and anywhere hot liquid is involved. I learned that one the hard way. Early on I quenched a blade in oil that was too cold, standing too close in a cotton shirt with no shield. The oil flared and took my eyebrows, and I kept my eyesight by luck. Nothing about that story is a warning I am willing to soften. Wear natural fibers near heat, cotton or wool or leather, because synthetics melt into skin. The full rundown is in the safety gear guide.
Second, the wool. Respirator on, every time you cut or handle it, new or used.
Third, ventilation and gas discipline. Carbon monoxide from any forge, propane or solid fuel, is invisible and it does not announce itself. Open doors, real cross ventilation, and a CO alarm in the shop if it is attached to a house. Leak check gas fittings with soapy water and never with a lighter. And never put galvanized steel in a forge or on hot work; the zinc fumes will make you genuinely sick.
What I would tell a friend
Build the shell, buy the burner and the regulator, and spend your care on the lining. Two layers of 1 inch, 8 lb wool, rigidized, with a Kast-O-Lite 30 floor or a soft firebrick sitting on top of the wool is the build I would put in a beginner's shop, and it will outrun most entry level bought forges for less money.
Skip the brake drum. If you want solid fuel, weld a shallow table and buy or build a real firepot, or go side blast. You will spend the same weekend and end up with a forge you keep.
And the one I would tell you not to cheap out on: the gas plumbing and the respirator. A soft floor you can recast in an afternoon. A lungful of ceramic fiber or a propane leak under a hot forge does not give you a second try. If you are still deciding what else the shop needs before you build, the starter tool list is where I would look next.