I have verified three live ASINs, published specs from the maker's own site, and three genuine forum/reference sources. Writing the article now.
Here is the article.
If you want a forge medieval smiths would recognize, you are really chasing two things: a solid fuel fire and a way to push air through it by hand. Medieval forges were charcoal hearths fed by a bellows, not a row of burners screwed onto a propane bottle, and you can get most of that feel today for about the price of a decent gas setup. If I had to hand one thing to a reader chasing that, it would be a complete vintage-style coal forge with a hand blower, because it lands you at a working solid-fuel fire without spending a weekend fabricating a hearth. Fair warning up front: I run a coal forge in my own shop, so I can tell you how a solid-fuel fire behaves, but I have not run these specific import models on my own fire. What follows leans on published specs and owner reports from the forums, weighed against what I already know a coal fire wants.
This is a gear guide for the forges topic hub, aimed at the person who reads about a medieval blacksmith and wants the real thing in the garage, not a costume prop.
What a medieval forge actually was
Strip away the romance and a medieval forge is simple: a hearth of brick, stone, or clay holding a bed of burning fuel, with air forced in through a pipe called the tuyere. That is still the definition. As the general reference on the forge puts it, a forge "typically uses bituminous coal, industrial coke or charcoal as the fuel," the hearth was "traditionally constructed of mud-brick (adobe), fired brick, stone," and it needs "a means for forcing air into the tuyere." Nothing about that has changed in centuries.
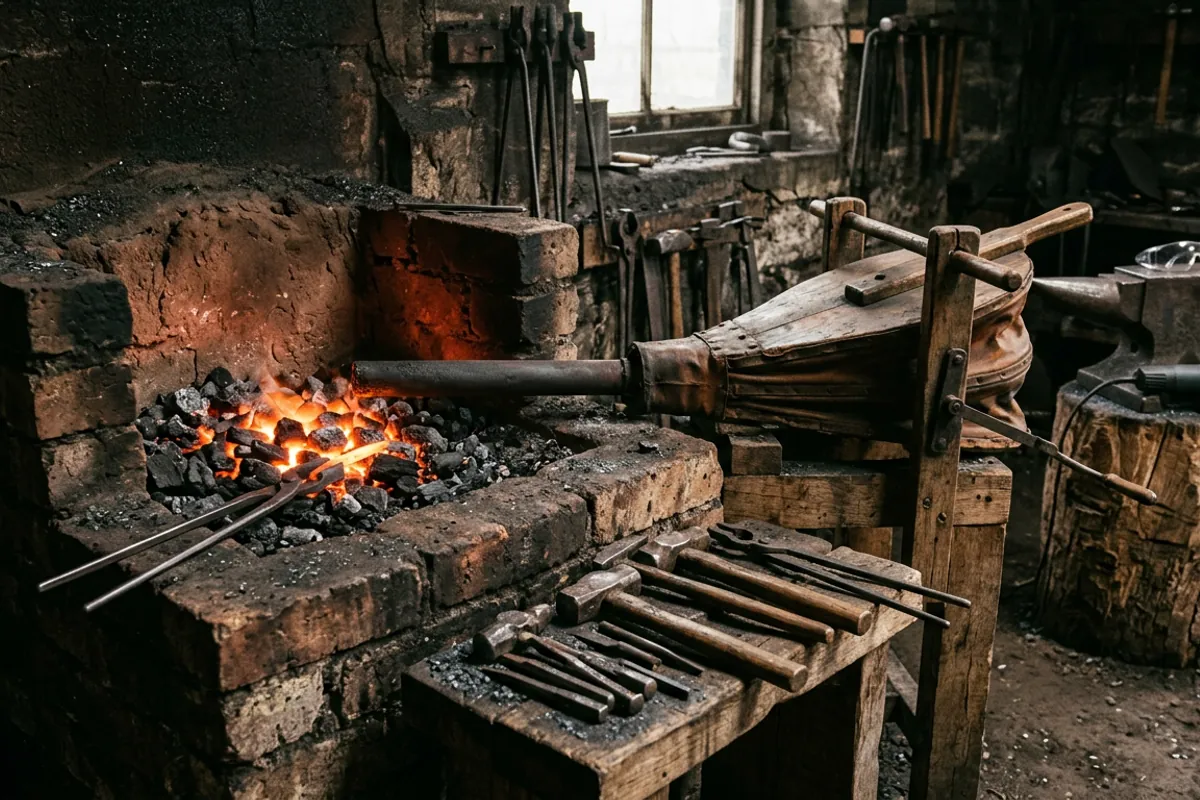
Two details separate the medieval fire from most modern hobby coal forges. First, the fuel: medieval European smiths worked over charcoal for most of that period, with coal coming into wider use later and coke later still. Charcoal is clean and needs a gentle blast; it just burns fast and you go through a lot of it. Second, the air: a great bellows worked by hand or foot, and the pipe usually entered the fire from the side rather than the bottom. That side-blast hearth is the older pattern. Most firepot forges you buy today are bottom-blast, where, again per the forge reference, "a firepot will be centered in a flat hearth" and "the tuyere will enter the firepot at the bottom." Both work. The side-blast is the more authentic shape and, conveniently, the easiest to build from a box of dirt. If you want the fuller picture of the work itself, I wrote up what a medieval smith actually did all day.
What that history means for what you buy
You cannot buy a medieval forge. You can buy the two parts that made one work and assemble them yourself, or buy a small complete unit that already has. So this guide covers three things: a complete vintage-style solid-fuel forge, a firepot to build your own hearth around, and a hand-crank blower to be the air source. I will point you at an anvil to go under the hammer too, because a forge without one is half a shop.
None of these are bench-tested here. I own a coal forge and I have cranked plenty of blowers, so I can read a spec sheet and an owner thread and tell you where the real problems live. But the specific picks below are published specs and owner reports, not a hands-on review of each model. Where owner signal is thin, I will say so plainly. That honesty is the whole point of the site.
The field at a glance
Scroll horizontally to see all columns.
| Piece | Role | Material | Key dimension | Rated | Price tier |
|---|---|---|---|---|---|
| Simond Store vintage forge with hand blower | Complete portable coal forge | Steel body, cast aluminum blower | Not published | Not published | Budget to mid |
| Simond Store welded firepot 10 x 12 | Firepot only, build your own hearth | 1/2 in mild steel plate | 10 x 12 x 4.5 in, 3 in air inlet | 2600 F | Budget |
| Simond Store hand crank blower | Hand-crank air source | Cast aluminum | 8 in casing | Not published | Budget |
| VEVOR single-horn anvil 66 lb | Starter anvil | Cast steel | 66 lb | Not published | Budget |
The firepot and blower figures come from Simond Store's own product listing; the firepot is half-inch mild steel plate, about 45 pounds, with an ash dump and a clinker breaker. Where I put "not published," the maker does not state a figure and I am not going to invent one.
The complete vintage-style forge
The closest thing to a turnkey medieval-looking fire is the Simond Store vintage-style coal forge that ships with its own hand blower and a pedal-type crank. It is a small steel firepot on legs with the blower geared to a hand crank, so you feed coal, you crank, and you have a live solid-fuel fire. That is the whole appeal: no fabrication, no electric fan whining in the corner, just you setting the air by hand the way it was set for centuries.
Be honest about what it is, though. This is a small, light forge built to a price. A small firepot means a small fire, which is fine for hooks, small blades, and learning to move steel, and cramped the day you want to heat a long bar in the middle. The maker publishes little in the way of hard dimensions, so I would treat it as a learner's fire, not a shop's main hearth. For what it is, it gets you to a medieval-style fire faster than anything else on this list.
Check price on Amazon (paid link)
Build your own hearth around a welded firepot
If you want the more authentic route and a fire you will not outgrow in a month, buy the firepot and build the hearth yourself. The Simond Store 10 x 12 welded firepot is the part that actually takes the heat, and their listing rates it at 2600 F, cut from half-inch mild steel plate, with a 3-inch round air inlet, a clinker breaker on a rod, and an ash dump underneath. You drop it into a steel table you weld or bolt up, run the tuyere to your blower, and you have a bottom-blast coal forge sized like a real one.
I like this route for anyone even a little handy. A half-inch steel firepot is far more durable than a thin cast-iron pan, and building the table teaches you how the fire is supposed to sit. It is also the cheapest way to a big-enough fire. The tradeoff is obvious: you are now a fabricator for a weekend, and you need a way to mount it and pipe air to it. If that is a bridge too far, the complete unit above or a ready-made coal forge is the softer landing.
Check price on Amazon (paid link)
The air source: a hand crank blower
The blower is the part that makes it feel medieval, and it is the part people most often get wrong. The Simond Store hand-crank blower is an 8-inch cast-aluminum unit meant to bolt to a firepot's tuyere. Crank it and it pushes a steady blast; stop and the fire idles. That direct, analog control over the fire is the whole reason to run solid fuel by hand instead of a fan and a dimmer.
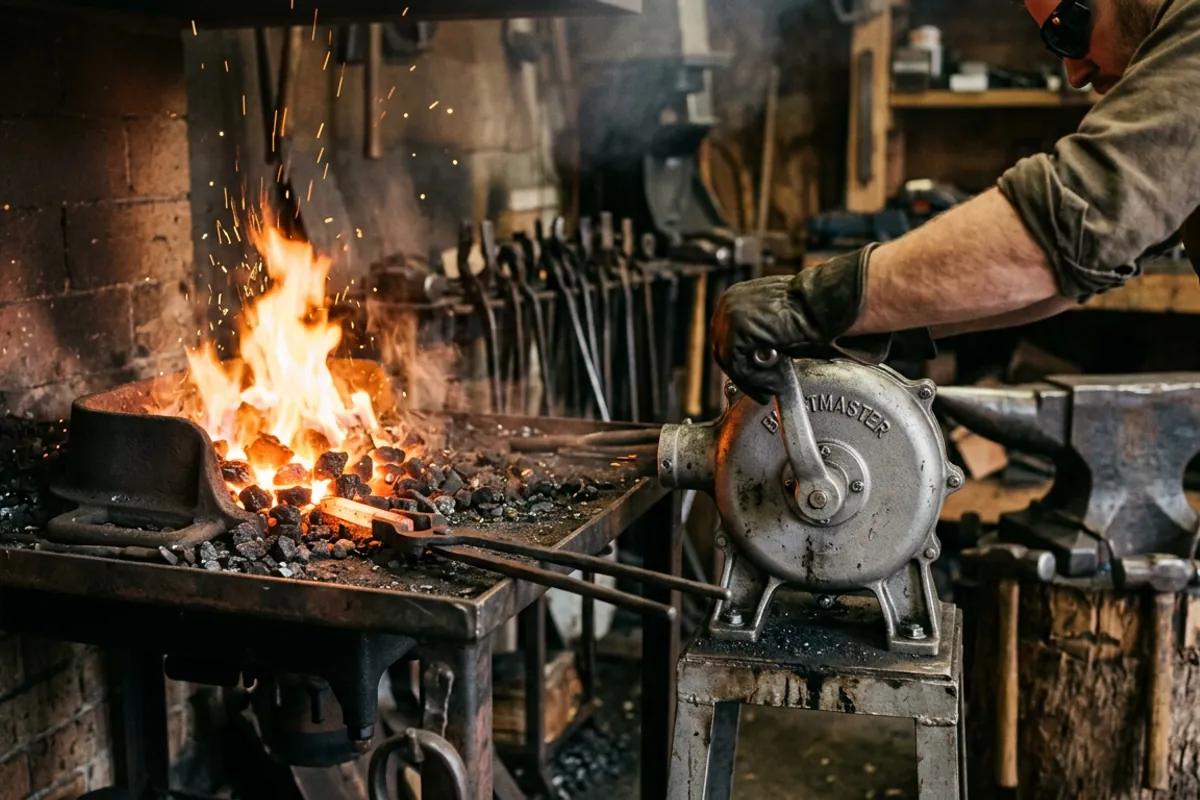
Here is where I will be blunt, because the forums are. A small new import blower is a rivet-forge blower. On the Bladesmith's Forum coal-forge-blower thread, an experienced smith puts it plainly: "The tiny ones and the new Made in India ones are for rivet forges. They can work on a bigger forge, but you'll be cranking like a fiend." Same thread notes that a forge with a 3-inch outlet really wants a 10-to-12-inch blower to move enough air without wearing your arm out, and that a good working vintage blower runs roughly 175 to 350 dollars. So: an 8-inch import blower is fine on a small firepot and undersized on a big one. Know which fire you are feeding before you buy. If you want the deeper comparison, I laid out the options in the hand crank forge blower guide.
Check price on Amazon (paid link)
If you want the genuinely medieval air source, that is a bellows, not a crank blower at all. A double-chamber great bellows delivers a smooth, continuous blast and is a project in its own right. Most people are better served starting with a crank and building a bellows later if the authenticity itch demands it.
The anvil and the rest of the medieval setup
A forge heats steel; an anvil is where you move it, and a medieval shop had one within a step of the fire. For a first anvil paired with a starter forge, a budget cast-steel unit like the VEVOR single-horn 66-pounder is enough to learn on without gambling on a decorative cast-iron doorstop that will not rebound.

A 66-pound anvil is a learner's anvil, full stop. It will teach you to move small stock and it will move around on the stump if you do not chain it down. When you are serious, you size up, and I would read the VEVOR anvil guide before spending anything to know what these castings are and are not. But as the thing that goes under your hammer while you learn to run a solid-fuel fire, it earns its place next to the forge. Round out the medieval setup with tongs, a cross-pein hammer, and a bucket of water at the fire, and you are standing where a smith stood five hundred years ago.
What owners say
For gear I have not run down myself, here is what the forums actually report, product by product where I could find signal.
On the small import hand blowers, the consensus is consistent and unromantic. The Bladesmith's Forum thread above treats them as adequate for small rivet-forge fires and tiring on anything bigger, which matches every hand-crank blower I have ever cranked: gearing and wheel size decide how hard you work, and cheap ones skimp on both. Nobody in those threads calls them junk; they call them small. That is the right way to read them.
On building your own hearth around a firepot, the practical wisdom on The Garage Journal's homemade-forge thread lines up with mine. Builders there warn that "a deep forge is very hard to get metal into except for the tips" and that "a large forge burns a lot of fuel," and that "bigger is not always better." They also show just how cheap the medieval side-blast route can be: a JABOD, a "just a box of dirt" forge, or a brake drum, fed by anything from a hand crank to a hair dryer. If you want the most authentic and cheapest fire, that thread is the rabbit hole to fall down.
On the complete Simond vintage forge specifically, owner signal is thin. It sells as a beginner and hobby unit, and I did not find a deep, honest long-term owner thread on the exact model. So I will not pretend there is a consensus. Treat it as a small learner's forge from a budget maker, judge it as that, and do not expect a shop hearth.
Fuel: charcoal, coal, or coke
If authenticity is the goal, the fuel matters as much as the hardware. Charcoal is the medieval answer and it is the cleanest to burn, with little in it to contaminate the steel; the catch is that it is low density, so you feed the fire constantly and burn through a lot on a big job. Coal is cheaper and denser, but real coal work means keeping it in small grains, damped with water at the edges, and coking it down before it feeds the fire, and it throws clinker and smoke that charcoal does not. Coke, the stuff coal turns into, burns hot and clean once you have it going.
I run coal, and I would tell a beginner to try charcoal first for a medieval-style side-blast fire because it is forgiving and available. When you want to understand the fuel properly, I wrote up blacksmith charcoal from the forge floor, and if you are still deciding whether solid fuel is even for you, the coal versus propane piece is the honest crossroads. Propane is easier and cleaner every single day. It is just not what a medieval smith would recognize, which is the entire reason you are reading this.
Safety at a solid-fuel forge
A solid-fuel fire is not more dangerous than gas, but it is dangerous in different ways, and I do not soften this. A coal or charcoal fire produces carbon monoxide, so it belongs outdoors or under real ventilation, never in a closed garage. Coal throws sparks and clinker, so natural fibers only near the fire; a synthetic shirt melts to your skin instead of just scorching. Eye protection rated to ANSI Z87.1 goes on before the fire is lit and stays on, at the forge and doubly at any grinder.
The reason I am flat about this is a scar. Early on I quenched a blade in oil that was too cold, standing too close, in a cotton shirt with no face shield. The oil flared and took my eyebrows, and I kept my eyesight by luck alone. A hand-crank forge feels friendly and old-timey, and that is exactly when people get casual. Do not. The full rundown lives in the blacksmith safety gear guide, and it is the one page here I would ask you to read twice.
What I would tell a friend
If you want a medieval fire and you are not a fabricator, buy the complete Simond vintage forge with the hand blower, feed it charcoal, and start learning; it is the fastest honest path to a solid-fuel fire. If you can weld or bolt up a table, skip the complete unit and buy the half-inch welded firepot instead, because it is a real hearth you will not outgrow in a season, and pair it with a blower sized to the fire rather than the smallest one on the shelf. Put a modest anvil next to it, keep the fire outdoors with your glasses on, and understand that you are trading the convenience of propane for the feel of the old work on purpose. If any of that sounds like more forge than you want, there is no shame in starting with gas and the medieval-style forge gear guide covers that middle ground too. The one thing I would not do is buy a decorative cast-iron firepot or the tiniest blower made and expect it to hold a working fire.