All ASINs and sources verified. Here is the article.
Type diy forge propane into a search bar and you will get a hundred coffee-can builds, half of them missing a regulator and a good number wrapped in bare ceramic wool that will slowly wreck the builder's lungs. So let me give you the verdict before the parts list: a diy propane forge is one of the best first builds a new smith can take on, but only three parts actually decide whether it works and whether it is safe. Get the burner, the insulation, and the gas plumbing right, and the shell can be almost anything. Get any of those three wrong and you have either a forge that will not reach welding heat or a health hazard sitting in your shop.
I run two forges. A coal forge for heavy stock and forge welding, and a propane forge for fast, even heat and most of my day-to-day work. The propane forge is the one I reach for far more often, and if I were starting over on a budget I would build it rather than buy it. What follows is the short list of parts I would put in a home shop build, with published specs where the maker gives them and honest owner reports where they do not. I want to be straight about one thing up front: I have not bench-tested every one of these exact SKUs in my own shop. These picks lean on published specs, owner consensus from the forge forums, and years of running propane heat. Where a claim is secondhand, I say so.
What a diy propane forge actually is
Strip away the marketing and a propane forge is a insulated box with a burner poking into it. The box holds heat, the burner makes heat, and the gas train feeds the burner. That is the whole machine. The reason a homemade one works as well as a bought one is that the expensive part, the fabrication, is trivial. A short length of steel pipe, an old air tank, or a stack of firebrick becomes the shell. The insulation and the burner are where the real performance lives, and those you can buy off the shelf for less than a complete unit costs.
The appeal for a beginner is not just the money you save. It is that you learn how the tool works. When your forge runs rich and sooty, you will know it is the burner tune and not some black box. When one end runs hotter, you will know why. That understanding pays off for the entire time you own the thing. If you want the deeper walk through shell options and layout, I wrote a full homemade forge build guide and a companion piece on the diy forge parts I would buy and the ones I would build. This guide is the propane-specific short list.
The parts that decide the build, at a glance
Here are the pieces I would actually buy, with the published specs that matter. Everything else in a build is scrap steel and hardware-store fasteners.
Scroll horizontally to see all columns.
| Part | Key spec | Rating or material | Price tier |
|---|---|---|---|
| Simond Store burner kit | Single venturi burner, includes valve, hose, and regulator | Stainless steel burner | Mid |
| Lynn Manufacturing ceramic fiber blanket | 1 in thick, 16 in x 48 in, 8 lb density | 2400F rated | Budget |
| GASPRO regulator and hose | 0 to 30 PSI adjustable, 12 ft braided hose | Brass body, stainless hose | Budget |
| Hell's Forge double burner (buy instead) | Two burners, complete insulated unit | 2300F plus rated | Mid |
The ceramic fiber rating comes from the maker's published figure, which lists continuous use at 2200F and intermittent use to 2400F before the material starts to shrink, per the manufacturer and confirmed on retailer listings like GrillPartsReplacement. The regulator and burner figures come straight from the sellers' own listings. Where a number is not published, I have left it out rather than guess.
The insulation is the part people cheap out on and regret
If you only get one thing right, make it the insulation. The difference between a forge that sips propane and reaches forge-welding heat and one that never quite gets there is almost always the wall. Firebrick works, but soft ceramic fiber blanket is lighter, heats faster, and holds heat far better for its weight. Two 1-inch layers of blanket is the standard for a general-purpose propane forge. One inch is not enough for a forge you plan to push to welding temperatures.
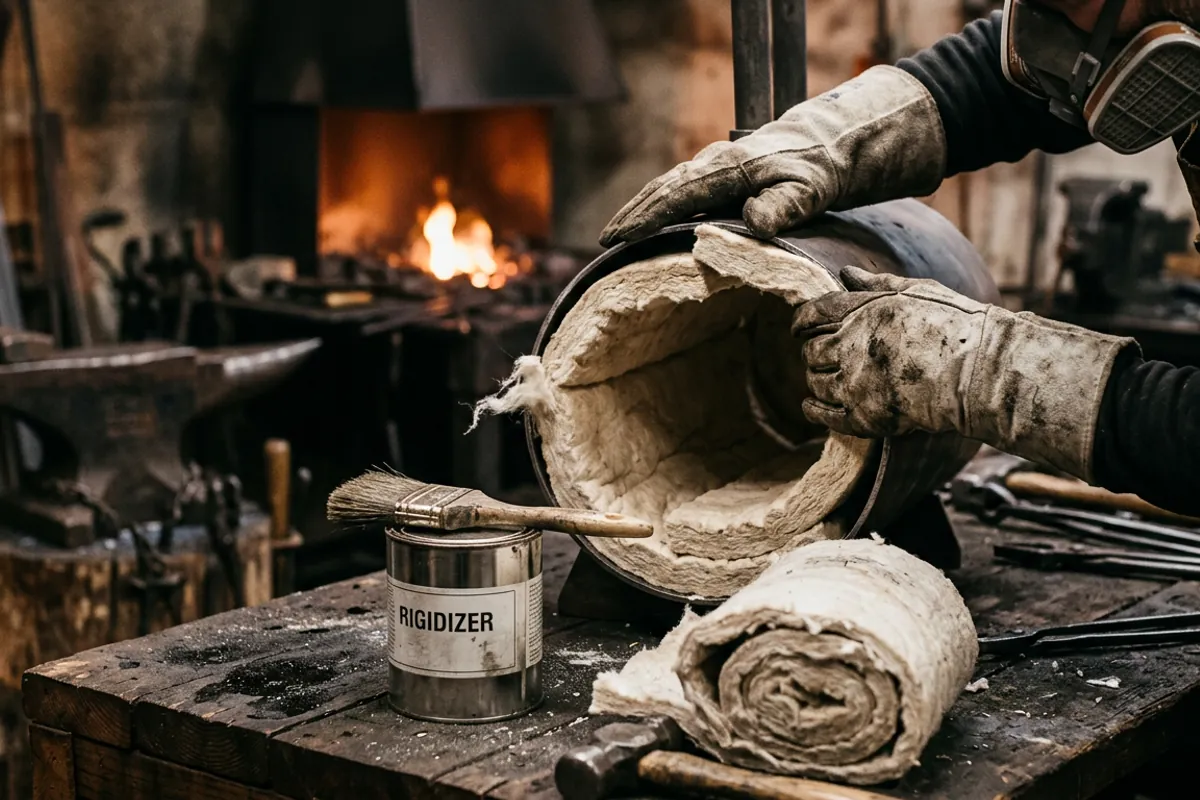
I would buy a 1-inch, 2400F-rated blanket in the 16 by 48 inch size, which is enough to double-line a small to medium build. The Lynn Manufacturing ceramic fiber blanket (paid link) is the one that shows up in most forge builds and matches the published density and temperature rating I would want.
Now the part nobody selling you a blanket wants to dwell on, and the reason I will not soften it: ceramic fiber, in its loose form, is a respiratory hazard. Refractory ceramic fiber is classified as a suspected human carcinogen, and NIOSH has documented it among the highest airborne fiber exposures measured in industrial settings during handling and removal. Read the NIOSH bulletin on refractory ceramic fiber exposure before you cut a single piece. When you handle raw blanket, wear a proper P100 respirator, not a paper dust mask, long sleeves, and eye protection. This is the same lesson my forge safety writing keeps coming back to, and it belongs alongside the rest of your blacksmith safety gear. The hazard is real, it is cumulative, and it is entirely avoidable with the right coating, which I will get to.
The burner: build it or buy the kit
The burner is the heart of the thing, and here is where a beginner has a real decision. You can build a naturally aspirated venturi burner from a few pipe fittings and a MIG tip, and plenty of smiths do, following well-documented designs. It works, it teaches you a lot, and it is cheap. But a first-time builder often spends more time chasing a rough tune than they expected, and a poorly made burner runs rich, sooty, and cold.
If you want to skip that learning curve on your first forge, a complete burner kit is money well spent. The Simond Store single burner kit (paid link) includes the stainless burner along with the valve, hose, and regulator, which means the gas train is matched to the burner out of the box. That is the honest advantage of a kit: no guessing whether your regulator can feed your burner. For a single-chamber forge up to roughly a foot of interior length, one burner of this size is plenty. Go to two burners only when your chamber gets long enough that one cannot heat it evenly.
If you would rather forge the tool than buy it, that instinct is a good one and I respect it. I keep a running argument with myself about which shop tools to make versus buy, and I laid it out in the diy forge hammer I would make instead of buy. A burner is closer to the buy side for a first build, only because a bad one is genuinely dangerous and hard to diagnose when you have never seen a good flame.
The gas train: regulator, hose, and the pressure you actually need
Here is the mistake I see most often on the forums, and it is a dangerous one. A standard grill regulator puts out around half a PSI. A propane forge needs a high-pressure adjustable regulator that runs from 0 up to about 20 or 30 PSI. If your burner kit did not come with one, or you are building your own burner, this is not the place to improvise with barbecue parts.
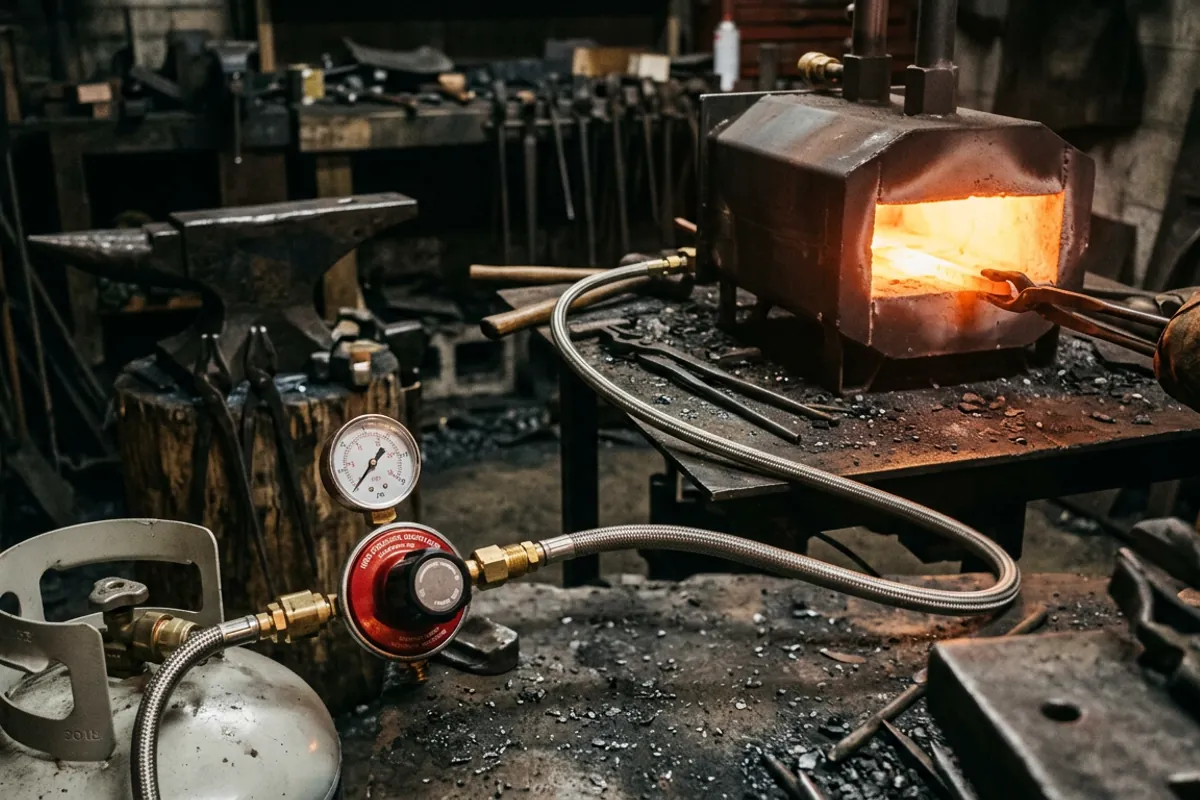
The GASPRO 0 to 30 PSI regulator with a 12 foot braided hose (paid link) is the pattern I would look for: an adjustable high-pressure regulator with a gauge and a stainless braided hose long enough to keep the tank a safe distance from the heat. The gauge matters more than people think. Being able to read and repeat your working pressure is how you learn your forge, and it is how you tune out a rich flame. Keep the tank well back from the forge, check every threaded joint with soapy water before the first light, and never run a propane forge in an enclosed space without ventilation. Carbon monoxide from a propane forge is invisible and it will put you down before you notice. The propane forge buying guide covers the same plumbing logic if you want to compare against complete units.
The refractory coating that keeps the fibers out of your lungs
This is the step that ties the insulation section together, and skipping it is the single most common failure I see in beginner builds. Bare ceramic fiber sheds. The airflow and heat of the burner strip fine fibers off the wall and push them into the air you are breathing over the forge. You fix this two ways, and a good build uses both: a rigidizer to lock the blanket surface, and a hard refractory face coat over it.
A rigidizer is a thin liquid, usually a colloidal silica, that you paint or spray onto the blanket. It soaks in and, once fired, hardens the surface so the loose fibers stay put. Over that, a hard refractory such as a castable like Kastolite or a coating like Plistix or ITC-100 gives you a durable, reflective inner face that survives dropped stock and flux. There is a long-running debate on I Forge Iron about whether rigidizer is strictly necessary, with some smiths arguing the wool self-hardens with use, in the thread "you do not need rigidizer, the ceramic wool hardens by itself". My read of that discussion and my own bias: coat it anyway. The downside of coating a wall that did not strictly need it is a few dollars and an hour. The downside of leaving raw fiber exposed is a cumulative lung hazard you cannot undo. That is not a close call.
When I would just buy a complete forge instead
I am a build-it person by temperament, but I will not pretend the build always wins. If you are short on time, if you do not have a way to safely cut and handle steel for the shell, or if you simply want to be forging this weekend rather than sourcing parts, buy a complete unit. A finished forge like the Hell's Forge portable double burner (paid link) arrives insulated, plumbed, and rated by the maker to 2300F and up, and it will have you making heat the day the box lands.
The math is closer than build-it purists admit. By the time you buy blanket, a burner kit, a proper regulator, rigidizer, and a hard refractory, a budget complete forge is in the same neighborhood on price. What the build buys you is not always dollars saved. It is the understanding of the machine and the ability to fix and modify it forever. If that appeals to you, build. If it does not, there is no shame in buying, and I say that as someone who genuinely enjoys the build. If you are still deciding between fuels entirely, my coal versus propane comparison is the place to start before you spend anything.
What owners say
For the parts I have not personally run down to the specific SKU, here is the consensus I see on the forge forums, reported straight.
On insulation, the agreement is close to universal: two inches of blanket total, and coat it. The strongest and most repeated safety point across I Forge Iron threads, including the rigidizer discussion linked above, is that raw fiber must be sealed one way or another. The disagreement is only about method, not about whether to do it. That lines up with the industrial-hygiene literature, so I weight it heavily.
On burners, the owner split is real and worth knowing before you buy. Smiths who enjoy fabrication tend to build their own venturi burners and report good results once tuned, and they are right that a homemade burner can match a bought one. The counter-consensus, which I share for a first build, is that a beginner without a reference flame to compare against often struggles to tell a good tune from a bad one, and a rich burner wastes gas and coats your work in soot. Kits get praise for taking that variable off the table.
On complete units like Hell's Forge and the Simond forges, owner reports skew positive on heat performance and negative in the predictable places: the included regulators are sometimes described as basic, and the doors and openings often get modified by their owners. None of that is damning. It is the normal reality of budget gear, and it is exactly the kind of thing a builder fixes without a second thought. I would not call the owner signal on any single one of these SKUs deep, so treat the praise as directional rather than a guarantee.
What I would tell a friend
The short version. Build the shell from scrap, that part barely matters. Spend your attention on three things: two inches of 2400F ceramic blanket, a matched burner and gas train, and a proper coating over the fiber. If you want the shortcut on the burner, the Simond Store burner kit (paid link) puts the whole gas train in one box. If you want to source your own gas train, a high-pressure adjustable regulator (paid link) is non-negotiable, not a grill regulator. And if the build is not for you this month, a complete Hell's Forge unit (paid link) is an honest way to start forging now.
The one thing I will not let you skip: seal the ceramic fiber and wear a real respirator when you handle it raw. Everything else on this list is about performance. That one is about whether you are still breathing easy in twenty years. When you are ready to compare your finished build against the store-bought field, the forges topic hub collects every forge guide on the site in one place.